
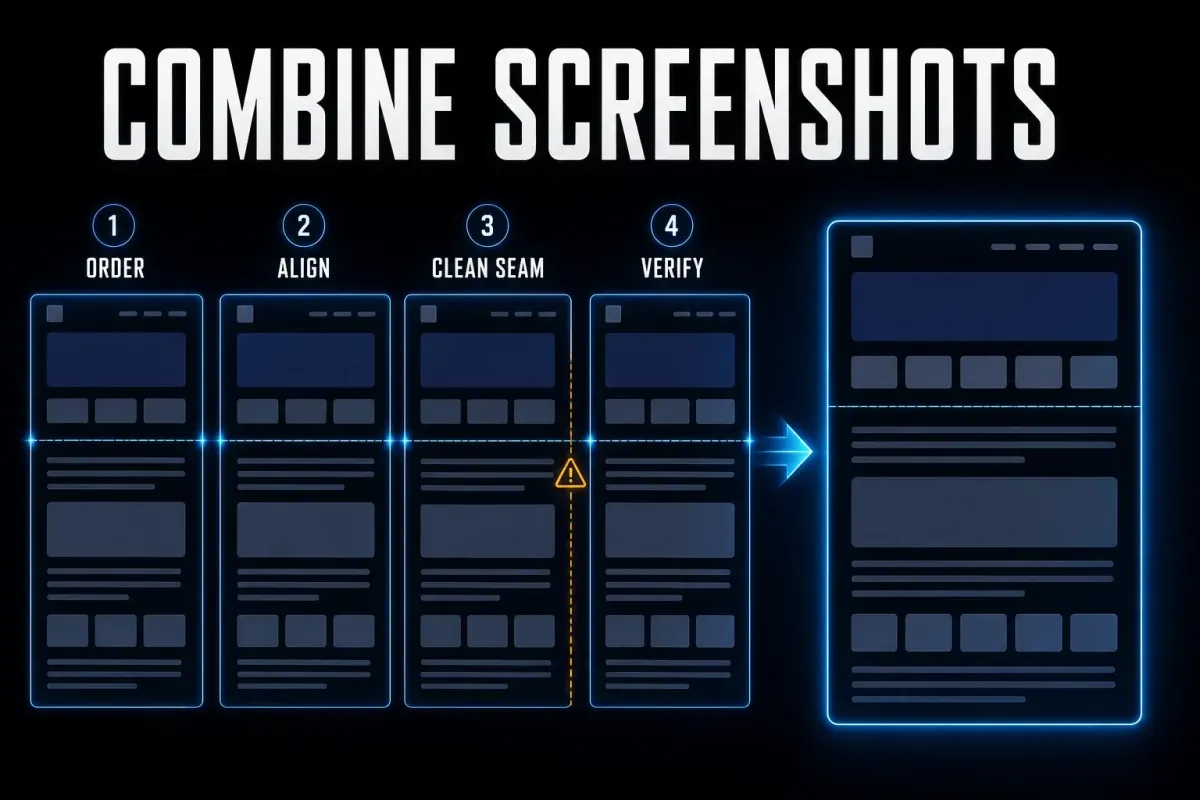
To combine screenshots into one image, place them on a shared canvas or use a Combine Images action. Choose a vertical stack for a sequence, side by side for a comparison, or a grid for an overview. Windows users can arrange a few images in Paint; Mac and iPhone users can build a Shortcuts workflow. Save a separate output and check its order and text size.
Joining and stitching are different jobs. A simple join keeps each picture intact. A continuous stitch also removes the content repeated between overlapping captures. Use overlap removal only for matching parts of the same page, not for unrelated screens. If a direct scrolling capture works correctly, it can avoid this manual assembly.
Documentation checked September 7, 2026. These are documentation-based workflows, not hands-on tests of every device. Controls vary by app and OS version. The illustrations explain layout and checking decisions rather than reproduce each current interface.
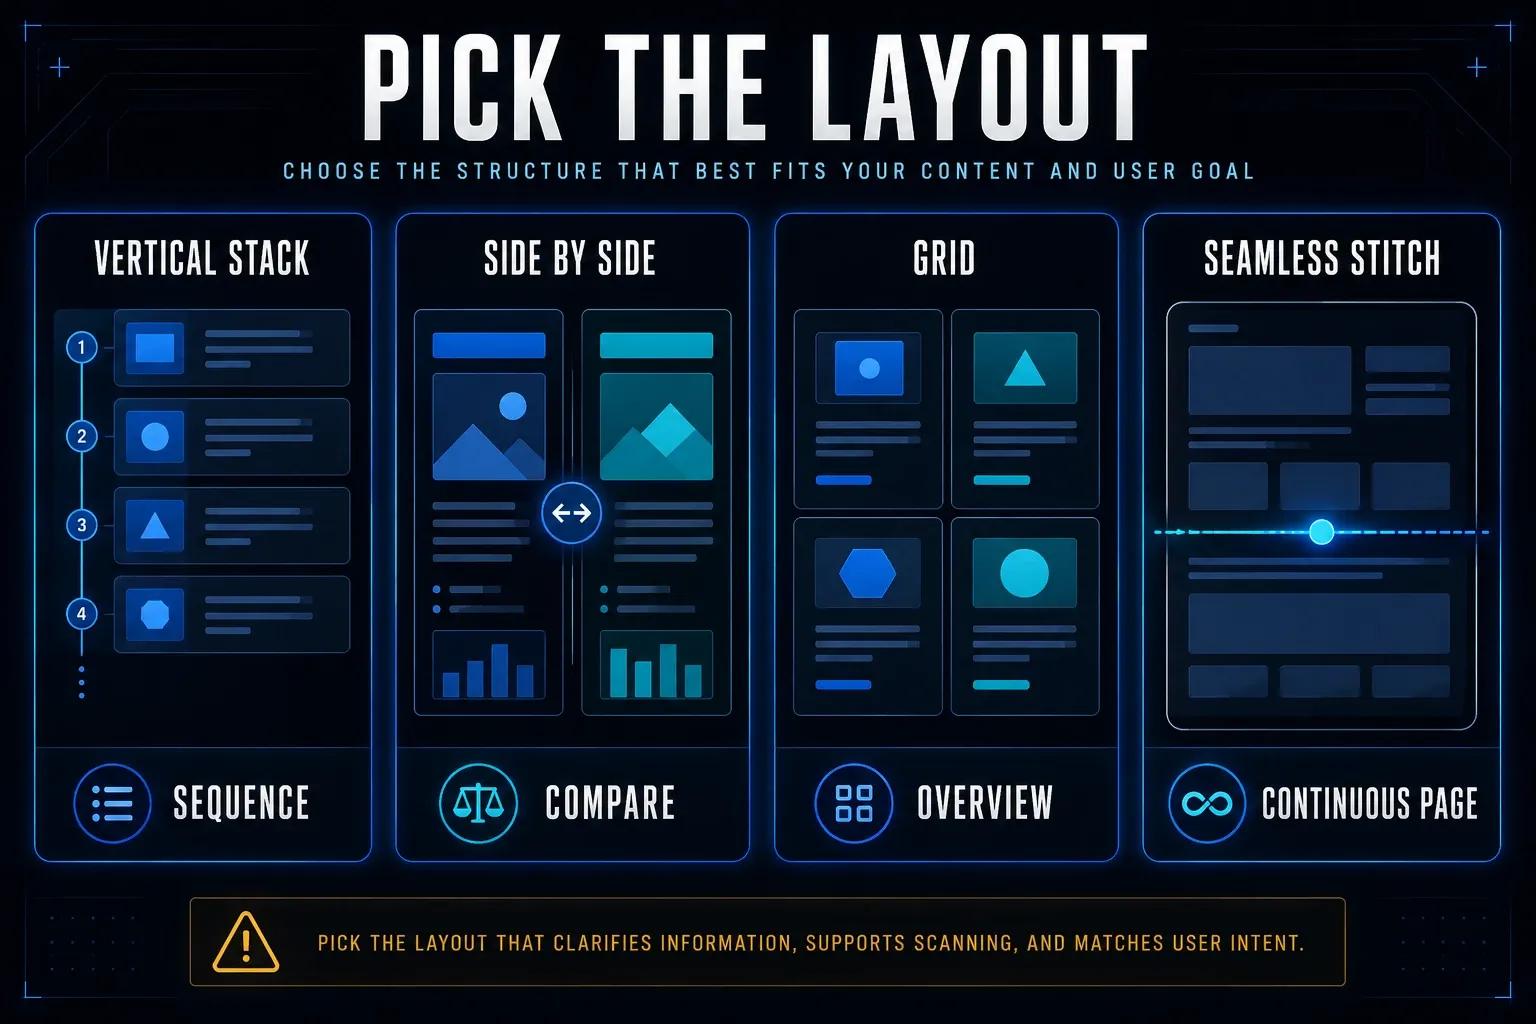
Choose vertical, side-by-side, or grid layout
| Layout | Use it for | Check before export |
|---|---|---|
| Vertical stack | Separate steps or ordered panels | Order, readable width and clear boundaries |
| Side by side | Before/after or two-device comparisons | Comparable scale, labels and proportional sizing |
| Grid | A compact overview of visual states | Text at the final display width |
| Continuous stitch | Overlapping parts of one page | Every seam for repeated or missing content |
For example, compare two error states in adjacent labelled panels. Present a sequence of actions from top to bottom. For a chat, keep enough surrounding messages to preserve the meaning; do not hide a gap in the conversation by making unrelated captures look continuous.
How to combine screenshots into one image
- Collect the source files. Work on copies and retain originals only where authorized or required.
- Set the order. Use numbered filenames or explicit ordering controls, then verify the imported sequence.
- Choose the layout. Decide whether the images are separate panels or overlapping parts of one continuous surface.
- Crop irrelevant areas. Preserve required context and a reliable shared anchor when stitching.
- Set the scale. Keep aspect ratios intact; compare a common control or text line instead of forcing every box to one size.
- Join the panels. Add consistent gaps between separate images, or remove exactly one copy of verified overlap.
- Add labels. Identify steps, devices or Before and After without covering useful content.
- Export and inspect. Save a separate image, reopen it and check order, seams, text, private data and destination limits.
Rename before you import
Names such as 01-login.png, 02-settings.png and 03-result.png make the intended order clear. They do not force every picker to sort by name. Check the imported sequence or configure a sorting action. For device comparisons, Desktop and Mobile labels are more useful than an unexplained number that might mean viewport width or image pixels.
Crop before resizing
Remove unrelated borders and empty margins before deciding the final panel size. Cropping removes content; resizing changes its scale when pixels are resampled. Those are different operations. For a continuous stitch, keep the same horizontal crop and a distinctive shared line in adjacent captures.
Prepare screenshots for a clean join
For one continuous page, keep browser zoom, window width, display scale and theme consistent. Different settings can change line wrapping and element sizes; matching file widths afterward cannot reliably undo that. Live counters, ads or messages may also change between captures.
Keep the source state consistent
Pause video where you can, dismiss irrelevant notifications and wait for images and fonts to load. Keep the window width fixed. If content keeps changing, capture separate labelled states. A fixed header may appear in every capture; remove repeated copies only when doing so preserves all required page content.
Use overlap with an anchor
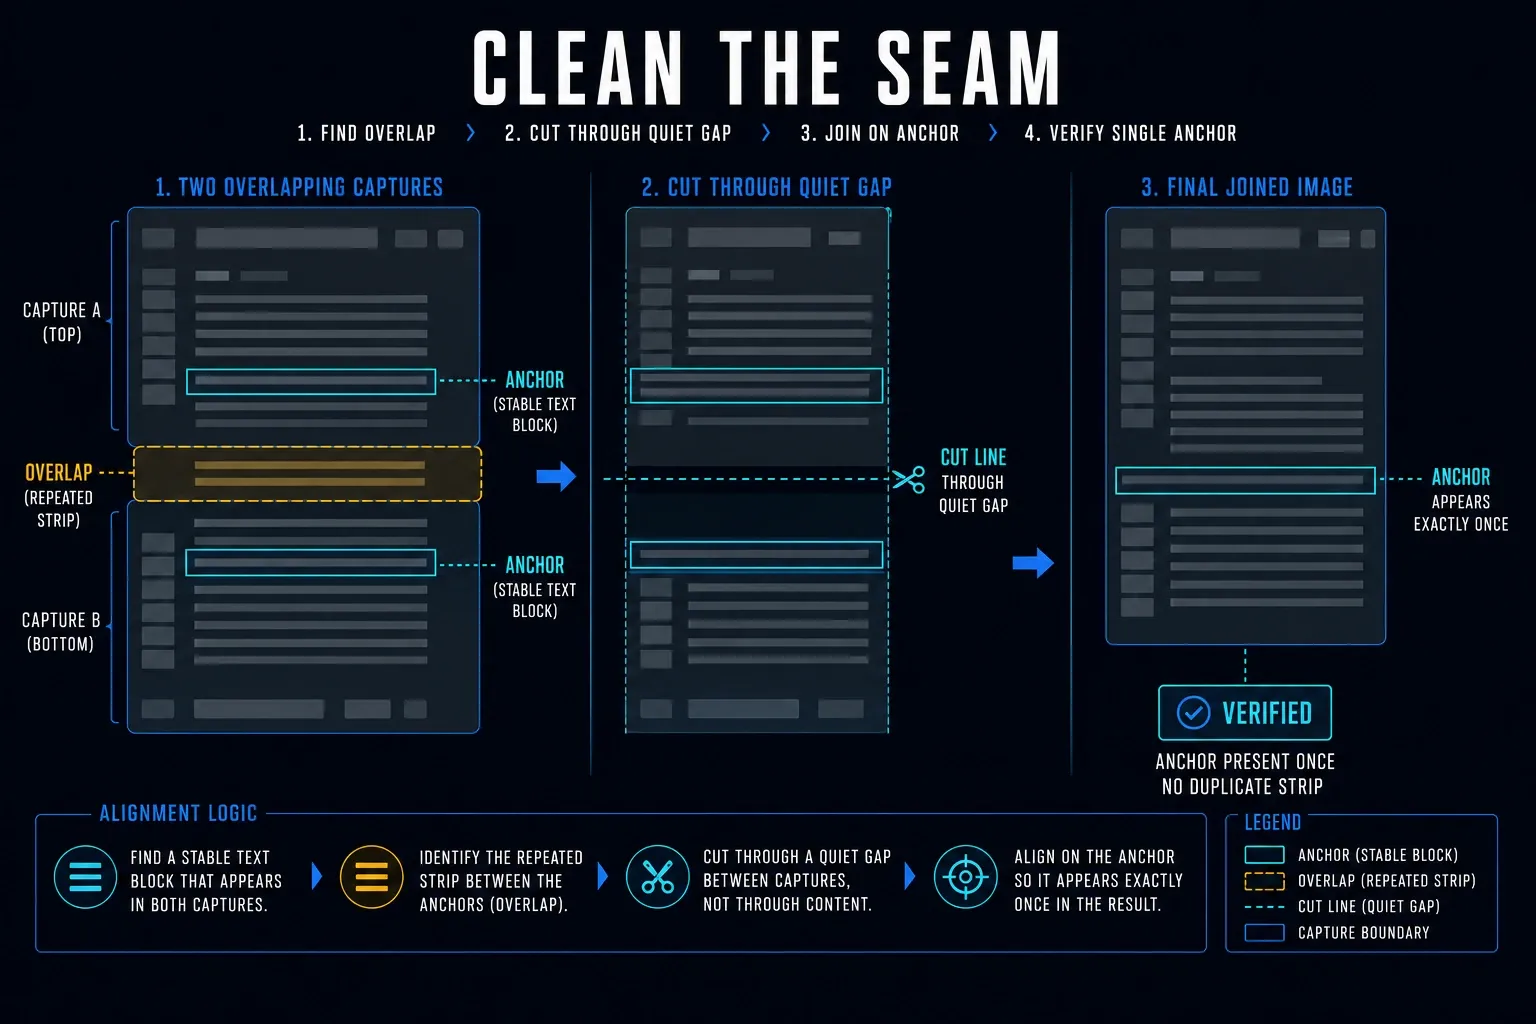
Look for the same complete text line, uniquely labelled row or image feature in both captures. A plain background or several identical rows is a weak reference. Scroll less or recapture until you have a distinctive overlap. There is no useful universal overlap percentage for every page and tool.
Remove overlap without deleting content
A stitcher may detect shared pixels or other matching features, but a plausible preview is not proof of a correct join. Blank areas, repeated rows and changing page content can make the boundary ambiguous. Check each join against the originals. For a wide table, inspect repeated columns just as carefully as repeated rows.
- Use an editor with layers and adjustable opacity, or a stitcher with a seam preview. Place adjacent captures over each other at the shared region.
- Align a distinctive complete line or image feature; check a second nearby detail to avoid matching the wrong repeated row.
- Choose a cut between complete lines or controls. For horizontal stitching, cut between complete columns.
- Trim exactly one copy of the shared region, keeping every required line or column once.
- Restore full opacity if you changed it. Inspect the join at actual pixel size and compare both sides with the sources.
If the source changed between captures, add a gap and label the panels as separate moments. Do not fabricate a seamless record by deleting a changed value or a message you cannot align. Where evidence retention matters, keep the authorized originals separately from the assembled illustration.
Combine screenshots side by side
Choose what must be comparable. Equal displayed heights can suit two full-screen overviews; matching the size of the same control is more useful for a UI comparison. Preserve proportions and leave a consistent gap. Equal outer boxes do not prove that text and controls have the same scale.
Make Before and After comparable
For a before/after comparison, keep the crop and capture settings consistent except for the change you are demonstrating. Put Before on the left and After on the right for left-to-right readers. Label both directly. Do not enlarge one result just to make it look better.
Use a divider for different devices
Desktop and phone captures often have different shapes. Align their top edges, retain each aspect ratio and label the devices. Use padding where needed. Do not stretch the phone panel to fill the desktop panel’s width or pretend their responsive layouts form one continuous page.
Build a grid without making text unreadable
A grid is useful when readers compare shapes or states, but text can become too small. For example, a two-column layout 760 pixels wide with a 16-pixel central gap gives each panel 372 pixels. A 1440-pixel-wide source then appears at about 26% of its original width. Check the smallest text at the actual delivery size.
Crop to the relevant component when context allows. Use padding instead of cutting important content merely to make equal cells. If readers need every line, use separate full-width images or a vertical sequence. Put short labels outside the content.
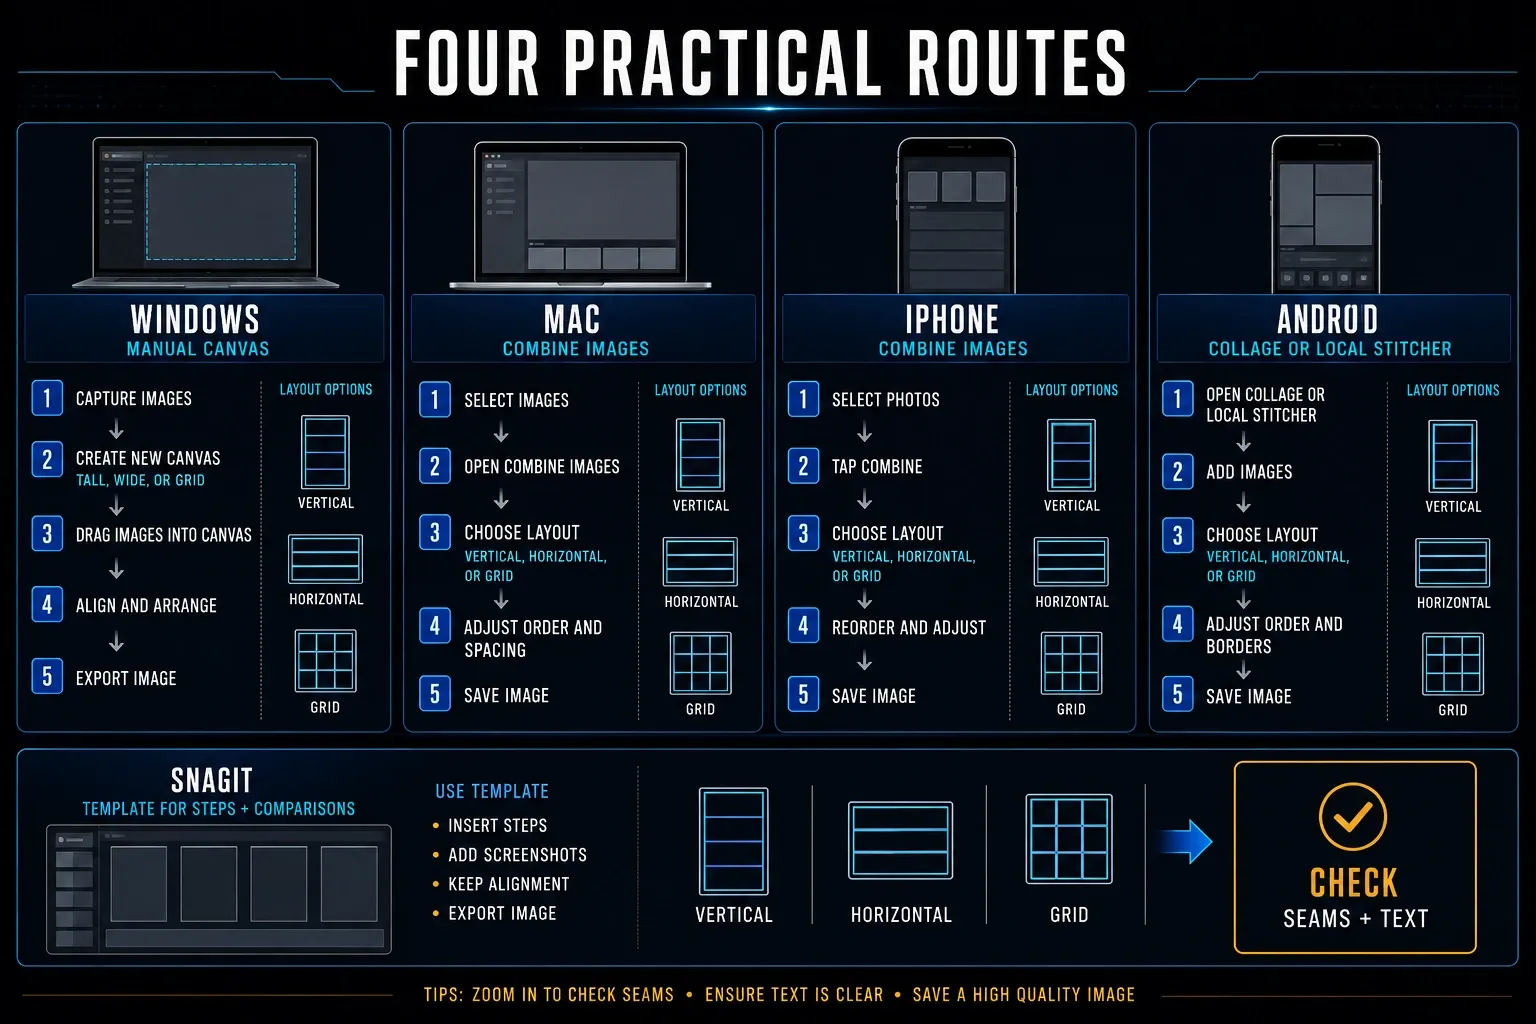
Combine screenshots on Windows
Microsoft Paint can handle a small manual layout with selection, cropping and image export. Use a second Paint window for the next source, so opening it does not replace the image you are assembling. Keep canvas expansion separate from resizing the picture itself.
- Open the first screenshot in Paint. Use Save as to create a separate working file.
- With no image selection active, expand the canvas by dragging its outer edge downward or to the right. Make room for the next panel without stretching the existing content.
- Open the next screenshot in a second Paint window. Select all with Ctrl+A, copy with Ctrl+C, return to the working canvas and paste with Ctrl+V.
- Move the pasted selection into place before clicking away. Check its dimensions and proportions; undo if the paste or a resize changed them unexpectedly.
- Repeat for the remaining panels, crop unused canvas and choose Save as > PNG picture for the delivery copy. Reopen it to check every join.
This route requires manual placement and trimming. If you have many overlapping captures, use a tool with a reviewable seam control or recapture the page. The Windows keyboard reference covers standard selection, copy and paste; the Paint toolbar can differ between versions.
Combine screenshots on Mac
Apple’s Mac Shortcuts action guide includes Combine Images. For screenshots stored as files, use file input rather than assuming they are in Photos. The following setup combines selected files; expand an action’s options if a setting is hidden.
- Create a new shortcut. Add Select File and turn on Select Multiple. Use numbered working copies for the intended order.
- Add Filter Files after the selection and sort by Name in ascending order. Add Combine Images after the sorted files; choose Horizontally, Vertically or Grid from its direction control and set any spacing.
- Add Save File after the combined image and turn on Ask Where to Save. Confirm it receives the combined output, not the original file list.
- Run the shortcut on two non-sensitive images first. Inspect order and size, then use the full set. If you need PNG, open the saved result in Preview and choose File > Export > Format > PNG under a new name.
Apple documents filtering and sorting an action’s input. An Apple Community file-combining example shows the file, layout and save controls, although its screenshots are from an older macOS version. Preview’s image export controls let you choose PNG explicitly. Combine Images arranges images; do not assume it removes repeated overlap. Crop verified duplicate regions first.
Combine screenshots on iPhone or iPad
On iPhone or iPad, use Apple Shortcuts to assemble screenshots already in Photos. Apple’s transform-action guide lists Combine Images. It is an Apple-app route, not a promise that Photos itself has a one-tap stitch button.
Create a shortcut with Select Photos and allow multiple selection. Add Combine Images, tap its direction setting to choose the layout, then add Save to Photo Album. Confirm the save action receives the combined image. Run it on two non-sensitive screenshots and inspect the order before using a longer sequence; do not assume the order you tap thumbnails is the order saved. If necessary, add sorting before the combine action or use the numbered-file Mac route. Crop verified overlap separately.
Combine screenshots on Android
For a collage on Android, Google Photos allows up to six selected images. Select them, choose Create > Collage, pick a template and adjust the crops. Touch and hold an image to drag it into a different position, then tap Save. Google lists Android 8.0 or later and at least 3 GB of RAM for collage editing. Grid templates do not let you move photo slots, layer photos or drag slot borders. Check that a fitted panel has not cropped off text.
A collage does not provide a verified continuous stitch. For overlapping captures, use an approved editor with manual seam adjustment. Stitch It’s developer describes ordering and transparent seam alignment on Apple and Android, but that is not an independent privacy test or a promise that every feature is free. Check permissions, current export restrictions and where files are processed before using private material.
Combine images in Snagit
TechSmith’s Combine Images instructions describe a template route for guides and comparisons. Use it when you want several distinct panels with captions. The template workflow is not documented there as automatic overlap detection.
- Capture the source images or drag files from your computer into Snagit.
- Select the images you want to combine.
- Choose Combine in Template.
- Pick a template with enough space for your intended panels.
- Reorder the images, adjust their sizes and add titles or captions. Check that fitting has not hidden useful content.
- Export a separate PNG and inspect it outside the editor. Retain the editable source separately only where authorized or needed.
For one continuous page, try scrolling capture when the source supports it. If that fails, assemble the captures and inspect each seam. A template is useful for separate steps even when a continuous stitch would be misleading.
Preserve screenshot text quality
Start from the highest-quality source you have. Preserve proportions and avoid repeated resizing. Scaling a small image up cannot recreate detail that was never captured; scaling a large panel down too far can make its text unreadable. If a comparison needs readable text, change the layout instead of forcing all panels into a narrow row.
Use PNG for interface-heavy images
PNG uses lossless compression, making it a useful default for interface text and flat colours. JPEG can suit photographic panels, but inspect small text after export. WebP has both lossy and lossless modes. Saving a blurry source as PNG does not restore its missing detail.
Watch the final pixel dimensions
Check both pixel dimensions and file size against the destination’s current limits. A very tall image may be scaled down in a message preview even when it uploads successfully. Open the delivered attachment, not just your local export. If readers cannot inspect it comfortably, split it into clearly numbered parts or use separate images.
Fix seams, spacing, and mismatched widths
Keep the alignment rule consistent within a layout: a common left edge for a vertical stack, a common top edge for adjacent panels, or regular cells and gaps for a grid. For continuous content, matching the actual text and interface scale matters more than equal file dimensions.
- Duplicate row at a seam: verify it against both sources, then remove exactly one copy.
- Missing line: return to the sources and move the cut. Recapture if neither source contains the missing content.
- Jumping scale: recapture with consistent settings where possible; proportional resizing alone cannot undo changed line wrapping.
- Repeated fixed header: remove duplicate copies only if no required content is lost; otherwise keep separate labelled panels.
- Colour mismatch: check whether the sources use different themes or states. Compare them in the same viewer before changing colours.
- Blurry text: compare the source, local export and delivered file. Change the layout or export settings at the stage where readability was lost.
Check privacy before you merge
Review every source before importing it and the complete output afterward. An editable crop or a changed panel fit can expose content you thought was outside the frame. Use the personal-information redaction guide for opaque covers, flattened delivery, metadata and original-sharing checks.
Do not upload confidential captures to an unapproved stitcher. Browser tools can process locally, remotely or both. A local editor also needs an approved storage location: cloud-synced folders and sharing settings can move files elsewhere. Test unfamiliar workflows with synthetic material, not customer records or credentials.
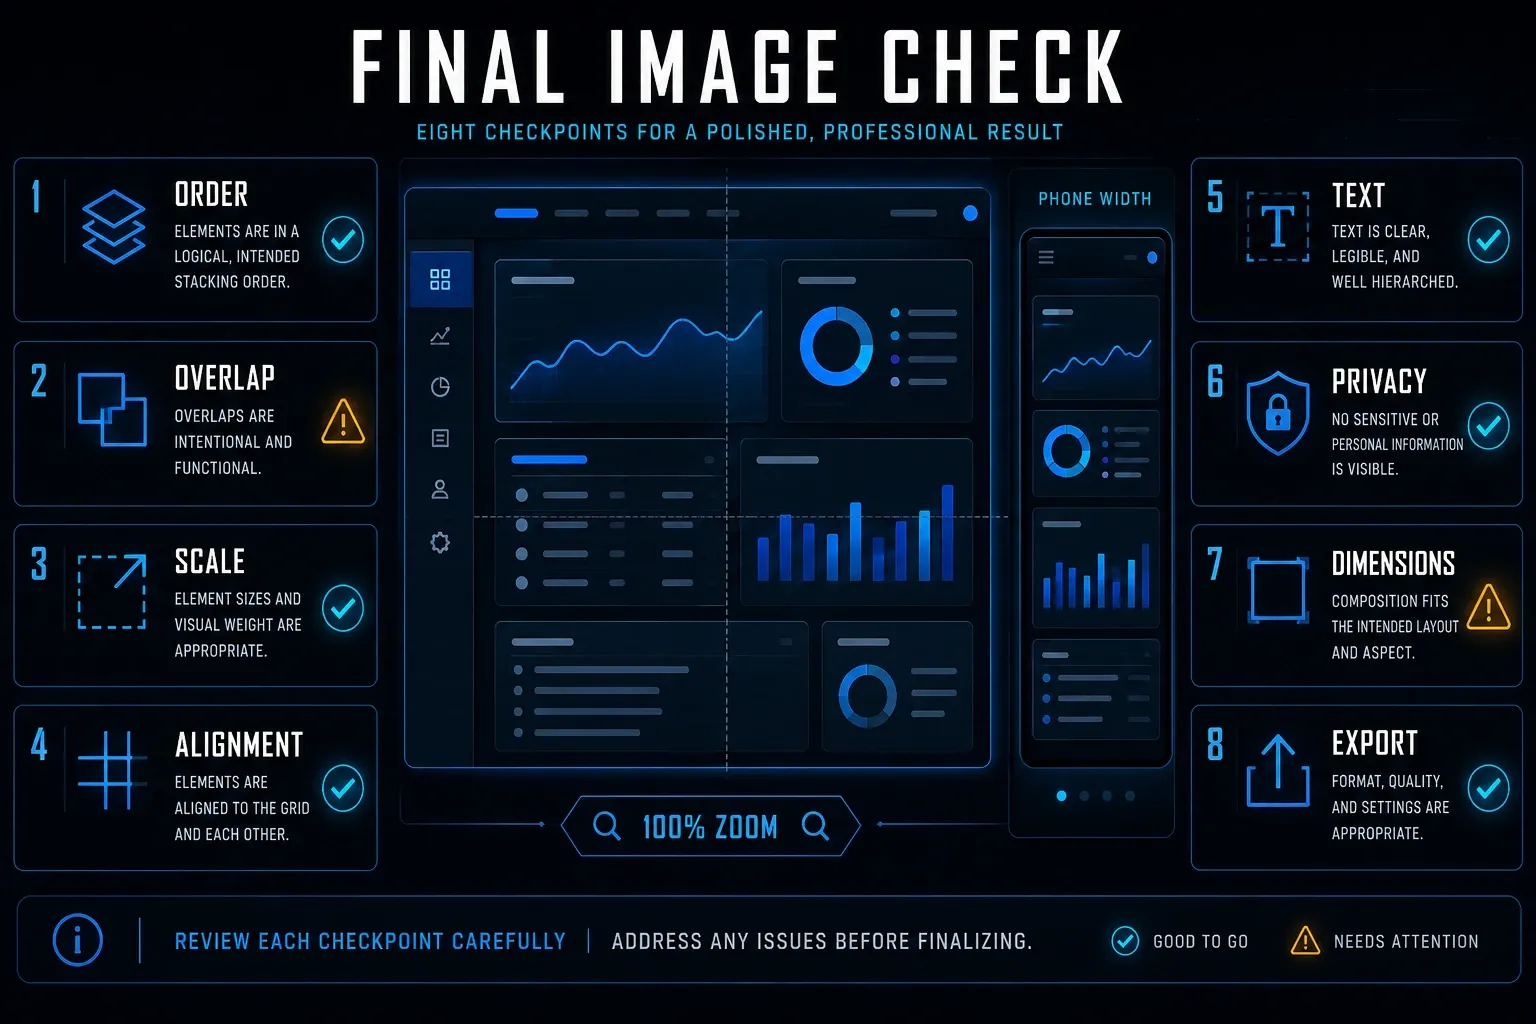
Verify the final combined image
- The panels appear in the intended order.
- Each continuous join includes every required line once; intentional omissions or separate moments are clearly marked.
- Scale, crop, alignment, gaps and labels fit the comparison or sequence.
- Text is readable at actual pixel size and at the intended article or message width.
- No withheld private information remains in the delivered pixels, metadata or accompanying files.
- The actual exported attachment opens correctly in another viewer.
- Its dimensions and file size meet the destination’s limits.
Use the right capture path next
Use the screenshot editing tools guide when you need to choose an editor for crop, annotation, redaction, OCR or layout work. For a single page that still scrolls, the scrolling screenshot guide may save you from assembling separate captures.
Keep separate images when joining would hide context, squeeze the text or make different moments look simultaneous. One file is useful only if the recipient can read it and understand how its parts relate.
Combine screenshots FAQ
How do I combine multiple screenshots into one image?
Choose a canvas editor or a Combine Images action, order the inputs and select a vertical, horizontal or grid layout. Preserve proportions, separate distinct panels and remove only verified overlap. Save a separate image and check its order, text and joins.
How do I make one long screenshot from separate screenshots?
Use adjacent captures with a distinctive shared line or feature. Align that overlap and remove exactly one copy, then compare every seam with the originals. If content is missing or changed, recapture it or label separate panels rather than inventing continuity.
Can I combine screenshots without a third-party app on iPhone?
Yes, using Apple’s Shortcuts app: select multiple photos, combine the images in the chosen layout and save the combined result to Photos. Check the output order. A simple Combine Images action is not a verified overlap-removal workflow.
Can Google Photos stitch screenshots vertically?
Google Photos offers collage templates, not a documented automatic overlap-removal workflow. Use it for a collage; for a continuous screenshot, use a reviewable stitching tool or manually trim and align the shared regions.
What format should I use for a combined screenshot?
PNG is a useful default for text-heavy screenshots because its compression is lossless. JPEG can be suitable for photographic content if the exported text remains readable. Changing format cannot restore detail already lost in the source or during resizing.
Why is my stitched screenshot blurry?
Possible causes include a low-resolution source, enlargement, excessive reduction, lossy export or compression by the sharing service. Compare the original, local export and delivered attachment to locate the change. Keeping a very tall image at full size also does not make its tiny message preview readable.
Should I combine screenshots or use scrolling capture?
Use scrolling capture for one continuous page when it works correctly. Combine separate screenshots for unsupported apps, comparisons, grids, or sequences that need labels and controlled spacing.