
Press Win + Shift + R, select the area you want to record, turn on system audio and your microphone as needed, then click Start. Windows 11's Snipping Tool can capture the screen and both kinds of sound without another recorder. I'd start there for a short demonstration; use Game Bar for a supported app or game, and OBS when you need more control over the recording.
Choose the recorder for what you need to show
The important distinction is what stays in the frame. A selected area suits a quick tutorial across windows. Game Bar captures a supported app or game. OBS lets you build a recording from display, window, camera, and audio sources.
| Your task | My first choice | What to check |
|---|---|---|
| Record part of the desktop, including a move between apps | Snipping Tool | Keep every action inside the selected area. Choose computer sound and microphone separately. |
| Record one supported app or game | Xbox Game Bar | Set the audio to record before starting. It isn't a desktop or File Explorer recorder. |
| Combine a screen, webcam, or more deliberate audio routing | OBS Studio | Select the correct sources and audio devices, then check a saved sample. |
For a one-off recording, skip the account sign-up and browser extension. Snipping Tool and Game Bar are included with Windows 11. OBS is a separate, free application, worth the setup when the built-in options don't fit.
Record with Snipping Tool, including computer sound
Microsoft documents video capture with Win + Shift + R. Win + Shift + S opens the screenshot overlay, so use R when you want a video.
- Prepare the screen. Open the app or document you want to demonstrate. Close private messages and move anything sensitive outside the recording area.
- Press
Win + Shift + R. If the shortcut doesn't open the recorder, search for Snipping Tool in Start, select Record, then New. - Select the recording area. Use rectangle recording and drag around the content you need. To show the whole monitor, cover that display with the selection. Check the edges before starting.
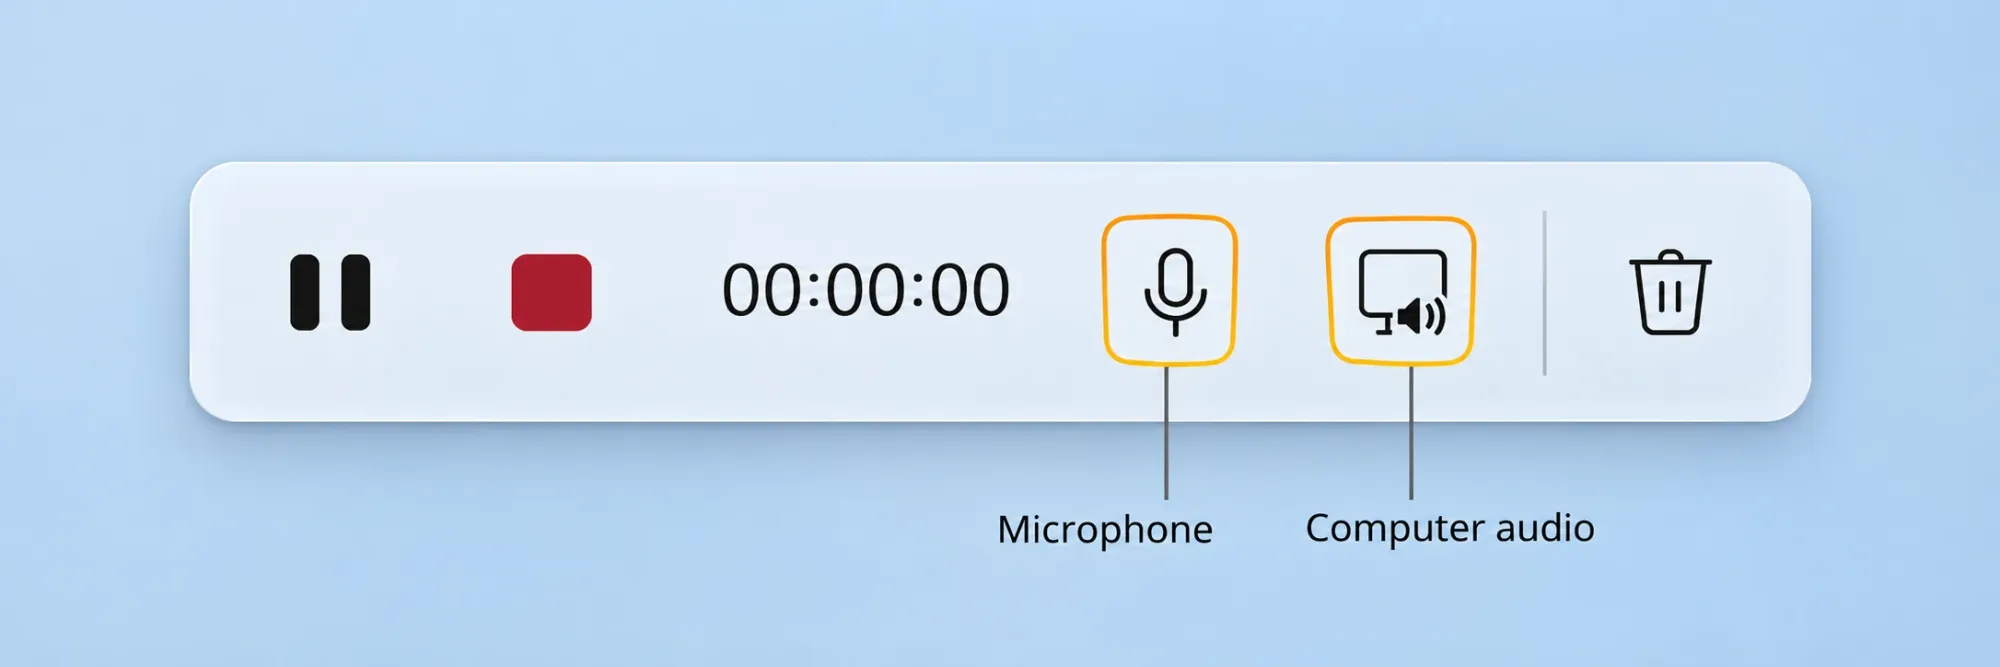
- Choose the sound. Enable the system-audio control for sound the computer plays. Enable the microphone control for your voice, and select the intended microphone if several are connected.
- Click Start. Wait for the countdown, then carry out the demonstration inside the selected area.
- Click Stop and review the result. Listen to the saved video as well as checking its picture. Use the save control to choose a filename and location when you need an explicit copy.
The two audio controls have different jobs. Microsoft added PC audio, microphone recording, and a choice of recording device to Snipping Tool; older advice saying it can't record sound describes an earlier version.
If those controls are missing, update Snipping Tool through Microsoft Store and reopen the app. On a managed work PC, ask your administrator about the available app version rather than installing an unofficial replacement.
Choose system audio, microphone, or both
System audio is playback from the computer, such as a video, app sound, or notification. Microphone audio is the input from your selected mic, including your voice and nearby sound. Enabling one doesn't substitute for the other.
| What you want in the video | System audio | Microphone |
|---|---|---|
| App sounds without your voice | On | Off |
| Your explanation without computer playback | Off | On |
| App sounds and your explanation | On | On |
| A silent demonstration | Off | Off |
I'd use headphones for narration over computer sound because speakers can feed the same playback back into the microphone. Also pause unrelated audio. A recording rectangle limits the picture; don't assume it limits captured computer sound to the app inside that rectangle.
Before a long take, record a brief sample in which you speak and play the sound you need. Stop and listen to that file. This catches the wrong microphone or missing playback before you repeat the entire demonstration.
Use Game Bar for a supported app or game
Game Bar is a good fit when your recording stays in one app. It won't solve a tutorial that needs the Windows desktop or File Explorer: Dell's Game Bar guidance identifies those capture limits.
- Open the app or game you want to record, then press
Win + G. - Open Game Bar's Settings → Capturing. Under Audio to record, select All when you want computer sounds included.
- Check the microphone button in the Capture widget. Set it to the state you want before recording.
- Return focus to the target app and press
Win + Alt + Rto start. Press the same shortcut to stop. - Open the resulting MP4 in Videos → Captures and listen to it.
Microsoft's Game Bar audio and keyboard instructions also document Win + Alt + M for toggling the microphone during a recording. Choosing All includes other apps and system sounds, so close or silence audio you don't want to share.
Choose OBS for a composed recording
I'd move to OBS when the recording needs a webcam, several visual sources, or specific audio devices. It takes more preparation than a screen snip, but the source list makes those choices explicit.
- Get OBS Studio from its official site and open Tools → Auto-Configuration Wizard. Choose the recording use case.
- In Sources, click + and add Display Capture for a monitor or Window Capture for an app. Select the intended display or window and check the preview.
- Watch the Desktop Audio and microphone meters in the Audio Mixer. If the wrong device is selected, choose the devices under Settings → Audio.
- Check Settings → Output for the recording location. Click Start Recording, make a short sample, stop, and play the file before the main take.
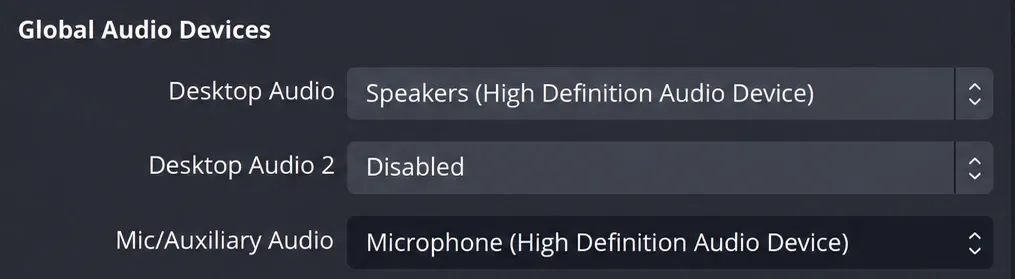
These are the source and device checks in the official OBS quick-start workflow. Keep the setup small: a display or window plus the audio you need is enough for a straightforward tutorial.
If the video has no sound, identify which sound is missing
Your voice is missing: check the recording toolbar's mic control and selected device first. Then open Settings → Privacy & security → Microphone and check microphone access for the recording app. Desktop applications use the separate desktop-app access setting.
Computer playback is missing: confirm that the app produces audible sound through the intended output device, then check the recorder's system-audio control. In Game Bar, revisit Audio to record → All. Turning on the microphone alone won't capture the computer's playback directly.
Both are missing: check the video's playback volume, then make another short recording with the two controls deliberately enabled. For a microphone that also fails outside the recorder, use Windows' Input device and microphone test before changing recording software.
A black picture is a separate problem from missing sound. Follow the black capture troubleshooting checks rather than repeatedly changing microphone settings. Keep protected content and workplace recording policies in mind; a different recorder isn't permission to bypass either.
Find the recording and check it before sharing
For Snipping Tool, the normal automatic-save location is Videos → Screen Recordings, as described in Microsoft's current Snipping Tool walkthrough. If you changed the save location or turned automatic saving off, check the app's Settings and save the recording explicitly. Game Bar uses Videos → Captures; OBS uses the path in its output settings.
Watch the beginning and end, listen for both intended sound sources, and check for notifications or private content. Snipping Tool can send the video to Edit in Clipchamp for further editing. Keep the original file until you've checked the copy you're going to send.
For quick Windows tutorials, my default remains Snipping Tool. Use the full Snipping Tool guide for its screenshot and markup features, or the Snagit recording workflow if repeated documentation work calls for that tool.