
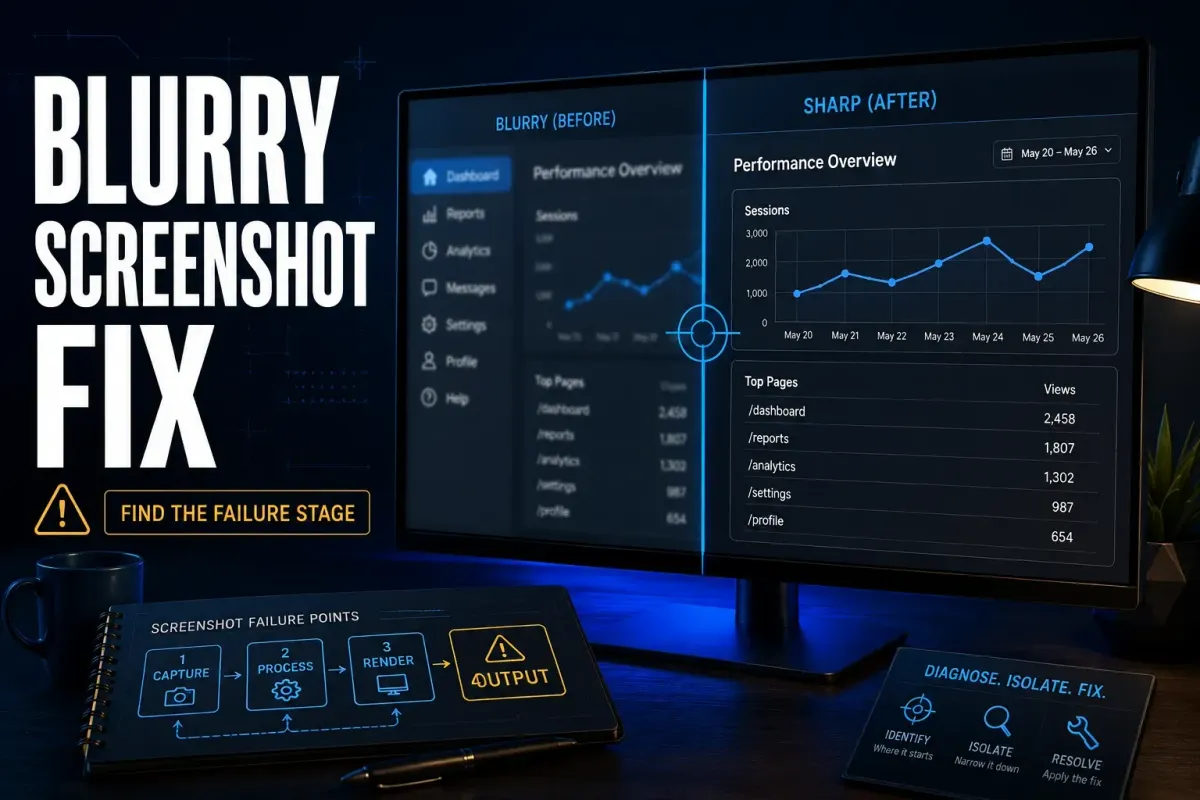
If a Snagit screenshot looks blurry, choose View > Actual Size in Editor, export an unchanged PNG and compare that file in a separate image viewer. A sharp PNG that becomes soft in Word or online points toward the receiving application, its layout or its delivered copy. It does not prove compression is the cause. If the PNG is soft too, check the source and any resize steps before recapturing.
Change one setting at a time and keep the original capture. First identify where the text becomes hard to read: Editor, the exported file, the destination or print. Use a harmless test screen without names, messages, account numbers or customer data.
Documentation checked September 19, 2026. This guide gives diagnostic checks, not results from a hands-on image-quality test. Menu labels and Office options vary by platform and version.
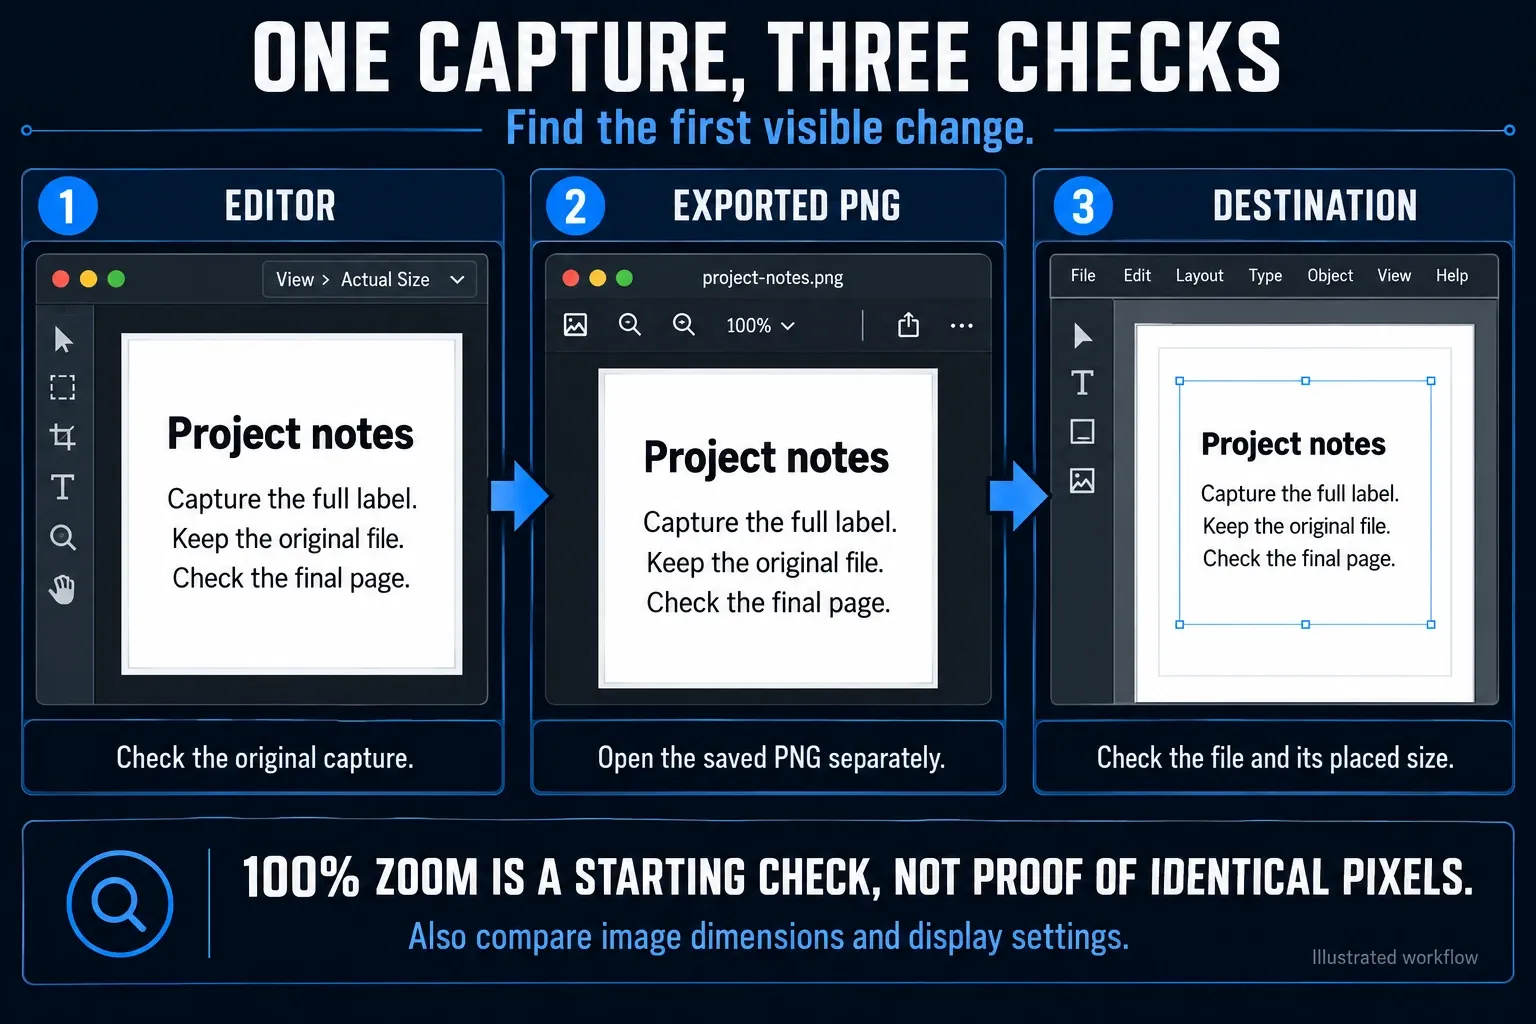
Find the blur with one capture in three places
Capture a harmless window containing ordinary text, a thin line and a solid color. Do not resize or annotate the capture. Make the source text legible before you start, then keep that same capture for all three checks.
- In Snagit Editor, choose View > Actual Size and inspect the text at 100% zoom.
- Export the unchanged capture as PNG. Open the saved file in a separate image viewer at 100% zoom and record its pixel dimensions.
- Insert that exact PNG into the destination. Compare its appearance, image dimensions and displayed size with the saved file on the same physical monitor.
Record the first stage that looks different. A 100% zoom setting is a useful starting point, but different applications can map image pixels to the screen differently. Browser 100% is not a guarantee of one image pixel per physical display pixel. Keep the monitor and viewing conditions the same, and compare actual dimensions as well as appearance.
| First soft stage | What to investigate | Next check |
|---|---|---|
| Editor only at fit-to-window zoom | Preview scaling | Inspect Actual Size before changing the file |
| Exported JPG, but not PNG | Lossy compression | Compare exports from the same unchanged source |
| Word, email or a learning platform | Layout, rendering or a changed delivery copy | Compare image dimensions and compression settings |
| Editor and the exported PNG | Source detail, earlier resizing or a capture issue | Compare a new harmless source before diagnosing the cause |
| Print only | Pixel count relative to printed size | Calculate pixels per inch and inspect a proof |
| Video only | Recording, playback or re-encoding | Check the original MP4 separately |
Fix a blurry preview in Snagit Editor
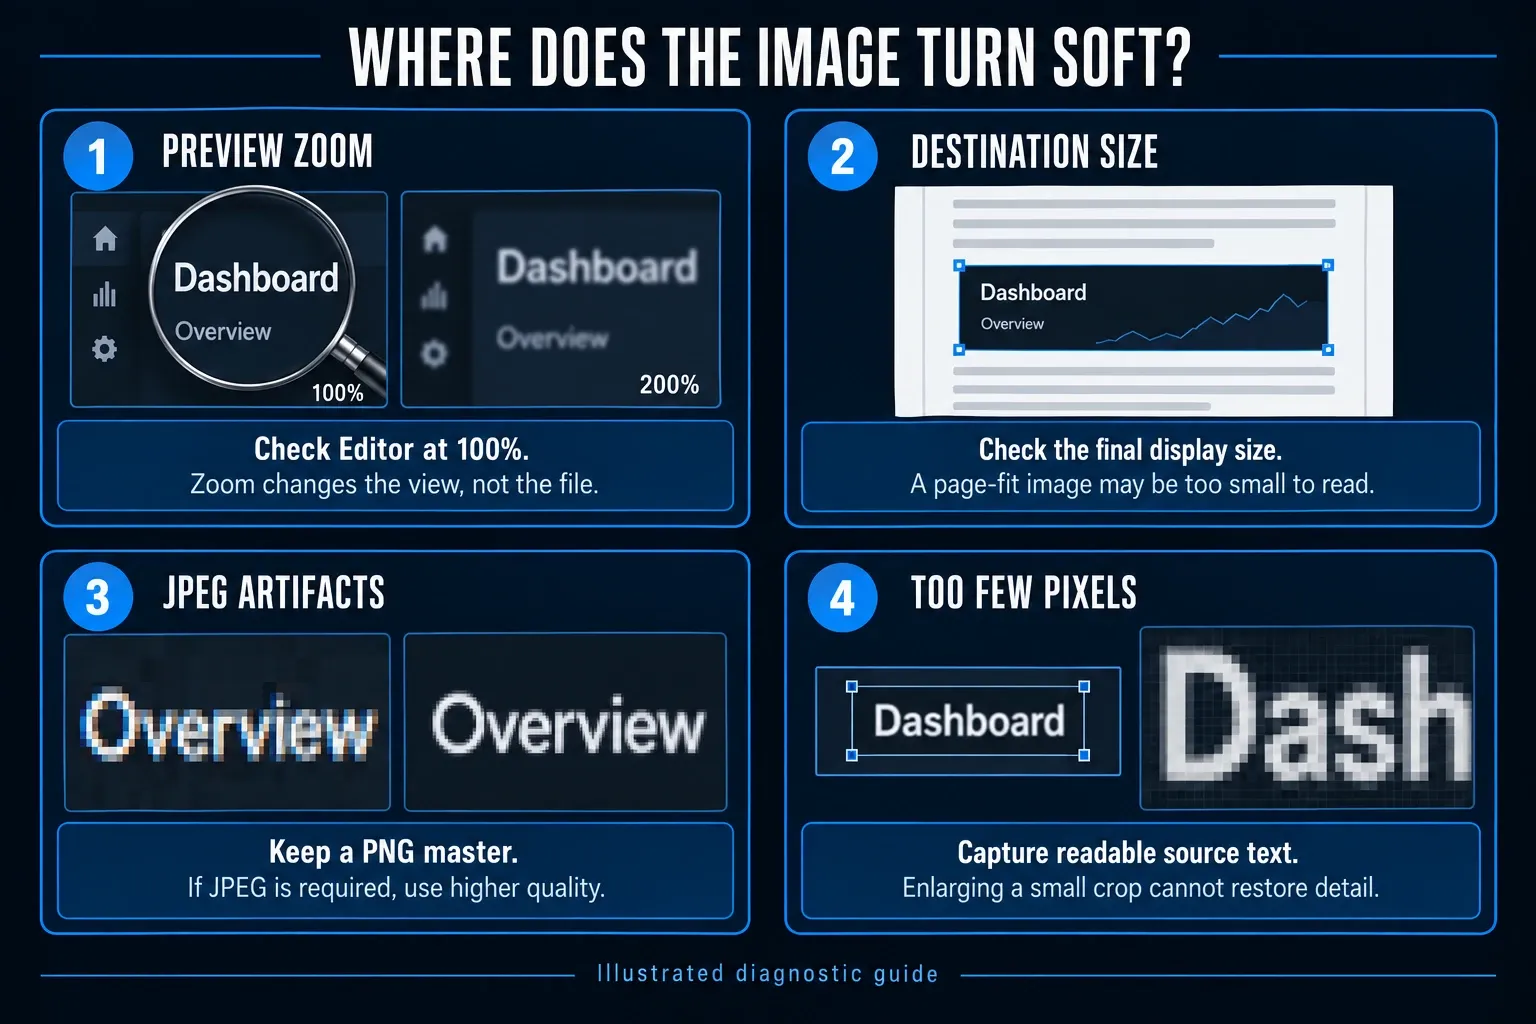
TechSmith's blurry-image guidance recommends View > Actual Size. Fitting a large image into a small Editor window changes its displayed size; that soft preview does not establish that the saved pixels are damaged.
If new captures open zoomed out, use View Zoom Options above the tray and deselect Always Shrink to Fit. TechSmith documents that control in its original-size support note. It changes the preview behavior, not the captured resolution.
At Actual Size, you may see only part of a long image. Scroll through it to inspect the labels. Do not recapture solely because the fit-to-window preview is soft when the exported PNG is readable at the size you need.
Fix a sharp capture that becomes blurry after paste
TechSmith's paste-and-resize procedure explains that a receiving application may shrink an image to fit. Compare the inserted image with the exported file before changing capture settings.
On Windows, the vendor uses Microsoft Paint as a comparison for pasting the same capture. Inspect its zoom and the image dimensions too. A clear image in Paint helps narrow the search toward the other application; it does not prove that every capture and export setting is correct.
For desktop Word on Windows, Microsoft's current compression instructions use File > Options > Advanced > Image Size and Quality. Select the intended document and enable Do not compress images in file. The option applies to that document; Word also offers All New Documents. File size can increase. Reinsert the original PNG if a previous copy has already lost detail. Do not use this Windows path as a Mac or Word-for-the-web instruction.
Also inspect the image's width and page fit. Turning off compression does not stop a narrow page from displaying text too small. Crop to the relevant area, split a long task into numbered captures or give the image more space. In Office for Mac, check the installed version's picture-compression controls; do not lower quality or discard editing data in your only copy.
Check Retina downscaling when sharing from a Mac
If the dimensions change only when you copy, drag or share a capture on Mac, inspect Snagit > Settings > Advanced. TechSmith's Retina sharing instructions document Scale down retina images when sharing. When enabled, that preference reduces shared dimensions. Check its actual state in your installed version rather than assuming a default.
Compare an exported PNG with the shared result. If the smaller shared copy lacks the detail you need, test with the preference off and check the resulting dimensions and destination layout. Keeping the full-resolution file does not require displaying it at an oversized width in the document.
Choose PNG for interface text before blaming Snagit
JPEG compression can add blocks or smudges around interface text and fine edges. Compare PNG and JPG exports from the same unchanged capture. If only the JPG has those defects, choose PNG for that delivery instead of sharpening the damaged copy.
PNG preserves image data without lossy compression, but it does not recover detail already missing from the source. A site or document can still resize or convert it. Avoid treating the file extension alone as a quality guarantee.
Use JPG when the destination specifically requires it or when a photographic image justifies smaller files, then inspect the actual exported result. Do not repeatedly open and resave a JPG while editing. Keep the editable source or a lossless master and create the delivery copy at the end. Our Snagit export settings guide covers the broader format and naming workflow.
Separate JPEG artifacts from too few source pixels
Compression artifacts and pixel enlargement look different. JPG often adds halos, blocks, or smudges around existing edges. A tiny source enlarged beyond its pixel dimensions produces visible stair steps or broad soft shapes because the missing detail was never captured.
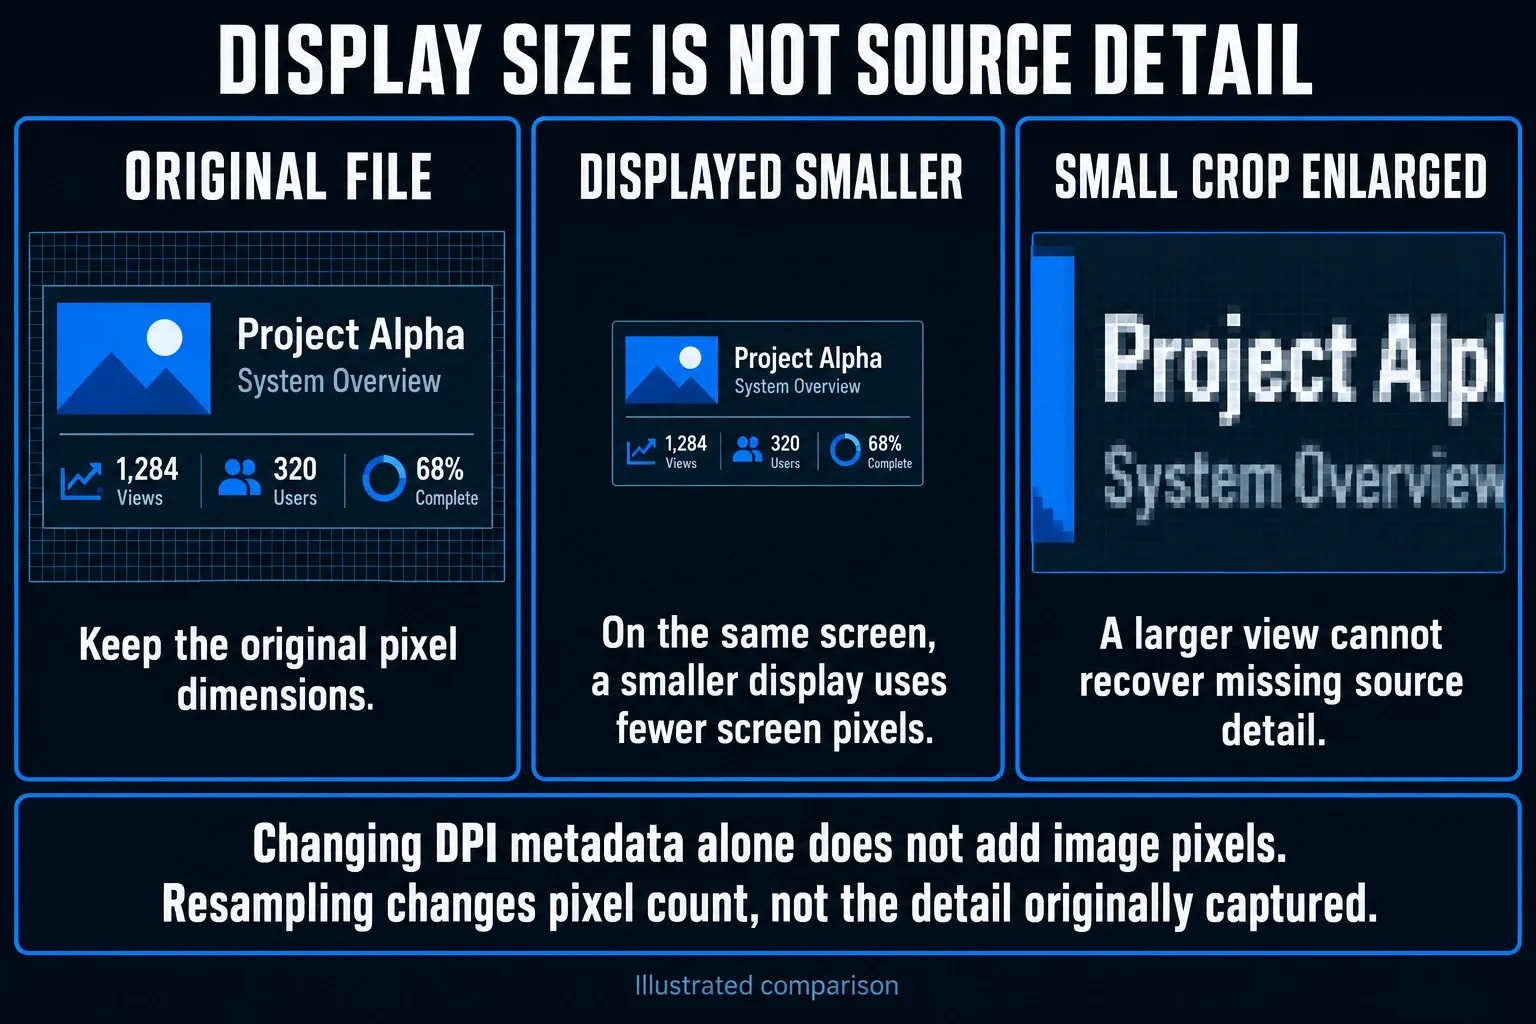
For example, enlarging a 500-pixel-wide crop to a 1000-pixel-wide image requires extra pixels to be calculated. It does not capture new detail. Edge sharpening may increase contrast, but it cannot reliably restore the exact letters of a label that was never readable.
Increase the source application's text or content zoom when available, then adjust the window so the needed controls fit. Merely widening a window may leave its font unchanged. Capture the relevant region at a useful size instead of capturing the whole desktop and enlarging one tiny control later.
Handle a blurry scrolling capture in documents
A sharp scrolling capture can become unreadable when a document fits the whole image onto one page. Check its placed height and width. A long image with small labels may need several pages or smaller crops even when compression is disabled.
Break a long procedure at meaningful task boundaries. Give each image one action, retain enough surrounding interface for orientation, and number the images in the article or document. Readers get larger labels and you avoid asking a page layout to make a very tall image readable.
Keep the original long capture if you need an archive, then make smaller approved crops for the document. The Snagit scrolling-capture guide covers taking the source image and choosing the capture area.
Check resize history before recapturing
Look for any resize step in the Capture preset, Editor history, batch workflow, export preset, CMS, document template, or email service. A platform may generate a smaller derivative while preserving the original upload. Download the delivered file and compare its pixel dimensions with your exported PNG.
Preserve an untouched master. Make a copy for crops, annotations, and delivery sizes. If you must resize, lock the aspect ratio and test the final dimensions in the exact page or document. Repeatedly resizing down and back up does not restore the first pixel grid.
If a resized copy is all you have, request the original or recapture the source. An AI upscaler can generate plausible-looking detail; do not rely on it to reconstruct exact interface labels, account numbers or compliance evidence.
Test browser and CMS derivatives
A publishing system may keep your upload and generate smaller versions for different layouts. Check the image actually loaded by the page, not just the original in the media library. Browser developer tools can identify the requested file; compare its dimensions with your export.
For example, a 600-CSS-pixel-wide image area on a display using two physical pixels per CSS pixel needs 1200 source pixels across for a one-to-one physical-pixel match. That is a sizing example, not a universal minimum. MDN's responsive-image guide explains how srcset and sizes help the browser choose an appropriate version. Ask the site editor to check those settings if the page loads a smaller copy than the layout needs.
Start with browser zoom at 100%, then check the actual desktop and mobile layouts. Device pixel ratio accounts for the difference between CSS and physical pixels, and page zoom can change it. Judge whether readers can read the labels at the intended size; do not assume matching two zoom percentages means matching two rendering paths.
Keep a record of the original filename and dimensions before upload. That gives an editor a clean control when the CMS later changes responsive-image settings or recompresses old media.
Understand DPI without chasing a false fix
Changing DPI metadata alone changes the intended print scale, not the captured pixel count. That is the distinction in TechSmith's DPI explanation. Resampling is different: a resize operation can calculate a new pixel grid. Raising its pixel count still does not recover source detail that was never captured.
For a practical print check, divide image pixels by the intended inches. A 1800-pixel-wide image printed at 6 inches provides 300 pixels per inch. The same file printed at 12 inches provides 150 pixels per inch. Ask the printer or publication for its real requirement instead of assuming one number fits every output.
On Mac, work on a copy in Preview if you need to adjust print sizing. Apple's resizing instructions distinguish changes with Resample image enabled from changes without it. Keep resampling off when you want to preserve the pixels, check the resulting print dimensions and inspect a proof. Do not infer current Snagit Mac controls from an old support article alone.
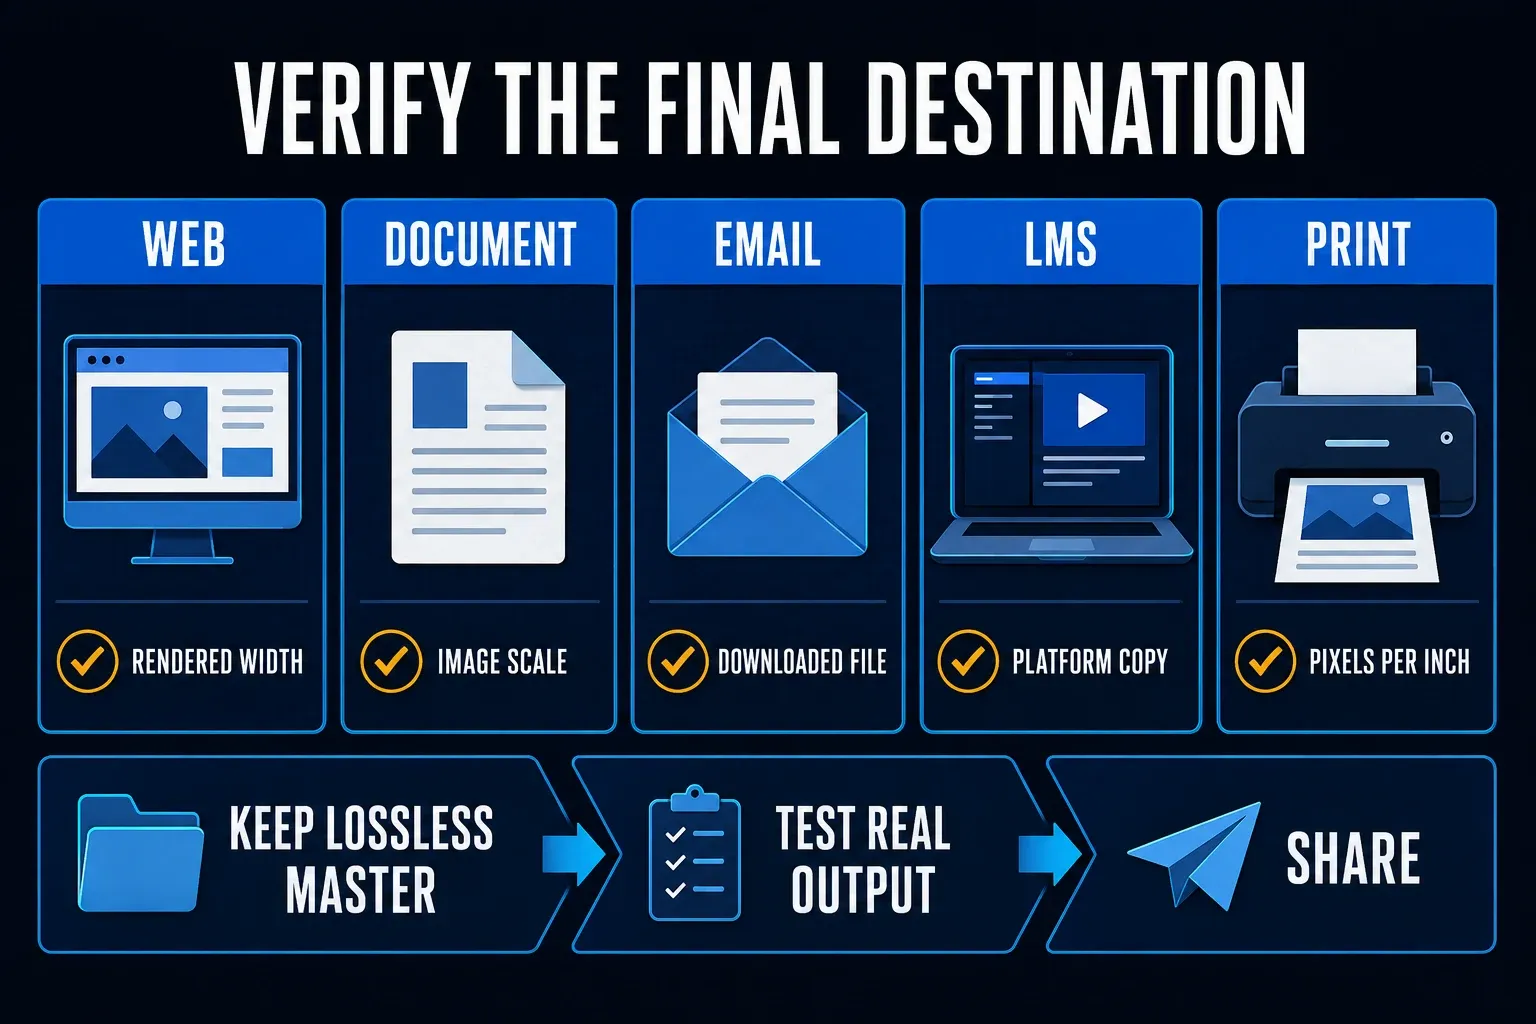
Use the right delivery route
- Web article or help center: keep a lossless PNG or editable source; check rendered width, responsive derivative, and a 100% sample.
- Word or Pages document: keep the original PNG; check image scale and page fit.
- Email or chat: keep the original outside the service; compare downloaded attachment dimensions with the inline preview.
- Learning platform: keep the original and an approved delivery copy; check platform compression and the learner viewport.
- Print: keep the highest useful pixel dimensions; divide pixels by intended inches and inspect a physical proof.
Test the route your readers use. In a 2024 Storyline discussion, the author reported that a PNG still looked blurry after insertion. The thread does not establish a single cause or a current product bug. Use the same-file comparison in your own published course or document, including the learner view, before accepting a suggested fix.
Keep video blur in its own branch
If a still PNG is sharp but an MP4 looks soft, stop changing image export settings. Video has different variables: recording dimensions, player scaling, bitrate, and platform re-encoding. Save the MP4 locally and view it at its original size before judging an embedded stream.
The Snagit screen-recording guide covers recording and delivery. A sharp still image narrows the investigation, but it does not validate the separate video workflow.
Build a privacy-safe support package
If the controlled PNG is blurry at Actual Size, record the Snagit version, operating system, capture dimensions, exported dimensions, file format, Editor zoom, resize steps, destination, and exact display scale. Include a harmless reproduction with large public text and simple lines.
Do not send a confidential production capture to prove image quality. Recreate the same dimensions with a neutral browser page or local document. State which of the three test stages first changed and attach the original PNG only when it contains no private information.
Snagit screenshot blurry FAQ
Why is my Snagit screenshot blurry in Editor?
Editor may be fitting a large capture to its window. Choose View > Actual Size. For new captures that open zoomed out, inspect View Zoom Options and Always Shrink to Fit. Compare an exported PNG before concluding the source is damaged.
Why is a Snagit screenshot clear until I paste it into Word?
Word may shrink the image, compress it or render it differently. Compare the original PNG and inspect its placed size. In desktop Word on Windows, check File > Options > Advanced > Image Size and Quality for the intended document.
Should I save a Snagit screenshot as PNG or JPG?
PNG is a good starting point for interface text because it avoids JPEG compression artifacts. It cannot restore missing source detail or prevent a destination from resizing the image.
Why is my scrolling screenshot blurry in a document?
The document may fit a very tall image onto one page, making its labels too small. Check the placed dimensions and split the capture into task-focused sections when needed.
Will increasing DPI make a Snagit screenshot sharper?
Changing DPI metadata alone does not add captured pixels. Resampling can change the pixel count, but it does not recover missing source detail. For print, divide image pixels by the intended size in inches.
Can sharpening fix a pixelated screenshot?
Sharpening may increase edge contrast, but it cannot reliably reconstruct missing letters or controls. Recapture with larger source text or request the original file when possible.
Why does a PNG still look blurry online?
The page may load a smaller derivative, convert the file or display it at a size that needs more source pixels. Compare the loaded file with the original and account for device pixel ratio, not just browser zoom.
What should I send TechSmith support?
Send a harmless reproduction, Snagit and OS versions, pixel dimensions, file format, zoom, resize history, destination and the first comparison stage that looked different. Do not attach a confidential production capture.