
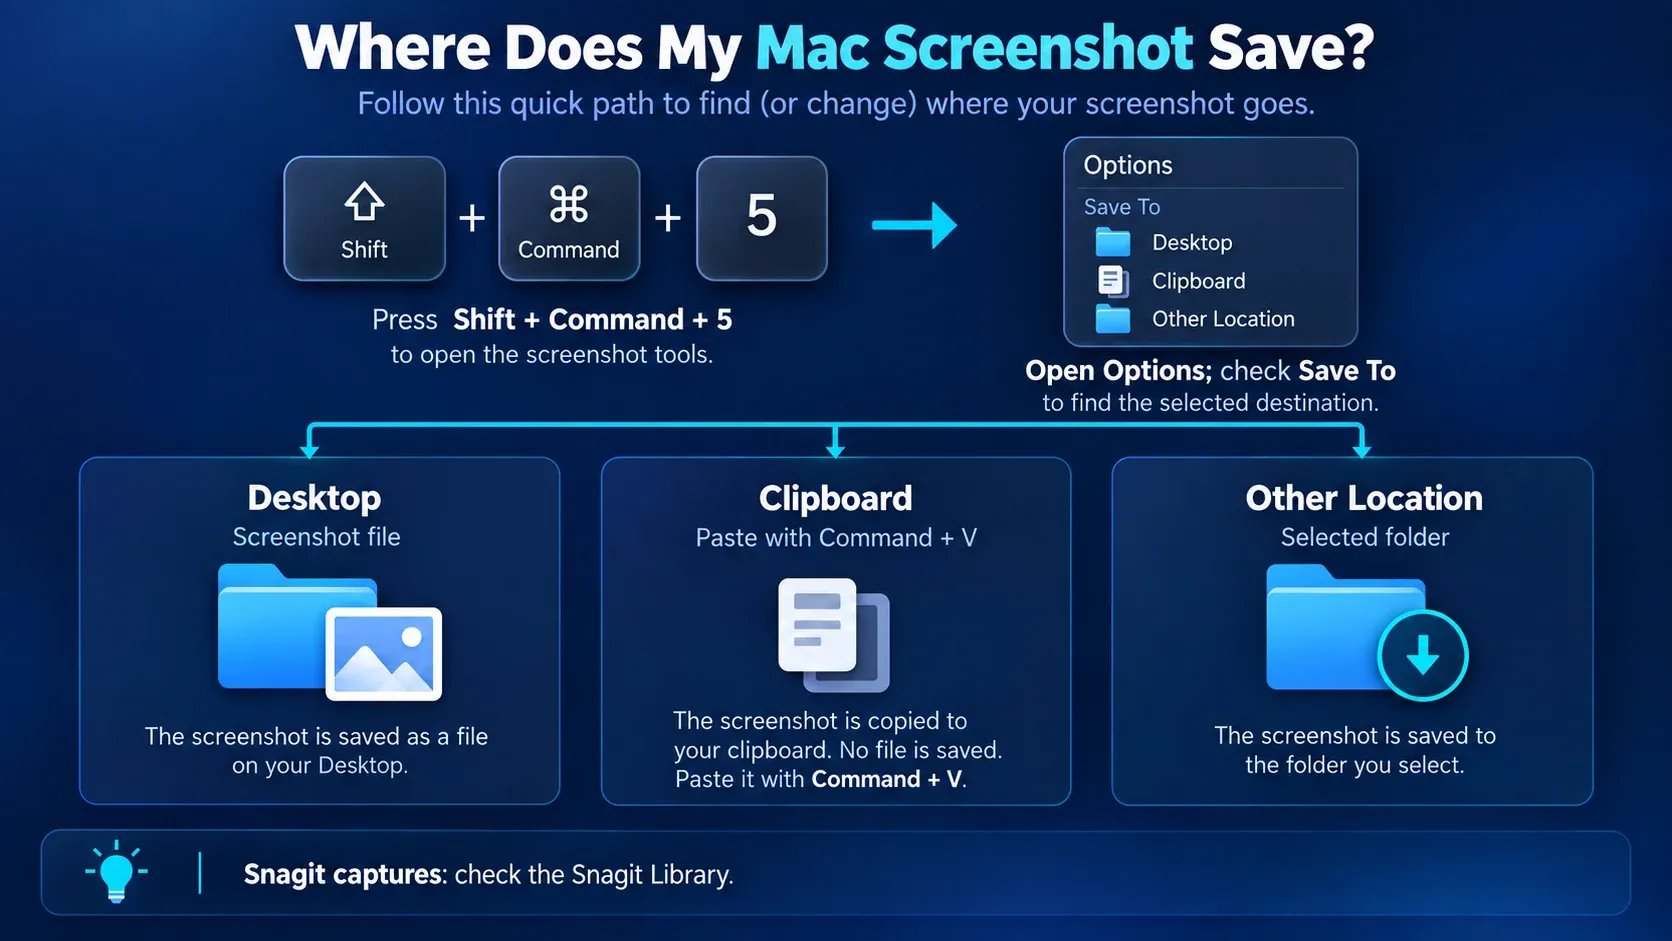
Most screenshots taken with the built-in macOS Screenshot tools go to your Desktop by default, as Apple’s Mac screenshot guide explains. If you cannot see the file there, check whether the capture was sent to the Clipboard, whether the save location was changed in Screenshot options, or whether your Desktop is stored in iCloud Drive.
The answer is different for Snagit. TechSmith’s Snagit Library instructions describe where app-managed captures are stored. A Snagit capture may never appear on the macOS Desktop unless you export or save a copy there.
Where Mac screenshots are saved
| How you captured it | What happens | Usual file destination |
|---|---|---|
Shift-Command-3 |
Captures the entire screen | Desktop |
Shift-Command-4 |
Captures a selected area | Desktop |
Shift-Command-4, then Space |
Captures a window or menu | Desktop |
Shift-Command-5 |
Opens the Screenshot controls | The location shown in the Save To section of Options |
Control plus a screenshot shortcut |
Sends the capture to the Clipboard | No normal screenshot file is created |
| Snagit | Stores the capture in the Snagit Library | The Library location shown in Snagit settings |
How to check the current save location
- Press
Shift-Command-5. - Click Options.
- Look under Save To.
The selected item is the destination for captures made through the Screenshot controls. Depending on your Mac and settings, the menu can point to Desktop, Documents, Clipboard, Mail, Messages, Preview, or another location. If you choose a folder, macOS uses that folder for later Screenshot captures until you change the setting again.
This is the quickest way to answer “where did my screenshot go?” without searching the whole Mac. It also explains why the file may be in Documents, Downloads, or a custom project folder even though you expected it on the Desktop.
Desktop and Clipboard are different destinations
A normal shortcut creates an image file. Holding Control while using the shortcut sends the image to the Clipboard instead. That is useful when you want to paste the capture directly into a document, chat, email, or editor, but it means Finder has no new file to show you.
If you used Control, click into the app where you want the image and press Command-V. If the paste works, the capture was in the Clipboard. If you need a permanent file, paste it into Preview or another image editor and save it to a known folder.
How to find a screenshot in Finder
When the destination is set to Desktop but the image is hard to spot, use Finder:
- Open Finder.
- Choose Desktop in the sidebar, or open the folder shown in Shift-Command-5 > Options > Save To.
- Sort by Date Modified to bring the newest capture to the top.
- If the folder contains many images, search for
Screen ShotorScreenshot, depending on the language and macOS version.
If Finder does not show the file in the expected folder, repeat the check in Screenshot options. The save destination is more reliable evidence than the folder you normally use for images.
Why a screenshot may not be on the Desktop
The save destination was changed
Screenshot settings are persistent. Someone may have selected Documents, Clipboard, a recently used folder, or another application in the Options menu. Open the menu again before changing anything else.
The image went to the Clipboard
The Control modifier changes the result from a file to a Clipboard capture. Paste it into the intended app or save it from Preview if you need a file.
Desktop is managed by iCloud Drive
When Desktop & Documents Folders is enabled for iCloud Drive, your Desktop and Documents folders are stored in iCloud Drive and shown there in Finder. The screenshot can still be associated with Desktop, but the folder may be visible under iCloud Drive rather than only under the local Mac section of the sidebar. Apple explains this setup in its iCloud Drive guide.
Open Finder and check iCloud Drive > Desktop. If the Mac is offline or iCloud Drive has not finished syncing, the newest file may take time to appear on another device.
The capture came from another app
Preview, a browser, and third-party capture tools can use their own export or save dialogs. A browser download may go to Downloads, while an image opened in Preview stays unsaved until you choose File > Save or Export. Do not apply the macOS Screenshot default to every image made on a Mac.
Where Snagit screenshots go on Mac
Snagit uses a Library for captures and edits. That Library is separate from the files created by the macOS Screenshot app. If you captured an image in Snagit and cannot find it on the Desktop, open Snagit and check the Library rather than looking only in Finder.
For Snagit 2022 and newer, TechSmith’s Snagit Library instructions document ~/Pictures/Snagit as the typical default Library path. Older versions can use legacy Autosaved Captures locations. The current setting is the one that matters: open Snagit > Settings > Advanced and check the Library location shown there.
My guide to Snagit Library location and backup covers the version differences, backup scope, and the checks to make before moving a Library. A Library path is not the same thing as the export folder for a PNG or JPEG, so check the command you used when the capture was made.
Change where future screenshots are saved
- Press
Shift-Command-5. - Open Options.
- Choose a destination under Save To.
- Make one small test capture and confirm that it appears in the selected destination.
Use Desktop for quick reference images, a project folder for documentation work, or Clipboard when you only need to paste the image once. If you create long captures, the scrolling screenshot guide for Mac explains how the capture method changes by browser and app.
A quick checklist when the file is missing
- Open
Shift-Command-5 > Options > Save Toand read the selected destination. - Check Desktop, Documents, Downloads, and any custom folder shown there.
- Check iCloud Drive > Desktop if Desktop & Documents syncing is enabled.
- Try
Command-Vin the target app if you heldControl. - Check the Snagit Library if the capture came from Snagit.
- Use Finder's Date Modified sort to find the newest image.
For the built-in Mac Screenshot app, start with Desktop, then verify the Save To setting. For Snagit, start with the Library location in Settings > Advanced. Run those two checks before moving or renaming files at random.