
If Snipping Tool won’t open, freezes or ignores Windows + Shift + S, test the app and the shortcut separately. Open Snipping Tool from Start, choose image capture and New, and drag a small rectangle over ordinary desktop content. Release to finish and look at the new image, then repeat the test with Windows + Shift + S. Seeing the toolbar appear isn’t enough to confirm that capture works.
If a capture finishes but no editor or notification appears, open a blank Paint document and press Ctrl + V. Make sure the image you see is the capture you just took and not an old clipboard item. If it’s the right one, start with notifications and saving in Fix 4. Do not reset the app just because you cannot find a file.
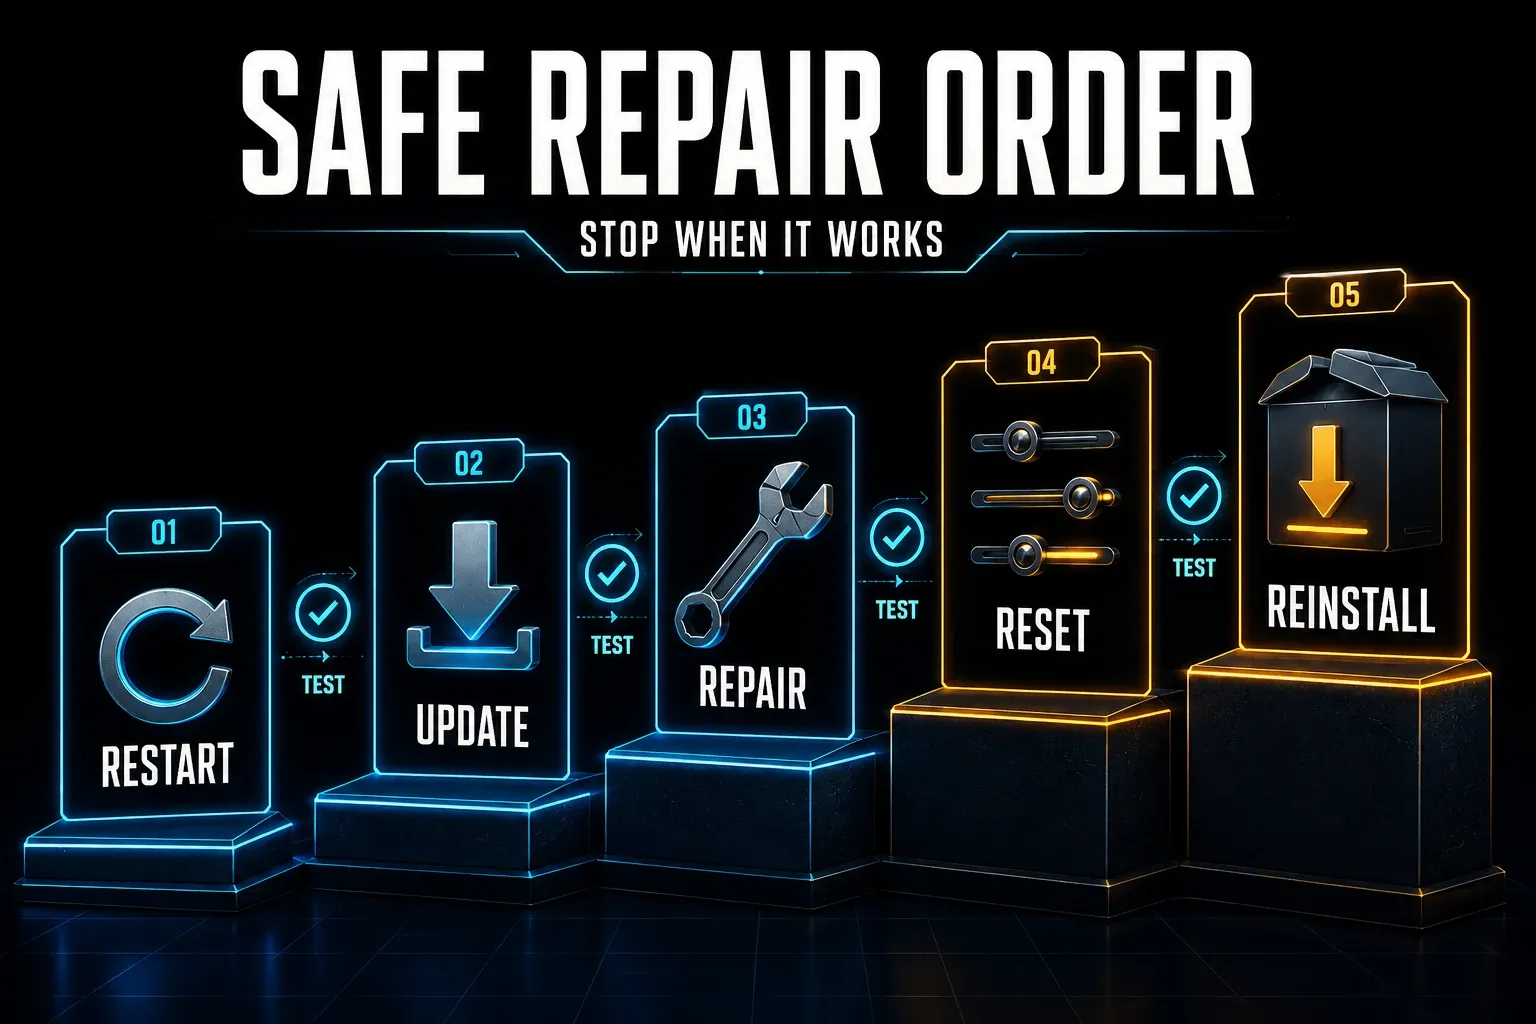
Checked September 18, 2026 against Microsoft documentation. These are symptom-based checks, not eleven changes everyone should make. Retest after each relevant step and stop when the problem is resolved. The diagrams illustrate the checks; they are not records of hands-on Windows testing.
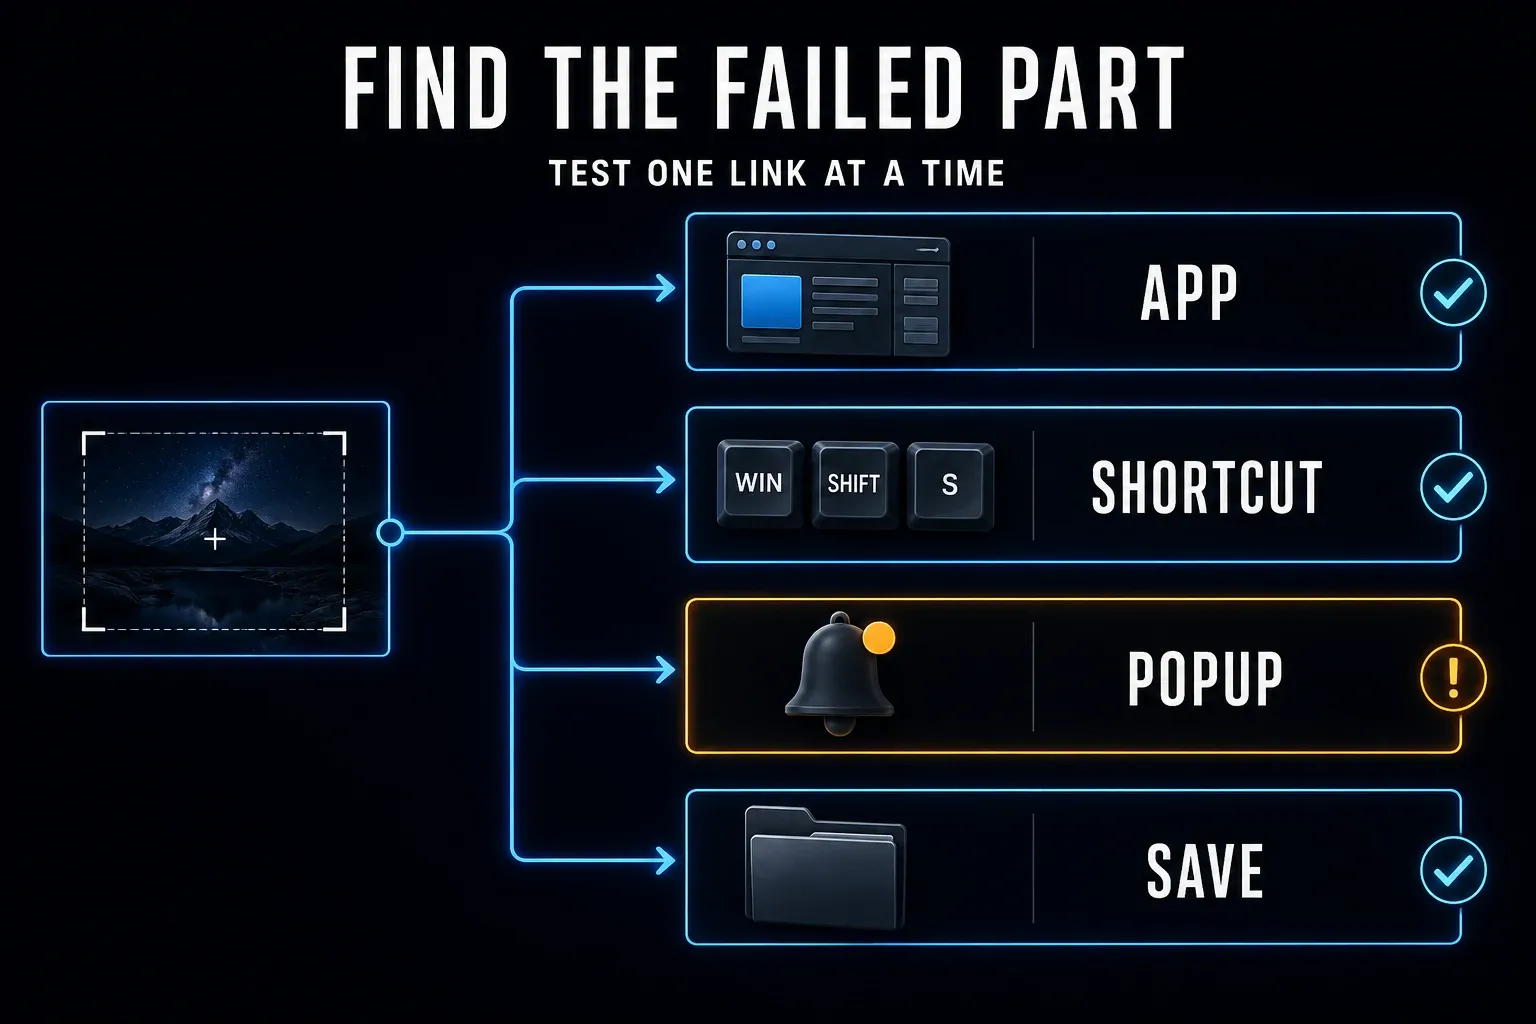
Find the failed part first
| What happens | What the test tells you | Start with |
|---|---|---|
| A complete capture works through New, but Windows + Shift + S does nothing | Manual capture works; the shortcut route needs checking | Fix 3: shortcut assignment and conflicts |
| A fresh snip pastes into Paint, but no popup appears | That capture reached the clipboard | Fix 4: notifications and save settings |
| The app closes or freezes before a usable capture | The failure is not just a missing saved file | Fix 2, then app updates and Repair if needed |
| The correct new image opens, but you cannot find a file | Capture worked; a chosen file destination is still unconfirmed | Fix 4: automatic saving or manual Save As |
| Several Store apps show an account or availability error | A single-app diagnosis may be too narrow | Fix 10 and the multi-app section |
| The captured image is black or blank | An image was produced, but its contents failed | Compare ordinary content in the black-capture section |
1. Test the app separately from Windows + Shift + S
- Open Start, type Snipping Tool and open the app. Use a harmless test screen with something recognizable, such as a short note.
- Choose image capture and New. Select rectangular capture, drag across the note and release. Check the resulting image in the editor.
- With the new image open in Snipping Tool, use Ctrl + C to copy it. Open a blank Paint document, press Ctrl + V and confirm the note is visible.
- Change the test note so the second image will be visibly different. Repeat the capture with Windows + Shift + S. Complete the rectangle, then inspect the new result. If no editor opens, try pasting into Paint and confirm the changed note is present.
Microsoft’s Snipping Tool guide documents Windows + Shift + S for image capture and Windows + Shift + R for video. Press S when you want a still image. Manually copying the image in the app also helps distinguish a capture failure from clipboard behavior.
If manual capture succeeds but the shortcut fails, try Fix 3. If the fresh capture pastes but the banner is missing, try Fix 4. If the app freezes or closes, start with Fix 2 and then check updates. A repeated account error across apps belongs in Fix 10; it is not a reason to work through every app repair.
2. End a stuck Snipping Tool task
Try this if Snipping Tool is unresponsive, or the shortcut works once and then stops. Save any accessible capture or unsaved annotation first: ending the task closes that app session.
- Press Ctrl + Shift + Esc to open Task Manager.
- Find Snipping Tool under Processes. Select only that app and choose End task.
- Open Snipping Tool from Start and complete a small test capture.
- Repeat with Windows + Shift + S. Record whether both attempts work or the failure returns.
An April 21, 2026 user report describes a shortcut that worked once after ending the process, while capture through New still worked. That is evidence of the symptom, not a confirmed cause or a fix for your PC. If ending the task only helps briefly, check updates, shortcut conflicts and Repair instead of treating it as a permanent solution.
3. Fix a shortcut that does nothing
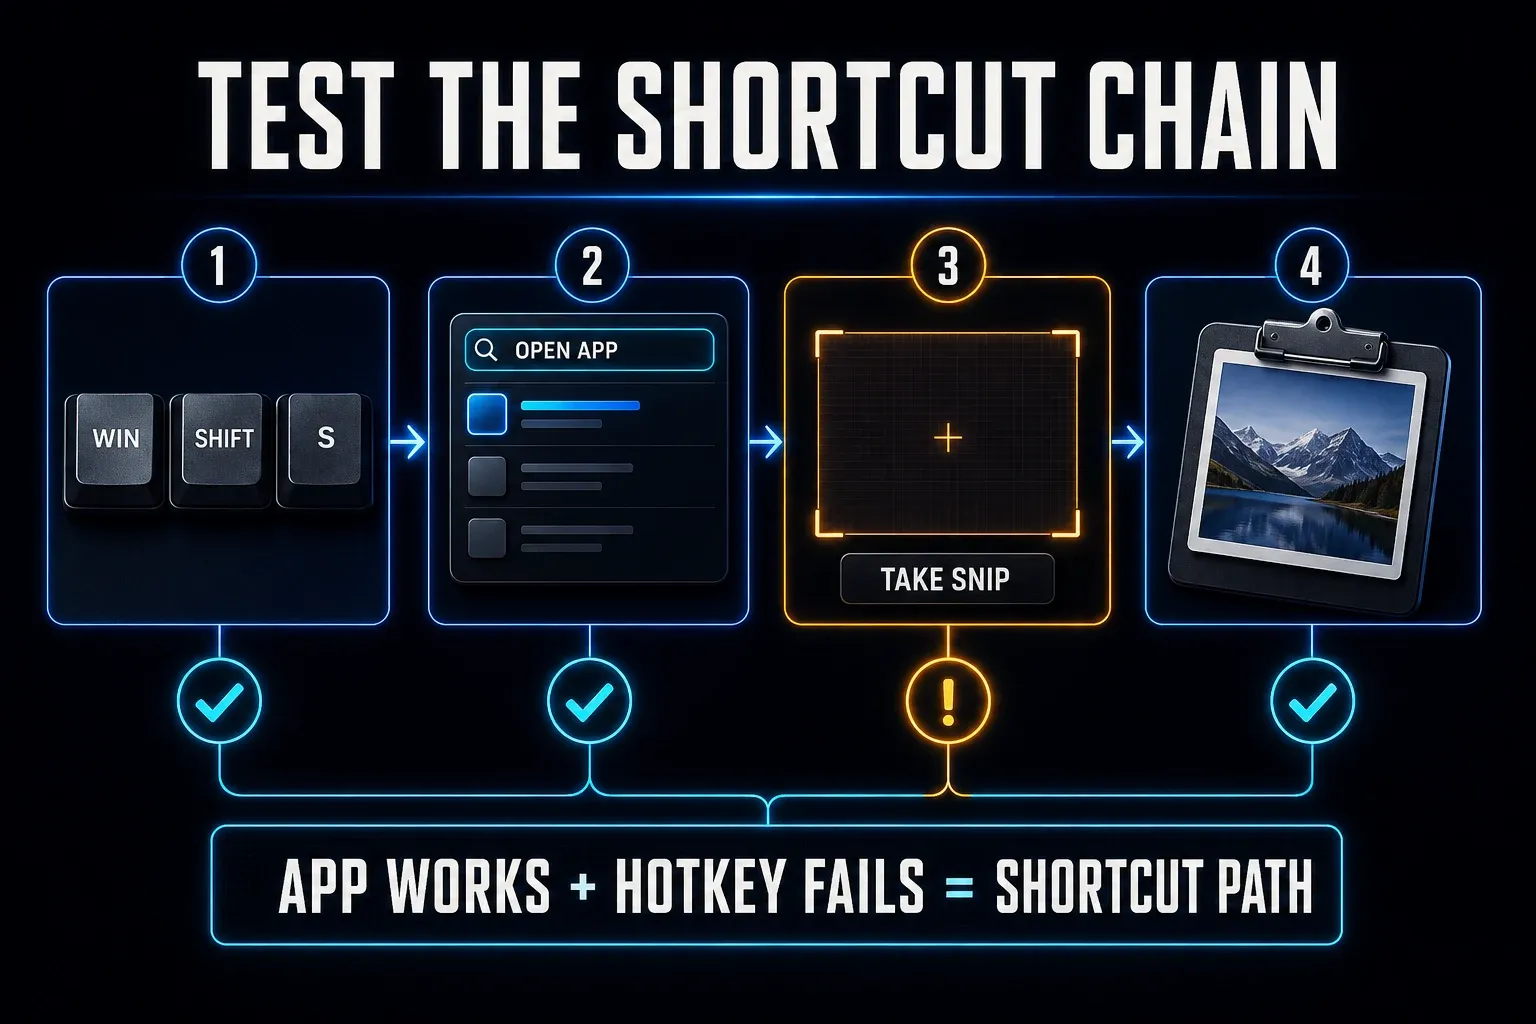
Press the Windows key on its own and check whether Start opens. If it does not, investigate the keyboard before repairing Snipping Tool. If the key works, compare a complete capture through New with Windows + Shift + S on the local desktop. For a remote session, check its documented shortcut handling; do not assume the local and remote PC receive the same keys.
Print Screen has its own assignment. Under Settings > Accessibility > Keyboard, check Use the Print Screen button to open screen snipping if you want that key to open the overlay. Microsoft’s Windows keyboard shortcuts document this setting. It does not reassign Windows + Shift + S; finish the selection after an overlay opens.
Inspect the shortcuts in capture or keyboard utilities you recognize. Exit one such utility at a time, retest, then assign a non-conflicting shortcut if you identify the cause. Do not disable security software or company controls. If Snagit uses Print Screen, follow the Snagit Print Screen setup guide. The diagram below presents separate diagnostic checks, not a requirement to reopen Start after pressing the capture shortcut.
4. Fix a missing popup or a screenshot you cannot find
After a completed snip, try pasting into Paint and identify the fresh image. If you need a file, check Snipping Tool > See more (...) > Settings. Microsoft documents automatic saving to the Screenshots folder, with settings for that behavior and destination. Pictures > Screenshots is a useful starting point, but your chosen folder may differ and automatic saving may be off.
If the image exists but no banner appears, open Settings > System > Notifications. Check the main notifications switch and Snipping Tool’s banner and notification-center options. Also check Do not disturb, which can suppress banners unless the notification is allowed through. Press Windows + N to inspect notification center. Microsoft’s notification and Do not disturb guide explains these controls; a banner setting does not repair a failed capture.
With the new image open in Snipping Tool, use Ctrl + S or Save As to choose a known folder, then open the saved file to confirm it is correct. Ctrl + C copies the image instead. If the capture worked but the destination is unclear, follow the Windows screenshot saving checks in our screenshot troubleshooting guide.
5. Update Snipping Tool in Microsoft Store
- Open Microsoft Store and find its library or updates area.
- Select Check for updates or Get updates, depending on the Store interface shown.
- Save any open capture before installing an offered Snipping Tool update. After installation finishes, close and reopen the app.
- Repeat the same manual and shortcut capture tests. If Store itself fails, use Fix 10 before attempting a reinstall.
Microsoft’s Store update instructions provide a manual update check even when automatic updates are available. Use Microsoft’s distribution routes for Snipping Tool. A download from an unrelated site adds uncertainty about the package you are installing.
6. Install Windows updates and restart
Save your work. Open Settings > Windows Update > Check for updates, install supported updates offered for the device and restart when required. After the restart, repeat the same small capture through New and Windows + Shift + S.
Record when the failure began and whether other apps are affected. Timing alone does not prove that the latest Windows update caused it. On a work PC, follow your organization’s update process; do not remove updates or change deployment policy based on a generic screenshot fix.
7. Repair Snipping Tool
- Open Settings > Apps > Installed apps.
- Find Snipping Tool and select the three-dot More menu.
- Open Advanced options.
- Select Repair if it is available.
- Launch the app and repeat the Start-menu and shortcut tests.
Microsoft’s Windows app repair procedure puts Repair before Reset. Repair and Advanced options are not available for every app or configuration. If the controls are absent or blocked on a managed PC, ask IT instead of using a removal script.
8. Reset Snipping Tool
Consider Reset only if an app-level failure persists after Repair. First save accessible captures to a known folder, back up files you need and note your capture and save preferences. Return to Settings > Apps > Installed apps > Snipping Tool > More (...) > Advanced options.
Read the Reset warning shown on your PC before confirming. Do not assume app-local work or preferences will survive. After Reset, reopen Snipping Tool, review its settings and repeat the controlled capture. Skip this step when the only problem is a missing notification or an unexpected save folder.
9. Reinstall Snipping Tool from Microsoft
If the app still fails after those checks, review Microsoft’s Snipping Tool uninstall and reinstall instructions before removing anything. Confirm that you can obtain the right installer. Check Settings > System > About > System type; Microsoft explains where Windows lists the system architecture. Match the installer to the processor architecture, including ARM64 where applicable.
- Save accessible work and back up needed captures. Confirm the appropriate official installer or working Microsoft Store reinstall route is available before uninstalling. On a managed PC, obtain IT approval.
- Open Settings > Apps > Installed apps, find Snipping Tool, open More (...) and choose Uninstall.
- Reinstall using the matching download linked from Microsoft’s support page, or the available Microsoft Store install route. Follow the installer’s instructions.
- Open Snipping Tool from Start and complete a capture. Repeat with Windows + Shift + S, then review the capture and save settings.
If you cannot identify the architecture, obtain the official installer or get permission to reinstall, stop here and ask support. Do not substitute a forum’s bulk PowerShell removal command. Reinstallation is an app-level option, not proof that an account or service error has been fixed.
10. Check Microsoft Store and account errors
Use this branch when Store will not update the app, installation fails, or Snipping Tool says it is unavailable in your account. Write down the full error and whether another Store app shows it. Microsoft’s Store app troubleshooting instructions include account sign-in, Windows updates, Store updates and app repair.
- Confirm that Microsoft Store is signed in to the account expected on this PC. On a managed device, ask IT which account should be used rather than changing organizational access.
- If Store opens, check its library or updates area for Store and app updates. Close and reopen the affected app after any update completes.
- If several apps fail, record their names, error codes and the time the problem began. Use the multi-app guidance below rather than uninstalling them in bulk.
- If Store cannot open or the account error persists, contact Microsoft Support or IT with those details. Do not delete accounts or change your region as a generic repair.
Once basic capture works, the Snagit vs Snipping Tool comparison can help you decide whether you need another editor. Buying a capture app is not a repair for a Microsoft Store account error.
11. Consider DISM and SFC for a wider Windows fault
System-file repair is not a first step for a missing screenshot banner or one failed shortcut. Consider it after app checks if a wider Windows fault remains, particularly when Microsoft Support or IT directs you there. Several apps showing an account error does not, by itself, establish file corruption. Save your work and follow IT guidance on a managed device.
- Search for Command Prompt, right-click it and choose Run as administrator. Approve the prompt only if you are authorized to make this change.
- Run DISM.exe /Online /Cleanup-image /Restorehealth. Wait for the message that the operation completed successfully; it can take time. If it fails, record the error and seek support before continuing.
- After DISM succeeds, run sfc /scannow. Leave the window open until verification reaches 100%.
- Record the result, then type exit. Follow any restart instruction and repeat the capture test. If the tools report an unresolved error, give support the exact message.
This sequence follows Microsoft’s System File Checker instructions. Do not treat a repair command as a guarantee. A successful run does not rule out a separate shortcut, capture or account problem.
If the capture is black or blank
Capture an ordinary desktop area with a recognizable note on it, then compare the result with the app that gives you black output. If the desktop image looks right, capture works in that context. The other app may restrict capture or have a capture fault, and the comparison alone can’t tell you which.
When the app or your organization explicitly blocks capture, switch to the export or sharing options you’re allowed to use. Do not disable protection. If ordinary desktop content is also black, save your work, restart and retest through both New and Windows + Shift + S. If it persists, report the results to support. Do not assume the display driver is responsible or keep resetting the app without new evidence.
When multiple Microsoft apps fail at once
When Snipping Tool and other Microsoft apps show the same error, widen the check beyond one app. In a January 21, 2026 Microsoft Q&A thread, users reported Snipping Tool account-availability error 0x803F8001 and similar failures affecting other users. Treat it as a dated community report. It isn’t an official incident diagnosis, and it doesn’t show that the same problem is active today.
Check the expected Store account, any available updates and your organization’s guidance, then give support the affected app names and the exact error codes. Avoid deleting several app packages or accounts at once. That removes useful diagnostic context and can leave more applications unavailable.
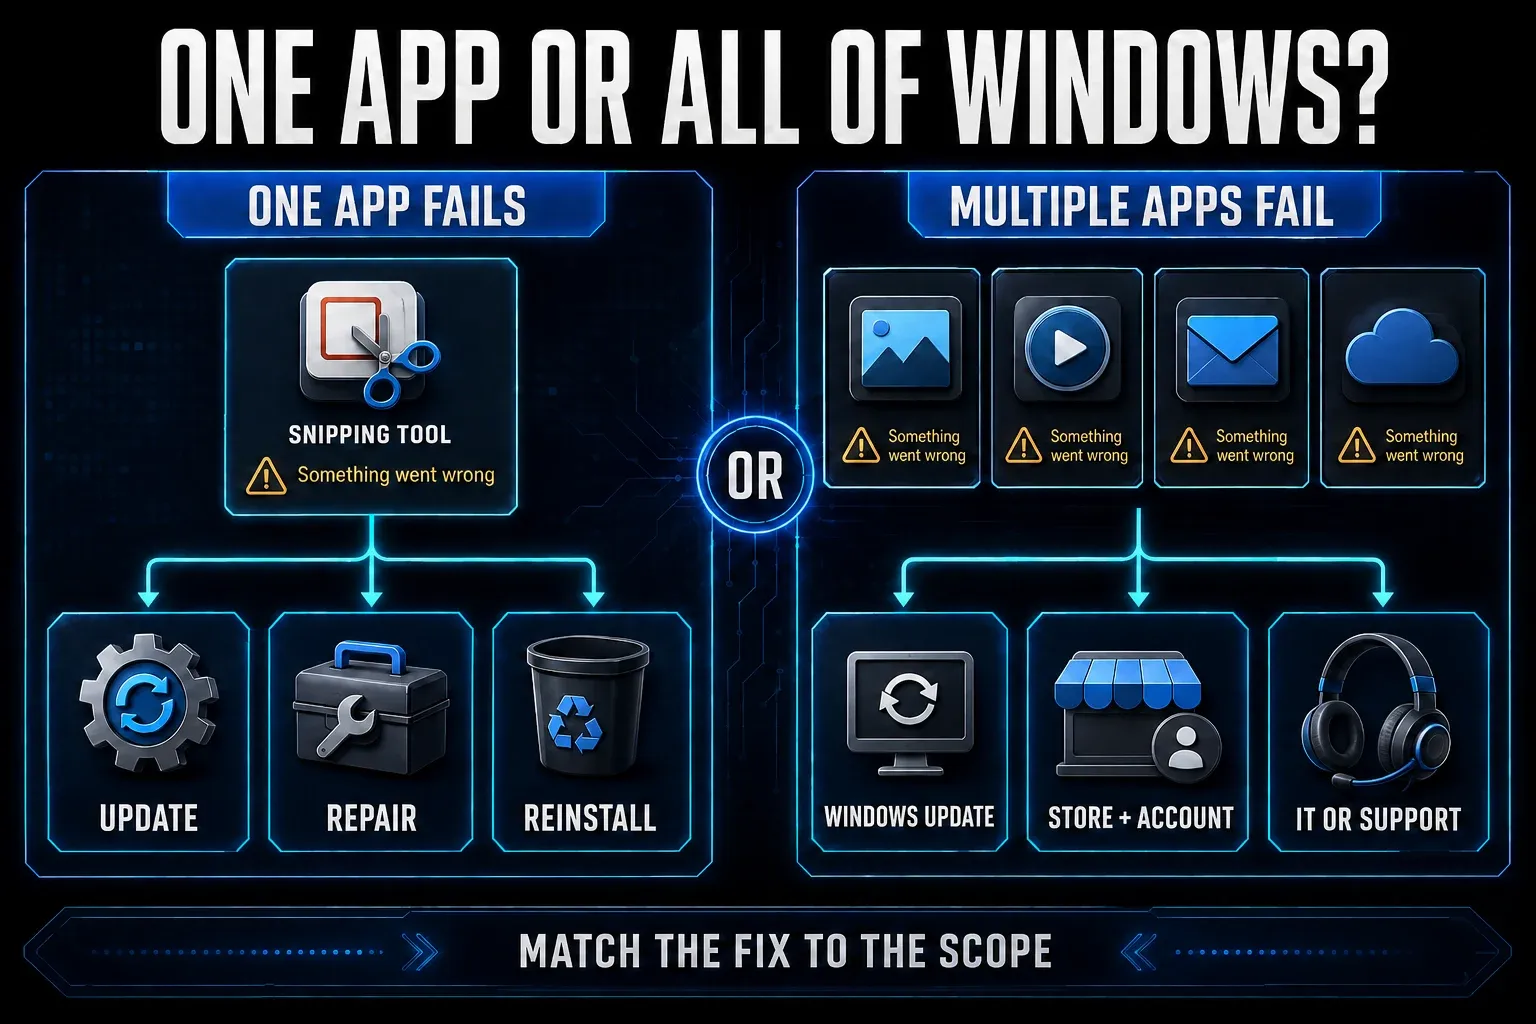
Stop and get help when the risk is wider than the app
Ask IT or Microsoft Support for help if controls are blocked, several apps fail, repair tools report unresolved errors or the problem comes back after every restart. Tell them your Windows version and Snipping Tool version, the exact error, what happened with a complete capture through New and with Windows + Shift + S, and whether the fresh image shows up in the editor, the clipboard or a saved file. Keep private notifications and customer data out of attachments.
Snipping Tool not working FAQ
Why is Windows + Shift + S not working?
Complete a capture through New in Snipping Tool, then compare it with Windows + Shift + S. If only the shortcut fails, check whether the Windows key opens Start and inspect recognized capture utilities for conflicts. A successful manual capture narrows the fault; merely opening the app does not prove capture works.
Why does Snipping Tool capture but not open?
After completing a capture, paste into Paint and verify the image is fresh. If it is correct, check Snipping Tool banners and Do not disturb under Settings > System > Notifications. Windows + N opens notification center. A missing banner is different from a failed capture.
Where did my Snipping Tool screenshot go?
Check See more (...) > Settings in Snipping Tool for automatic saving and its destination. Pictures > Screenshots is a starting point, but your folder or setting may differ. The new image may be on the clipboard. With the image open, Ctrl + S lets you save it explicitly.
Should I Repair or Reset Snipping Tool?
Try Repair first for an app-level failure. Before considering Reset, save accessible work, back up needed files and note your preferences. Read the Reset warning on your PC. Do not reset solely for a missing banner or unexpected save folder.
How do I reinstall Snipping Tool on Windows 11?
Before uninstalling, confirm that the matching official Microsoft installer or a working Store reinstall route is available. Back up needed captures and obtain IT approval on a managed PC. Uninstall through Installed apps, reinstall from Microsoft, then test manual and shortcut capture.
Why does Snipping Tool work once and then stop?
The symptom does not establish one cause. Save accessible work, end only the Snipping Tool task in Task Manager, reopen it and repeat both capture tests. If the failure returns, check updates, shortcut conflicts and Repair; report the recurring pattern rather than assuming a permanent fix.
Do I need to run SFC for Snipping Tool?
Not for a missing banner or one failed shortcut. Consider system-file repair for a wider Windows fault after app checks or when support recommends it. An account error across several apps is not proof of corruption. Microsoft’s sequence runs DISM first, then SFC only after DISM succeeds.