
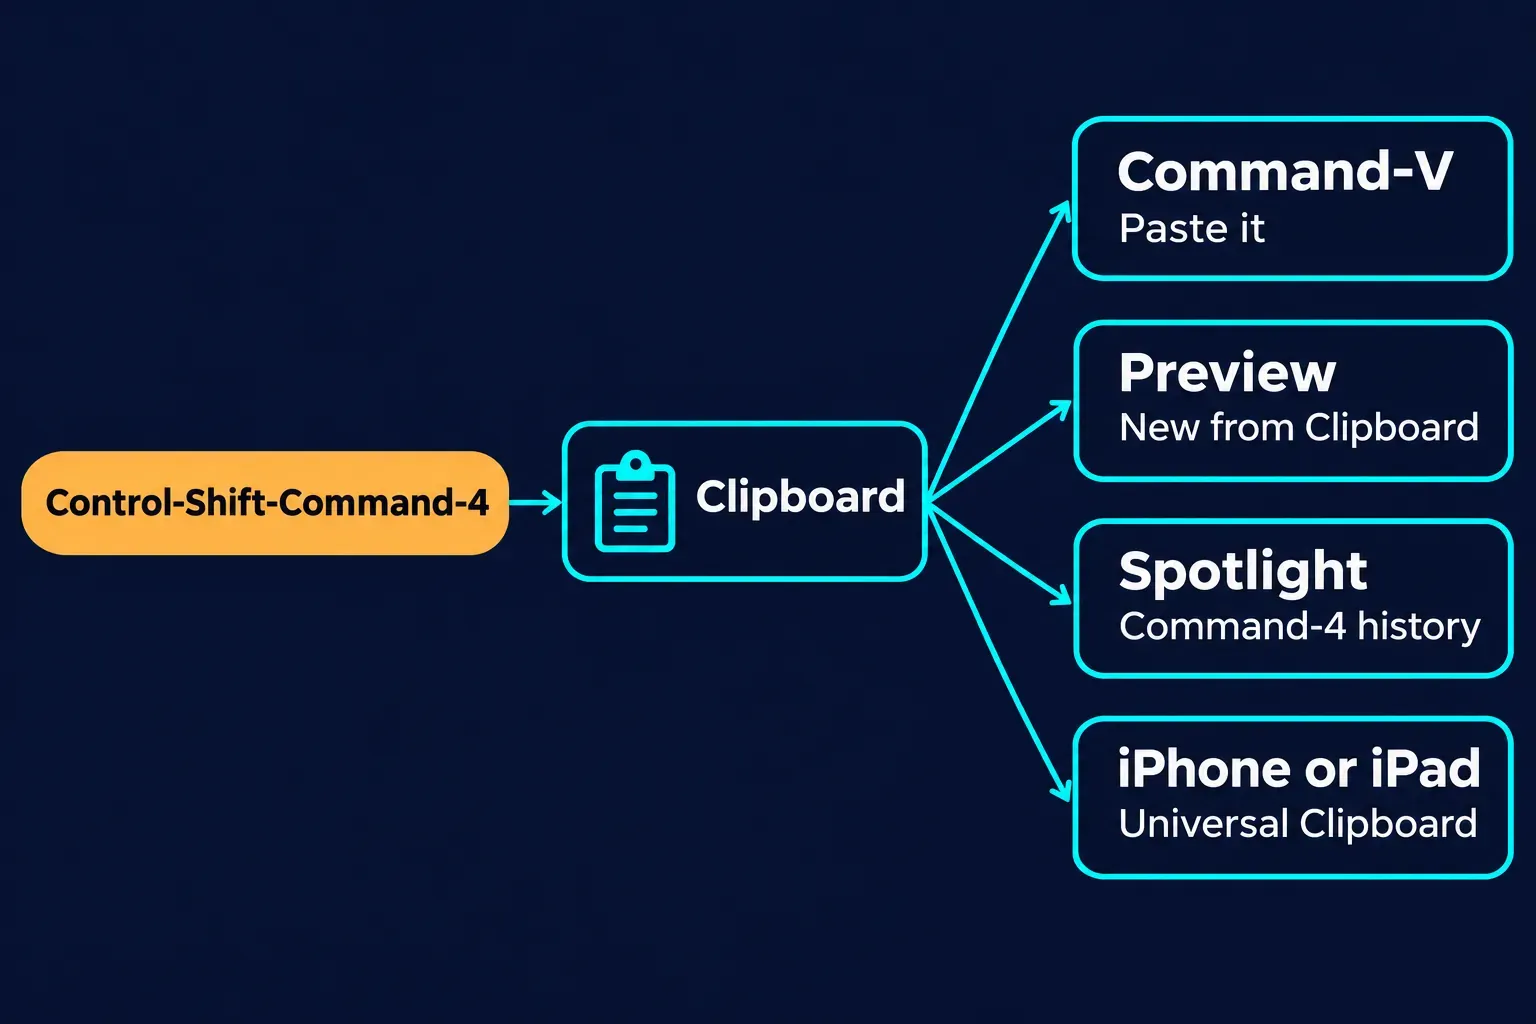
Add Control to any Mac screenshot shortcut and the shot goes to the clipboard instead of a file: Control-Shift-Command-4 for an area, Control-Shift-Command-3 for the whole screen. Then press Command-V wherever you want it, in Slack, Mail, Messages, a Google Doc or a Keynote slide. Nothing lands on your desktop.
If you never want the file, change one setting instead: press Shift-Command-5, open Options and pick Clipboard under Save to. Your normal shortcuts copy from then on. Below are both routes, how to keep a file and a copy at the same time, where the shot can go after you copy it, and what to check when it saves a file anyway.
Which Mac shortcuts copy a screenshot to the clipboard?
Each Shift-Command-3 and Shift-Command-4 shortcut has a copy twin with Control added. Apple puts it as a tip in its Mac User Guide page on screenshots: hold Control while you press the other keys, and the shot is ready to paste in an email or on another device.
| What you want | Save as a file | Copy to the clipboard |
|---|---|---|
| Whole screen | Shift-Command-3 | Control-Shift-Command-3 |
| An area you drag | Shift-Command-4 | Control-Shift-Command-4 |
| One window or the menu bar | Shift-Command-4, then Space bar, click | Control-Shift-Command-4, then Space bar, click |
| A window without its shadow | Same, hold Option as you click | Same, hold Option as you click |
| An open menu | Open the menu, Shift-Command-4, drag over it | Open the menu, Control-Shift-Command-4, drag over it |
If you only learn one, make it Control-Shift-Command-4. A dragged area is what you paste most often, and it keeps a stray menu bar and dock out of the shot.
Forgot Control when grabbing a window? You can still add it: after Shift-Command-4 and Space bar, hold Control as you click the window and that shot goes to the clipboard instead of a file. The Ask Different thread on clipboard screenshots spells this out, and the screencapture manual page says the same of its interactive mode. Esc cancels the capture, and holding Space bar while you drag moves the selection without resizing it, per Apple's Take a screenshot on Mac article. For every other capture mode, the full Mac screenshot guide has the rest.
How do I make every screenshot go to the clipboard?
You have two ways to stop typing Control: point the Screenshot app at the clipboard, or swap the shortcuts so the short one copies.
Set Save to Clipboard once
- Press
Shift-Command-5to open the Screenshot toolbar. - Click Options.
- Under Save to, choose Clipboard. The other choices on macOS 27 are Desktop, Documents, Mail, Messages, Preview and Other Location.
- Close the toolbar.
The choice sticks. Plain Shift-Command-4 follows it from then on, as an Ask Different answer for Ventura points out, so your muscle memory keeps working. The catch is that no file is made at all. To get files back, open the same menu and pick Desktop again.
Swap the shortcuts instead
Swapping keeps both behaviors one keystroke away: Shift-Command-4 copies and Control-Shift-Command-4 saves a file. Apple's rule from its guide to changing keyboard shortcuts is that a combination already used by another command won't work, so park one shortcut on spare keys first.
- Choose Apple menu > System Settings > Keyboard, click Keyboard Shortcuts, then click Screenshots.
- Select Save picture of selected area as a file, click its key combination and press spare keys, such as
Option-Shift-Command-4. - Select Copy picture of selected area to the clipboard, click its key combination and press
Shift-Command-4. - Go back to Save picture of selected area as a file and give it
Control-Shift-Command-4. - Click Done. Repeat with Save picture of screen as a file and Copy picture of screen to the clipboard if you want the same swap for the whole screen.
Which one would I pick? If you nearly always paste and rarely keep a file, I'd use Save to Clipboard, because it's one menu you can flip back in two clicks. If you split your day between pasting and filing shots, I'd swap the shortcuts, because both results stay on the keyboard and nothing changes until you press the other combination.
What does Save to Clipboard on the thumbnail do?
It moves that one shot to the clipboard and skips the file. After a normal Shift-Command-4, the floating thumbnail sits in the bottom-right corner for a few seconds. Control-click it and the menu offers Save to Desktop, Save to Documents, Save to Clipboard, Open in Mail, Open in Messages and Open in Preview.
Apple's screenshot article is precise about the result: Save to Clipboard puts the screenshot on the clipboard "instead of your desktop." You don't get both, whatever some guides claim. It's handy when you decide after the fact that this shot belongs in a chat, not in a folder. The thumbnail only appears when Show Floating Thumbnail is ticked in Shift-Command-5 > Options. You can also drag the thumbnail straight into a document, an email, a note or a Finder window.
Can I save a file and copy it at the same time?
Not with the built-in tools. macOS makes you pick, which Justin Searls sums up in his post on saving and copying Mac screenshots: you can copy screenshots to the clipboard or save them to files, "but not both." There are three ways around it.
| Route | How it works | Trade-off |
|---|---|---|
| Copy, then make a file in Preview | Capture to the clipboard, open Preview, choose File > New from Clipboard, then save | Built in, but one extra step per shot you want to keep |
| Snagit with Copy to Clipboard on | Each capture is copied and also kept in the Snagit Library | Paid app; the Library copy is a SNAGX file until you export it |
| A script bound to a shortcut | A screencapture script saves the file, then copies it, run from a Shortcuts keyboard shortcut | Setup work and permission errors on some macOS versions |
The Preview route works because Apple's Preview guide documents File > New from Clipboard as a way to create a new file from whatever you copied. I'd use it for the odd shot that turns out to matter, rather than saving everything and cleaning up later.
Searls' script route is the careful version of the DIY fix, and he's candid about its limits: on macOS 14.4 Sonoma he warns of "Operation Not Permitted" errors and suggests Keyboard Maestro instead. If you copy a one-line version from elsewhere, check the file path. A * wildcard inside a quoted path isn't expanded, so a line like that never finds the screenshot it just saved.
The Snagit route is the least fiddly if you already own it. TechSmith's capture tutorial lists Copy to Clipboard as a Capture window option that copies each capture "to paste into another program or location," and its recent captures tray page says Snagit automatically saves any image capture as a SNAGX file in the Snagit Library. So the copy and the kept version happen in one shortcut.
Where can I paste a Mac screenshot?
Anywhere that accepts images: Command-V or Edit > Paste puts it in Mail, Messages, Notes, Pages, Keynote, Slack, most chat apps and most web editors. Apple's copy and paste article adds the rule behind the exceptions: each app decides what it can paste and where, and when it can't, Paste is dimmed.
- Paste is dimmed. That spot doesn't take images, which is common in plain-text fields, terminal windows and some form boxes. Paste into a document or chat instead.
- It pasted in the wrong place.
Command-Zundoes the paste, as Apple's Mac User Guide page on copy and paste notes. - You need a file after all. Open Preview, choose File > New from Clipboard and press
Command-S. - You need the text in the shot, not the picture. Live Text gets it out; the guide to copying text from a screenshot on Mac covers it.
Paste before you copy anything else, because the clipboard holds whatever you copied last. On macOS Tahoe 26 or later, an earlier copy can still be found in clipboard history.
Can I get back a screenshot I copied earlier?
Yes, on macOS Tahoe 26 or later. Apple's copy and paste article says clipboard history covers text, images, links and files you recently copied, and you reach it through Spotlight:
- Press
Command-Space barto open Spotlight. - Press
Command-4, or click the clipboard button to the right of the search field. - The first time, macOS asks whether to allow search results from the Clipboard. Click Allow.
- Find the screenshot, select it and press
Command-C, or click the copy button beside it. - Click where you want it and press
Command-V.
Apple's clipboard history steps also warn that sensitive information may appear there, and the button beside the search field has Clear History. If you've just copied a password or a screenshot of a bank page, clearing it is a good habit. On older macOS there's no history to search: copy again or take the shot again.
How do I paste a Mac screenshot on my iPhone or iPad?
Copy it on the Mac, then paste on the iPhone or iPad the usual way: Universal Clipboard moves it across. Apple's Universal Clipboard article lists what has to be true:
- The devices are near each other.
- Both are signed in with the same Apple Account.
- Bluetooth and Wi-Fi are on for both.
- Handoff is on for both. It's on by default.
If Handoff was switched off, Apple's Handoff article gives the paths. On the Mac, go to System Settings > General > AirDrop & Continuity, or AirDrop & Handoff on some versions, and turn on "Allow Handoff between this Mac and your iCloud devices." On the iPhone or iPad, go to Settings > General > AirPlay & Continuity, or AirPlay & Handoff, and turn on Handoff.
Apple says the copied content stays on the other device's clipboard only briefly, or until you copy something else. I'd paste right away rather than count on a fixed window, because Apple doesn't publish one.
Why does my screenshot still save a file, or not save at all?
Almost always it's a setting, not a fault. Match what you see:
| What happens | Likely cause | Fix |
|---|---|---|
| A file lands on the desktop | Control wasn't held, or the copy shortcut was changed | Check System Settings > Keyboard > Keyboard Shortcuts > Screenshots for the copy entries |
| No file appears anywhere | Save to is set to Clipboard | Shift-Command-5 > Options > Save to > Desktop |
| Paste does nothing or is dimmed | The app or field doesn't accept images | Paste into another app, or use Preview's File > New from Clipboard |
| A window comes out blank or won't capture | The app blocks screenshots, as the Apple TV app can | Nothing to fix on your side |
| The shot opens in Snagit Editor | Snagit's "Open system screenshots and videos in Snagit" is on | Turn it off in Snagit's preferences |
That last row catches people who installed Snagit and forgot. TechSmith's Snagit Mac preferences page explains that the setting opens shots taken with the macOS keys in Snagit Editor and moves the capture into the Snagit Library. If the macOS shortcuts don't respond at all, the Mac screenshot not working fixes go through permissions, keys and the Screenshot app in order. And if you're hunting for a file you thought you saved, the guide to where screenshots go on Mac covers every Save to location.
When is Snagit worth it for clipboard screenshots?
For a quick paste into a chat, it isn't. Control-Shift-Command-4 is free, instant and already on your Mac. I'd only add Snagit when the shot needs work first, like arrows, a blurred email address or a numbered step, or when you want every copied capture kept without thinking about it.
In that case, turn on Copy to Clipboard in the Capture window and capture with Control-Shift-C. If you'd rather skip the editor and paste straight away, switch off Preview in Editor too; the guide to stopping Snagit Editor from opening after capture walks through that preset. The Snagit for Mac guide covers the rest of the Mac setup.