
If Snagit records video with no sound, test the microphone and system audio separately. Record your voice with System Audio off, then record a harmless local sound with Microphone off. Use a short test, such as ten seconds, to narrow the next checks. Keep the original files and check playback before reinstalling anything.
Checked September 13, 2026. These instructions are based on current TechSmith, Microsoft and Apple documentation, not a hands-on test of your computer. Save open captures before quitting apps or restarting. Stop any active recording and finish calls before disconnecting audio equipment.
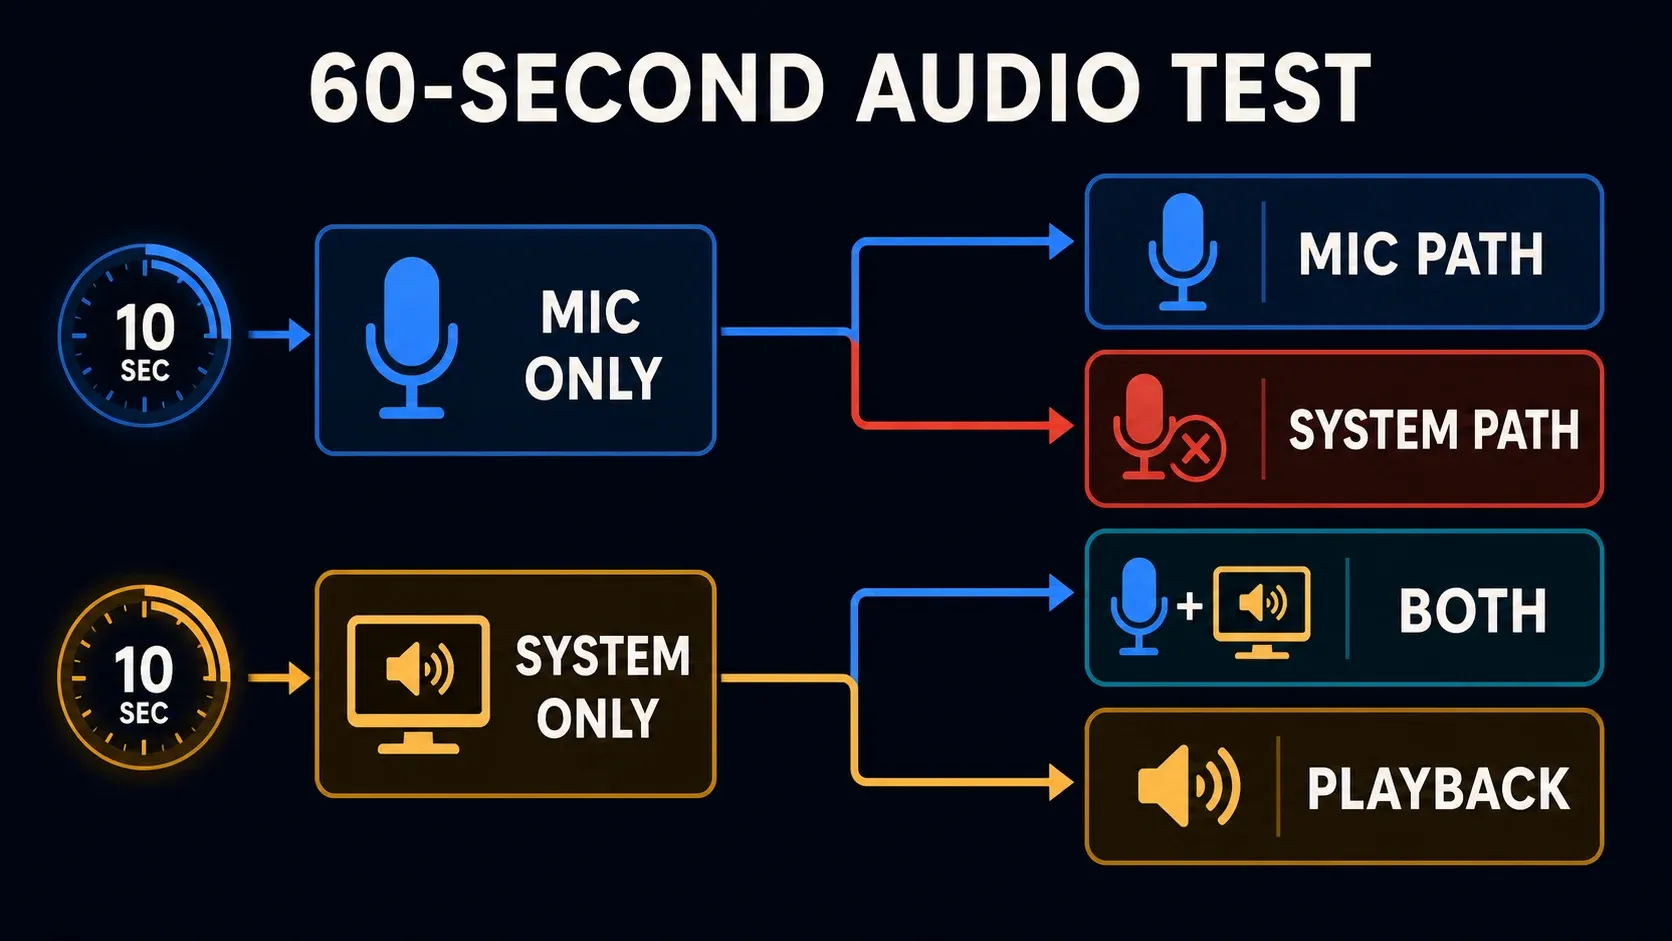
Read the test results using the table below, not the arrows in the illustration. A silent mic-only test does not establish a system-audio fault, and a silent system-only test does not establish a playback fault. The illustration’s 60-second label is not a measured diagnosis time.
Find which audio test fails
- In Snagit Capture, choose Video. Turn Microphone on, select the intended input and turn System Audio off. Record a short spoken sentence and play the saved result.
- Turn Microphone off and System Audio on. Play a harmless local sound, record it and play the saved result.
- If one test is silent, use the corresponding microphone or system-audio section below. If both are silent, check playback as well as recording devices and permissions.
- If recording cannot start at all, use the initialization-error section. Do not treat an error dialog as a completed silent recording.
- If both tests work but another recording is silent, compare that original file, its saved or uploaded copy, and playback in a second local player.
Use a local sound you are allowed to record, not a private conversation or protected stream. TechSmith’s video recording instructions warn that protected media may not be recordable. A successful local test confirms only that the tested setup worked at that moment.
| Result | What to check | Next test |
|---|---|---|
| Mic-only test is silent | Selected input, microphone access and playback | Run the OS microphone test; inspect the saved sample |
| System-only test is silent | System Audio switch, output route and Mac access | Play a local sound through the intended output |
| Both saved tests are silent | Playback, audio devices, switches and permissions | Check a known-good file before broader resets |
| Recording will not start | Device initialization or missing required components | Use the exact error and OS-specific checks |
| Local original works; another copy is silent | Save, upload or playback differences | Compare the original and derived copy |
| Sound is present but poor | Levels, echo, Bluetooth or processing | Change one relevant setting and retest |
Snagit supports microphone audio, system audio or both. Your microphone records an input; System Audio records computer playback. A working microphone does not establish that computer sound was captured. A moving meter is not a substitute for listening to the saved test.
Check the two Snagit audio controls first
Open Capture > Video. Turn on Microphone for narration and choose the intended device in its selector. Turn on System Audio for computer sound. Start the test with the Capture button in that window. On Mac, Snagit 2026.3.2, released September 2, removed the microphone-options button during recording; choose the input before you start.
Check the launcher if a preset behaves differently. TechSmith’s Windows capture-mode guide distinguishes current Capture-window settings from saved preset settings: the global capture hotkey uses the former, a preset hotkey uses its preset. Compare those settings before changing OS access. The preset guide covers saved setups; the screen-recording guide covers the complete recording workflow.
Fix a silent microphone on Windows 11
Open Settings > System > Sound > Input and select your microphone. In its properties, use Start test, speak, then Stop test > Play where shown. Check the mute switch, connection and input volume if the sample is silent. An OS test that fails needs attention before you can assess Snagit’s recording.
- Open Settings > Privacy & security > Microphone.
- Turn on Microphone access if you are authorised to use it.
- Turn on Let apps access your microphone.
- Turn on Let desktop apps access your microphone.
- After saving work, quit Snagit Capture and Editor. Reopen Snagit, choose the tested input and record another sentence.
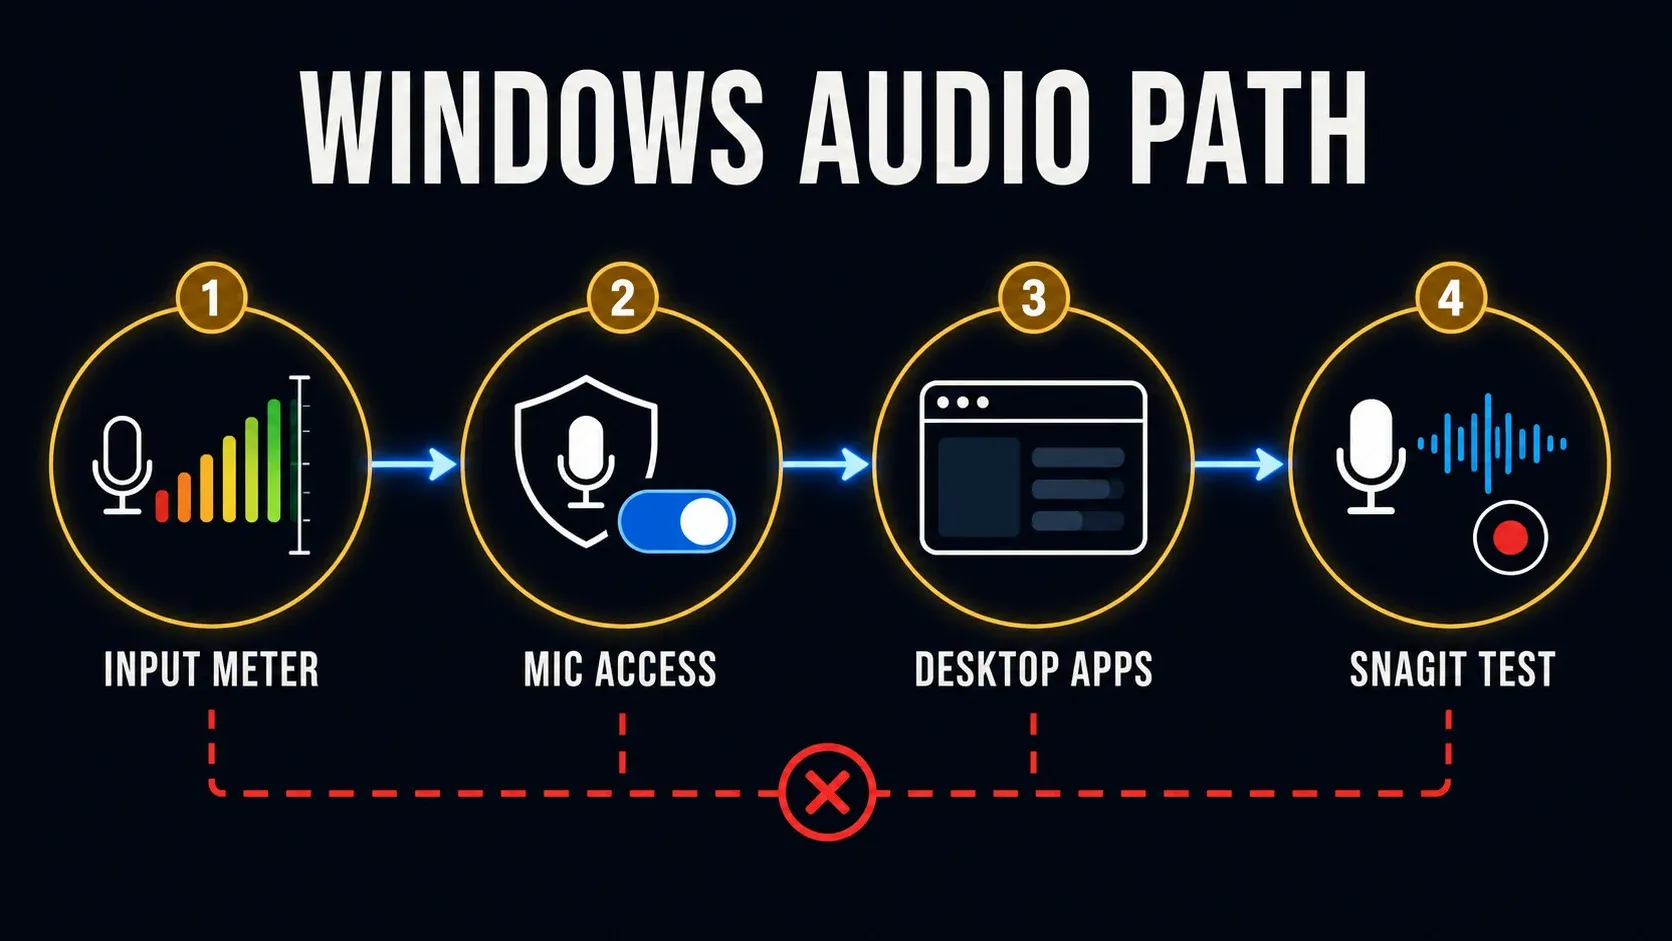
Microsoft’s microphone permission instructions include the shared desktop-app switch; do not wait for a separate Snagit toggle in the Store-app list. On Windows 10, the category is Settings > Privacy > Microphone. For the input test, low volume or an undetected device, use Microsoft’s microphone troubleshooting steps. Ask IT about locked controls on a managed PC.
After saving work or ending your call, close one potentially relevant audio app and repeat the test. Meeting clients, voice changers and virtual routing tools can introduce another device or processing step. One successful retest is a clue, not proof of a conflict. Look for a repeatable difference; do not uninstall utilities or disable security software indiscriminately.
Fix missing system audio on Windows
Enable System Audio, then play a local sound. In Settings > System > Sound, select the output you actually use and check app levels in Volume mixer. Confirm that you can hear the source through that output. A monitor, dock or meeting app can leave you checking a different device. Microsoft’s Windows sound guide covers output selection, mute controls and device settings.
For a controlled test, use built-in speakers if available or a compatible wired output instead of Bluetooth. TechSmith’s initialization guidance does not recommend Bluetooth playback or recording in Snagit. Use that recommendation to choose a simpler test, not to assume every Bluetooth device fails. Recheck the selected output after switching devices.
Snagit requires Media Feature Pack on Windows N. If it is missing, follow Microsoft’s N-edition installation instructions: find Optional features in Settings, add Media Feature Pack and restart after saving work, even without a restart prompt. Do not install it on standard Windows as a generic cure for silence.
Fix microphone or system audio on Mac
On Mac, Microphone access and Screen & System Audio Recording are separate. Apple’s screen and audio permissions guide also distinguishes audio-only access from screen access. Use the permission needed for the failed task; microphone access alone does not record computer output.
- Save your work and quit Snagit before changing microphone access.
- Open System Settings > Privacy & Security > Microphone and allow the trusted Snagit app when voice capture is needed.
- For screen or computer sound, review the matching Snagit entry under Screen & System Audio Recording. Audio-only access does not grant screen capture.
- Reopen Snagit, choose the intended input and repeat the separate local tests.
- If an entry is missing, use Snagit > Settings > Capture > Fix Capture Permissions or request the feature once. Ask IT about locked access rather than bypassing it.
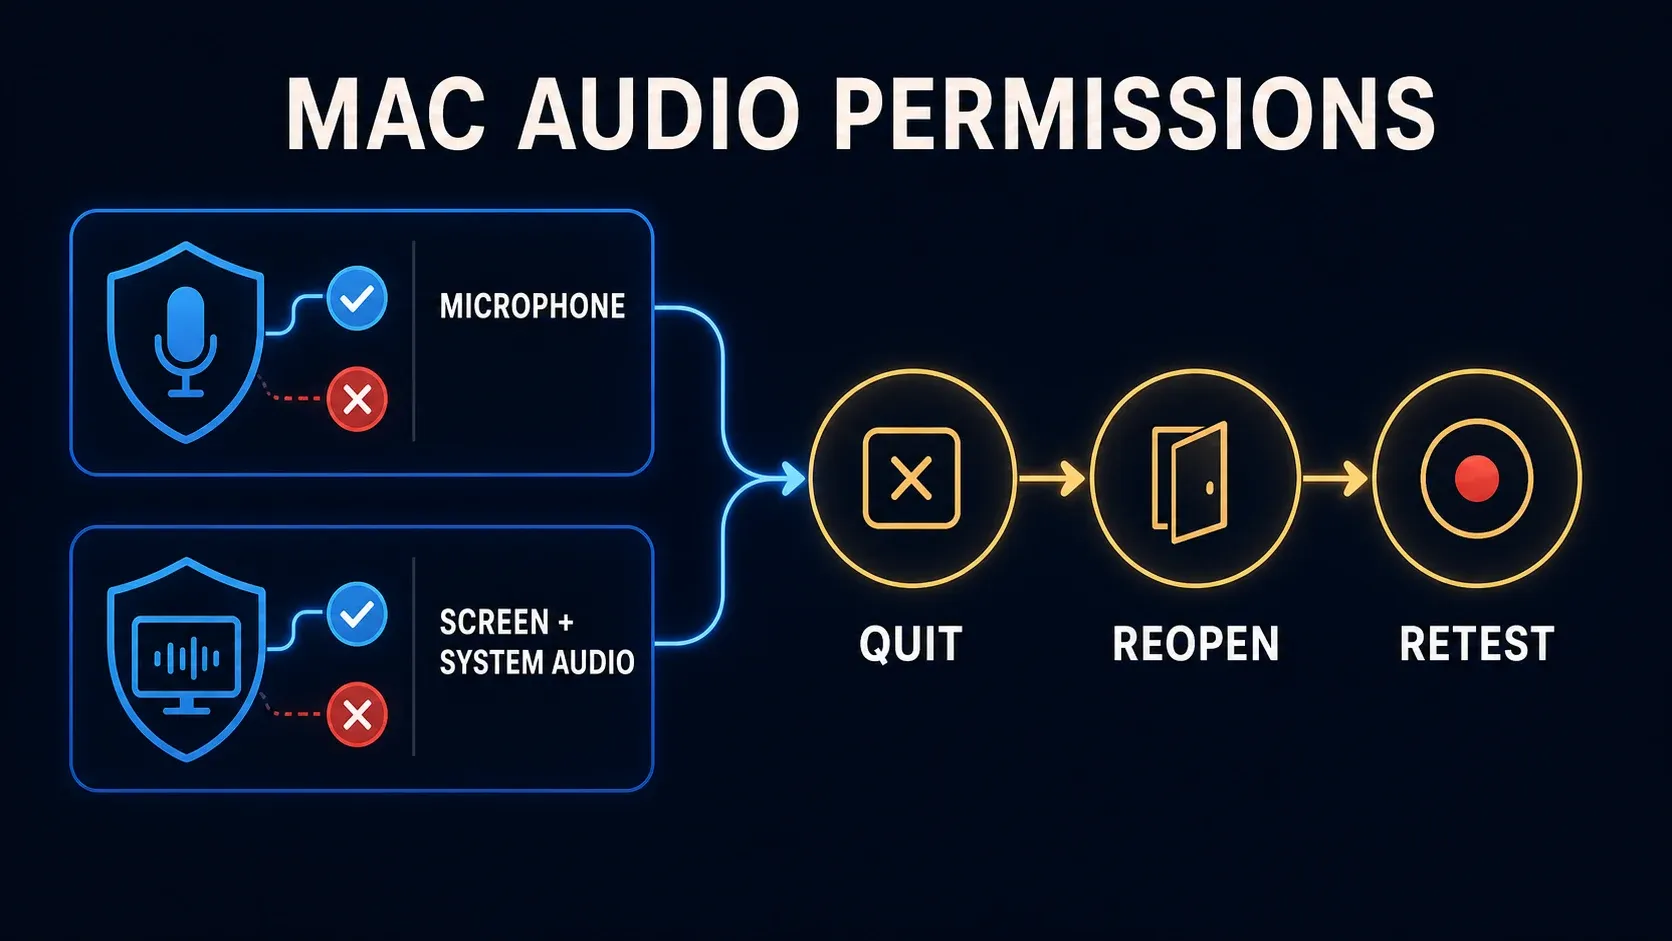
Apple specifies quit, grant microphone access and reopen. TechSmith’s Mac sample-buffer guide also checks the intended input. Test a built-in microphone if your Mac has one, or a compatible direct USB microphone. Permission to use an input is not a guarantee that an external interface works with Snagit.
Current Snagit 2026 uses native system audio on its supported Mac systems. For older releases on Ventura, native support starts at 2022.2.3 and 2023.0.1; 2023.0.0 used the old workflow. Do not install legacy extensions or weaken Recovery security as a routine 2026 fix. Snagit 2026 currently lists Sequoia 15 and Tahoe 26, not Ventura. The Mac permissions guide covers missing entries, helper access and scoped resets.
Fix Unable to Initialize Audio or a recorder that will not start
An initialization error stops recording from starting; it is different from a completed silent file. TechSmith’s Windows video-capture guidance says audio devices are initialized even when audio is switched off. That means muting the microphone is not necessarily a workaround for a Windows device error. Do not assume identical behaviour in every Mac release.
- Save captures and other work, stop recording and finish active calls.
- Quit Snagit and close nonessential audio-processing apps normally.
- Disconnect nonessential audio hardware safely. Do not remove a storage dock during a write.
- Restart and test with a compatible direct microphone and simple output. Use built-in devices only if your computer has them.
- Check current Snagit maintenance updates and manufacturer updates for the exact audio device and OS.
- If the simple setup works, reconnect one device or reopen one app at a time and repeat the test.
On Windows, TechSmith suggests 16-bit, 44.1 kHz as a compatibility test. In Sound settings, open More sound settings > Recording or Playback > device Properties > Advanced and inspect Default Format if available. Note the original value. Try the suggested format only if the device offers it, retest, and restore it if it does not help. This is not a universal requirement or a guarantee for an unsupported interface.
Do not copy a registry workaround without confirming its scope. TechSmith’s initialization article limits its recording-method change to Snagit 2023 and earlier. Its audio-quality article, updated August 5, 2026, gives a 2026 folder example. These instructions conflict. Ask support to confirm the method for your exact release instead of guessing an AllowMfAudioCapture key.
When a Zoom call, webinar, or browser video is silent
First test local system sound, then the actual meeting or browser source. TechSmith’s webinar recording procedure checks the meeting’s output and both Snagit audio controls. Recheck the chosen speaker and microphone after joining or reconnecting a headset. A successful local test does not guarantee that a particular protected source can be recorded.
- Get participants’ permission and follow your organisation’s recording policy before a meeting test.
- Check the meeting app’s selected speaker and microphone.
- Check Snagit’s chosen input and System Audio control before recording.
- Make a short authorised test and listen to the result before relying on the setup.
- Use headphones if speaker playback is entering the microphone.
When the MP4 is silent after saving or uploading
Keep the original recording. Play the same section of the same local MP4 in a second player; VLC can open a local file. If sound works there, compare the failing player’s volume, selected output and audio-track selection before changing capture settings.
Use the desktop version of MediaInfo to inspect the file locally. An Audio section identifies track metadata, not proof of audible speech or correct decoding. An audio stream can contain silence; signal analysis such as FFmpeg’s silence detector examines that separate question.
The diagram below is a simplified checklist. A track that exists can still be silent. A track missing from a saved or uploaded copy does not prove the original lacked sound. Compare the original first. If it contains the needed audio, make a new copy using the supported save/share route and check it before recording again.
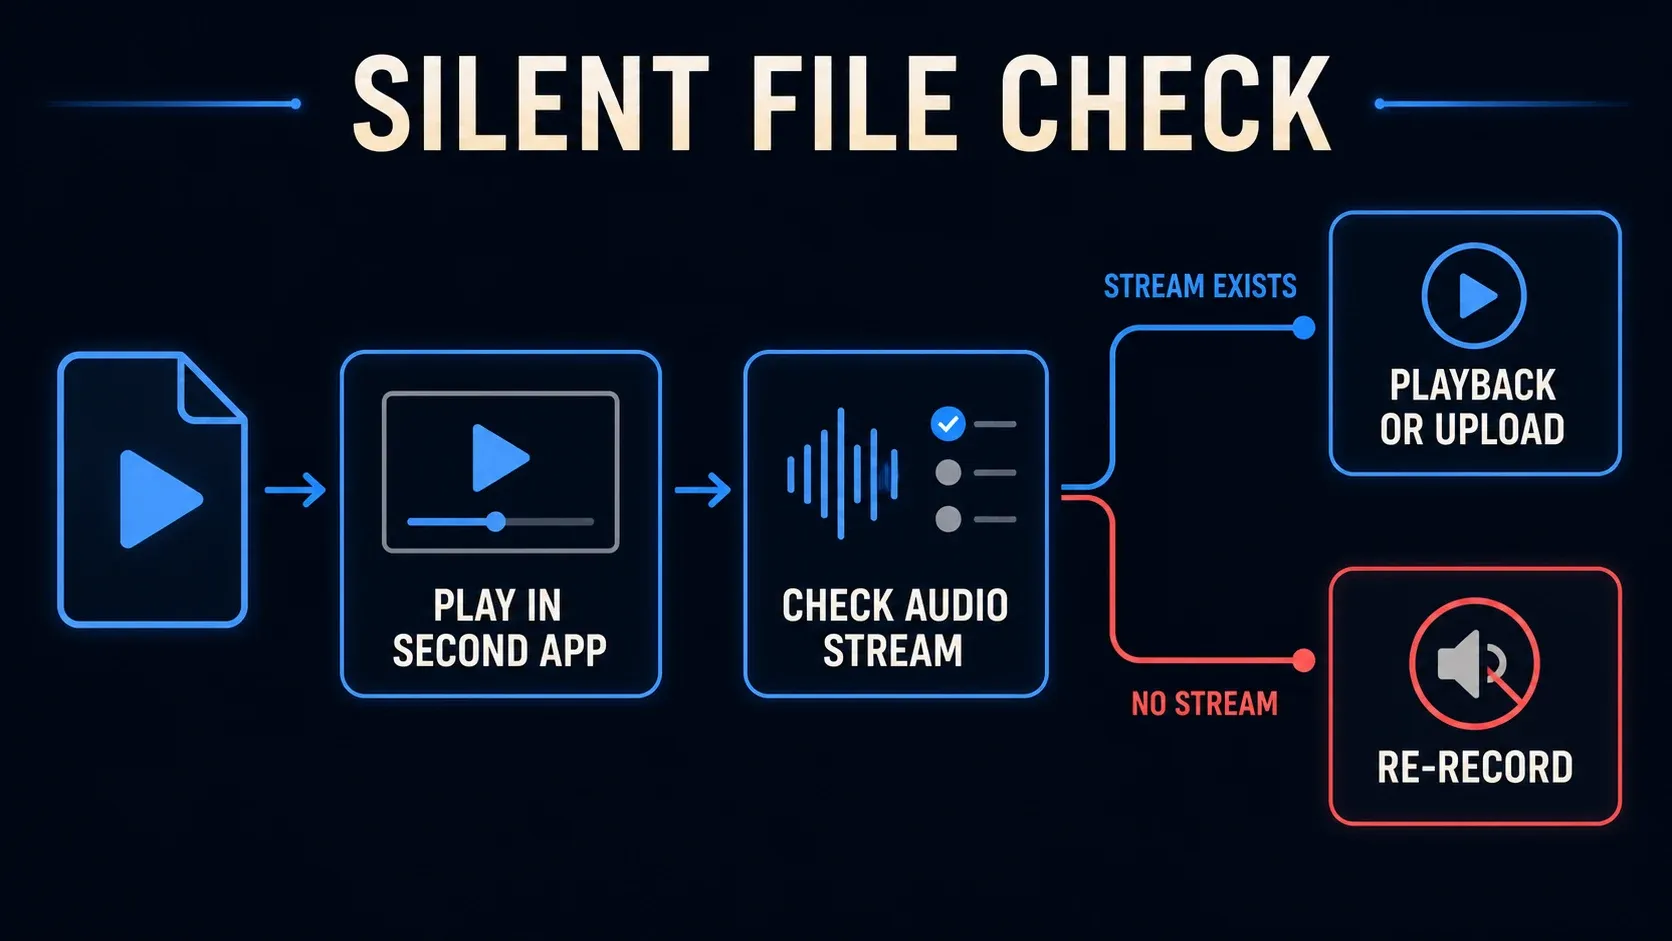
If no usable original contains the missing sound, a player cannot reconstruct that recording. Re-record only after checking the capture path and any authorised backup. Keep the original local file until the delivered copy has finished processing and you have listened to it. Do not upload a private meeting to an online file inspector for this test.
Fix echo, clipping, low volume, or distorted sound
- Echo or doubled playback: speaker sound may enter the microphone while System Audio records it too. TechSmith’s echo guidance suggests headphones, or microphone off when you only need computer playback.
- Clipping or low voice: adjust the selected microphone’s input level, check physical gain and mute controls, and test at your normal speaking volume. Do not raise every volume control at once.
- Distortion or dropouts: compare a direct compatible device with the failing Bluetooth, dock or processing setup. On Windows, try one device’s audio-enhancement setting off if available and restore it if unhelpful.
- External interfaces: TechSmith’s Windows audio-quality page currently says they are not supported. A sample-rate change is not a promise of compatibility.
- Krisp: that page advises against recording Krisp Microphone and System Audio together. Test the physical microphone directly before adding another noise-removal layer.
Change one setting, make a short test and label the result. If the problem disappears, repeat the same comparison before deciding which change helped. Do not treat an unrelated app closing once as a confirmed cause.
When to update, reinstall, or contact TechSmith
Check a compatible Snagit maintenance update and the audio manufacturer’s guidance before reinstalling. A reinstall is not a reliable fix for the wrong input, a muted device, blocked access or a silent source file. If support identifies an installation problem, back up captures and record the current settings before following its repair procedure. Check the supported operating systems rather than upgrading blindly.
Contact TechSmith support if a simple supported setup still fails. Include the exact Snagit and OS versions, error text, input/output models, microphone-only and system-only results, launch method, and what changed recently. Use a harmless reproducible sample. Do not send a private meeting recording or an unredacted desktop simply to demonstrate silence.
Use this preflight before an important recording
- Connect the devices you intend to use and finish unrelated audio sessions.
- Choose Video in Capture and select the correct microphone before starting.
- Enable System Audio only when you need computer playback.
- Test the same app, headset, dock and output planned for the session.
- Listen to the saved file through the intended delivery path.
- Check available storage, notification privacy and recording permission.
If the picture fails as well, use the black-screen capture guide. If Editor will not launch, follow the Editor startup checks. Those problems need different evidence from a completed video with missing sound.
Snagit audio FAQ
Why does Snagit record video but no sound?
Check the Microphone and System Audio switches, selected devices, OS access and playback. Separate mic-only and system-only tests help narrow the next checks, but a silent result alone does not identify one broken component.
Why is my microphone missing in Snagit?
Check its connection, mute state, OS input test, Snagit device selection and microphone access. Save work before closing another audio app or restarting. A device working in another app does not prove Snagit has the same access or supported setup.
Why does Snagit capture my voice but not computer sound?
Microphone and System Audio are separate sources. Enable System Audio, check the actual output route, and on Mac review screen/system-audio access. Test a harmless local sound before blaming a meeting app or protected source.
Why does Snagit say Unable to Initialize Audio?
A recording device, output, driver, interface or processing app may prevent startup. Save work, restart with a simple supported setup, check compatible updates, and repeat one change at a time. Do not apply a registry workaround without version-specific support confirmation.
Can Snagit record Zoom or webinar audio?
It can capture microphone and computer audio in supported setups. Check both apps’ selected devices and run an authorised test after joining. Protected content may not record. Obtain participants’ permission and follow the applicable recording policy.
Why is the exported MP4 silent?
Compare the original with the saved or uploaded copy and try the same section in another local player. An audio track can contain silence. If a copy has no track but the original has sound, try saving a new copy before re-recording.
Should I reinstall Snagit to fix missing audio?
Not as the first step. Test source selection, access, devices and playback first. Reinstalling is not a reliable cure for those causes and cannot recreate sound absent from every usable original. Back up captures before a support-directed installation repair.
For a different capture error, the Snagit troubleshooting hub points to the relevant diagnostic guide. Keep the working audio settings unchanged while investigating an unrelated symptom.