
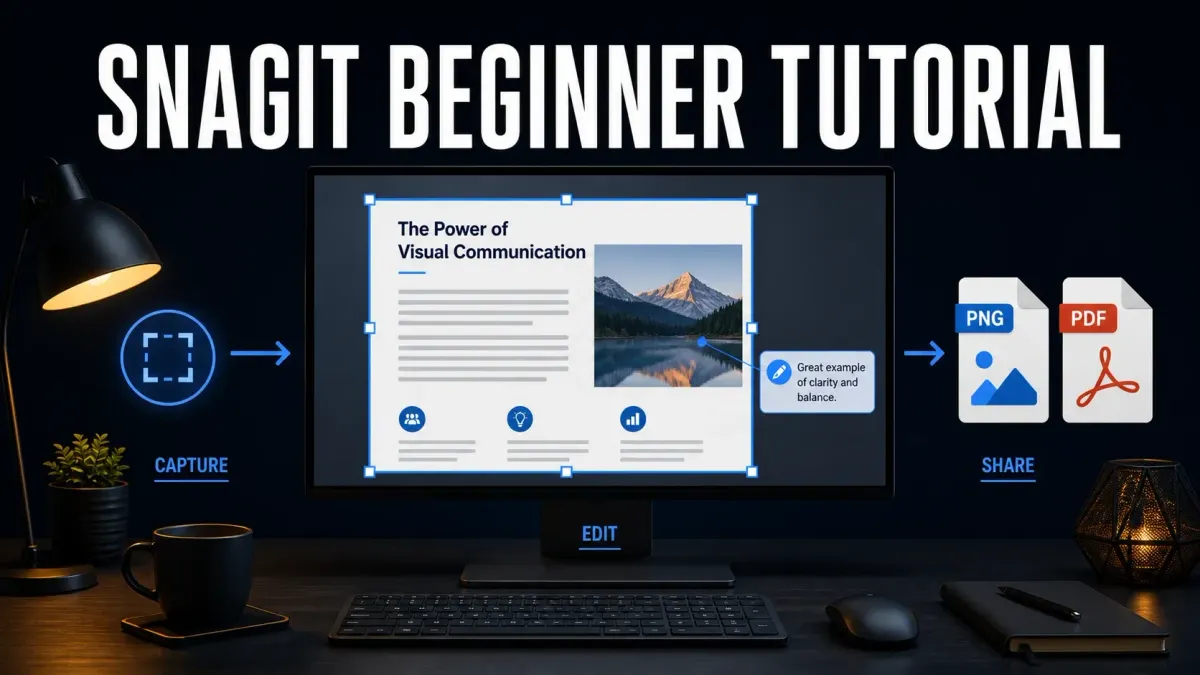
To take your first Snagit screenshot, choose Image and Region, turn Preview in Editor on, then click Capture and drag around the area you need. Add an arrow or callout in Editor, save an editable SNAGX master, and use File > Save As again for a separate PNG. Open that PNG and check it before you send it.
Documentation checked September 14, 2026. This walkthrough is based on TechSmith and Apple documentation, not a hands-on test of an installed build. The official histories currently list Windows 2026.3.1, released July 23, and Mac 2026.3.2, released September 2.
Before your first capture
If you have not installed Snagit, get it from the official TechSmith download page and follow the install and update checklist. The fully functional trial lasts 15 days. It requires a TechSmith account, not a software key. TechSmith restricts the trial to evaluation, not company projects or training and marketing materials. Use harmless sample content while evaluating; use an appropriately licensed copy for real work.
On Mac, allow the screen access Snagit requests. Apple puts Screen & System Audio Recording under System Settings > Privacy & Security. Microphone access is a separate permission for recording your voice, not a requirement for this still-image exercise. If capture is blocked, use the Mac permissions checklist rather than repeatedly reinstalling the app.
You will work in three areas: Capture chooses what to grab, Editor lets you annotate and save it, and the Library tab inside Editor helps you find earlier captures. Library is not a separate capture app. The Snagit Editor guide explains the workspace if you need a longer tour.
Take your first Snagit screenshot
Start with a small dialog or part of a page. Include its heading and the control you want to explain, but leave out unrelated tabs and personal information. Follow this Image-tab route from TechSmith's image capture instructions.
- Prepare the window or page you want to capture. Close notifications and remove private information from view.
- Open Snagit Capture: click the Snagit icon in the Windows taskbar or notification area, or in the Mac menu bar. If Editor is already open, click its Capture button.
- Select the Image tab and set Selection to Region. Leave automatic effects and automatic sharing off for this first capture.
- Turn Preview in Editor on so you can review the screenshot before sending it anywhere.
- Click Capture. When the crosshairs appear, click and drag around the useful area, then release the pointer.
- Review the image in Snagit Editor. If the wrong area was captured, return to Capture and try another small region.
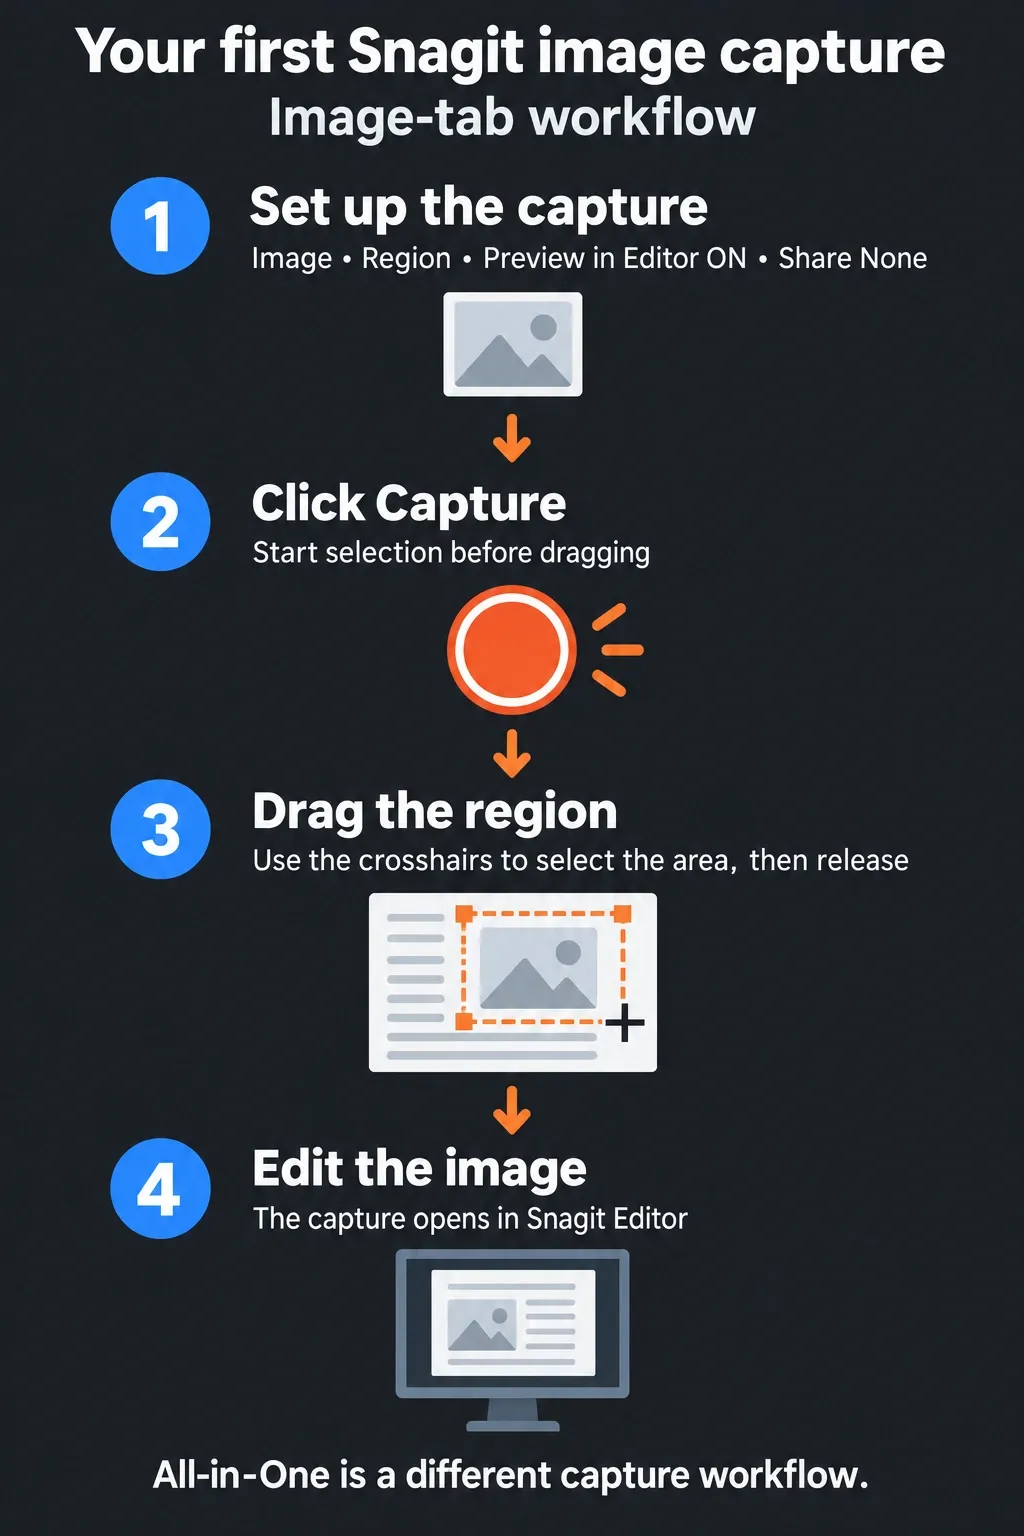
The default global capture shortcuts are Print Screen on Windows and Control+Shift+C on Mac. They use the current Capture settings, so check the Image tab before pressing one. If your shortcut has been changed, the Capture button avoids that uncertainty. Press Esc to cancel a selection.
All-in-One is a different route: it displays a toolbar after you select the area, where you choose an image, video, or scrolling capture. Do not wait for that toolbar when following the Image instructions above. If Print Screen launches Snipping Tool instead, use the Capture button for now, then follow the Windows Print Screen ownership guide. The Windows and Mac shortcut guide covers custom assignments.
Add one arrow and a short callout
Give the reader one action to take. For example, point to a button and label it with the action it performs. An arrow is enough when the button's own label already explains the action.
- If you want an untouched original, right-click the capture thumbnail in the recent tray on Windows, or Control-click it on Mac, and choose Duplicate. Work on the duplicate.
- Choose Arrow in the Editor toolbar. If it is hidden, open More. Pick a style, then drag from the arrow's tail toward the control you want to identify.
- Choose Callout, drag on the canvas to draw it, and type a short instruction. Keep the callout clear of the button and any text the reader needs.
- Choose Move to select and reposition your arrow or callout. Select an unwanted annotation and press Delete to remove it.
- Review the whole image. Keep enough surrounding context to identify the screen, and remove marks that do not help the reader act.
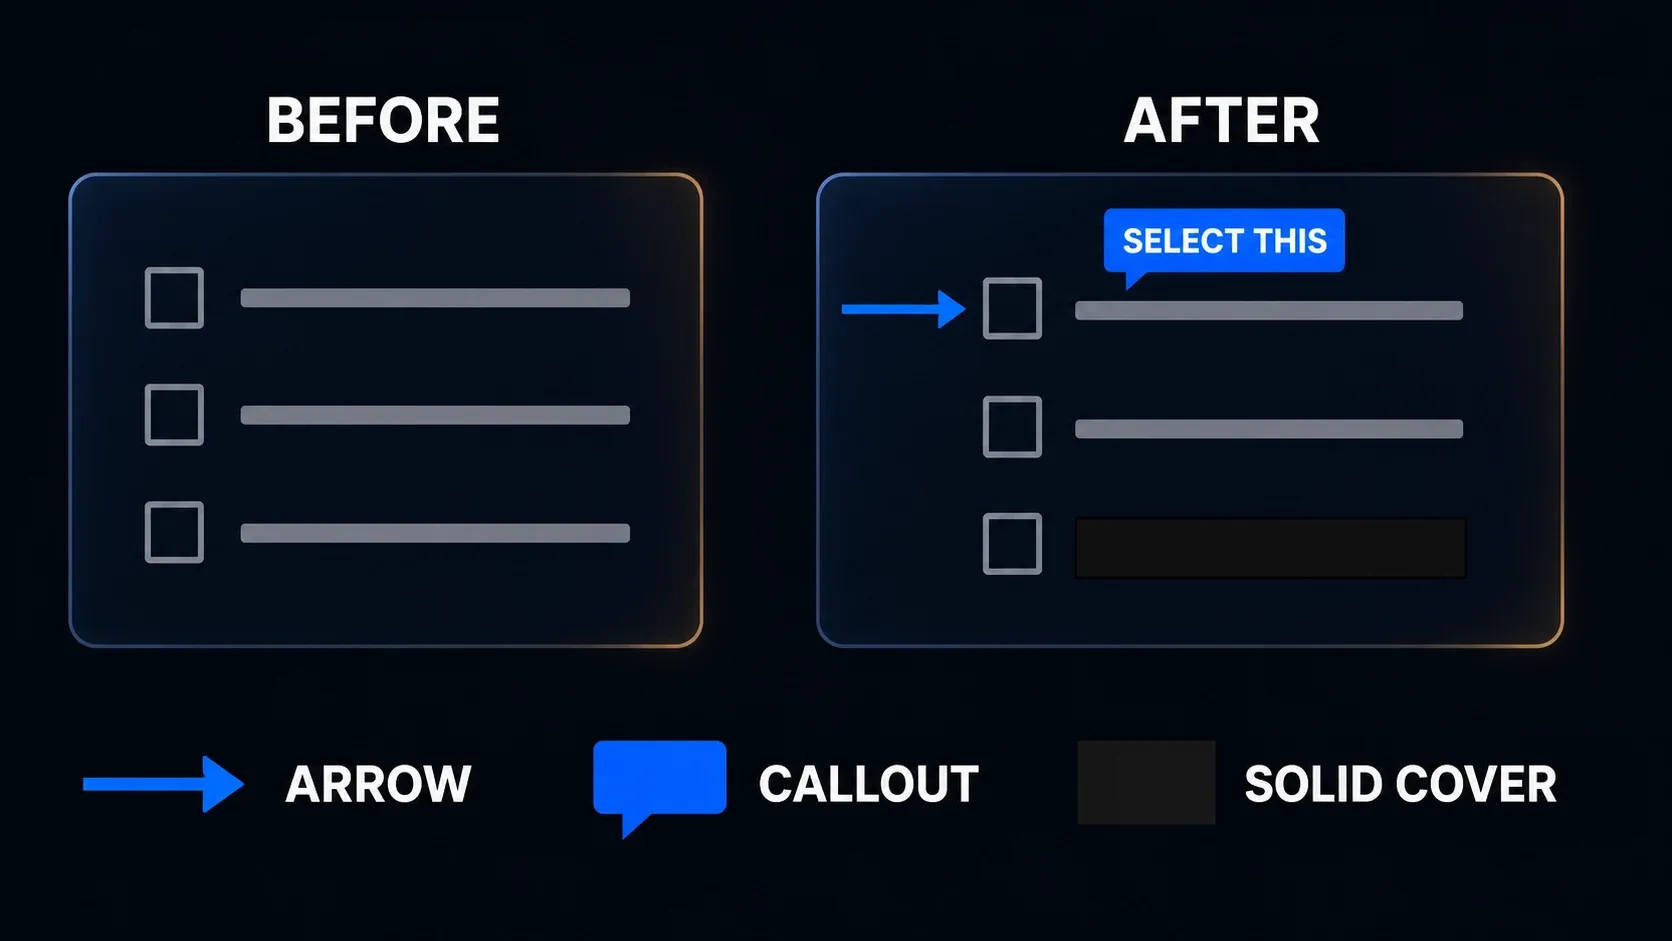
TechSmith documents the Arrow tool's drawing direction and the Callout tool's text and handles. For more layout examples, follow how to annotate a screenshot without clutter. These Editor tools annotate still images; they do not add editable callouts to an already recorded video.
Remove confidential details before sharing
The safest practice capture contains no secrets. If a screenshot includes customer details, account numbers, passwords, or recovery codes, do not rely on blur or pixelation. TechSmith warns that third-party tools can reverse them.
Choose Blur in Editor, open More if needed, and select Solid shapes in the Type property. Drag over the entire sensitive area and check that no characters remain exposed. The official redaction instructions require a flattened sharing copy so the covering objects cannot be removed.
Keep the editable master private when it contains covered secrets. A recipient can remove a redaction object from an editable source and reveal what is underneath. Having a compatible Snagit version is not a reason to send that source. Export a PNG using the next section and inspect the actual file outside Editor.
Do not flatten your only master just to prepare a delivery copy. If you choose Flatten All instead, work on a duplicate after preserving the private master; flattening prevents further editing of those objects. The blur and redaction guide covers the checks for more sensitive captures.
Save a SNAGX master, then a separate PNG
Snagit normally autosaves image captures and their annotations as SNAGX files in Library. Windows users can turn that autosave off. A named project copy still helps you control where important work is stored and backed up.
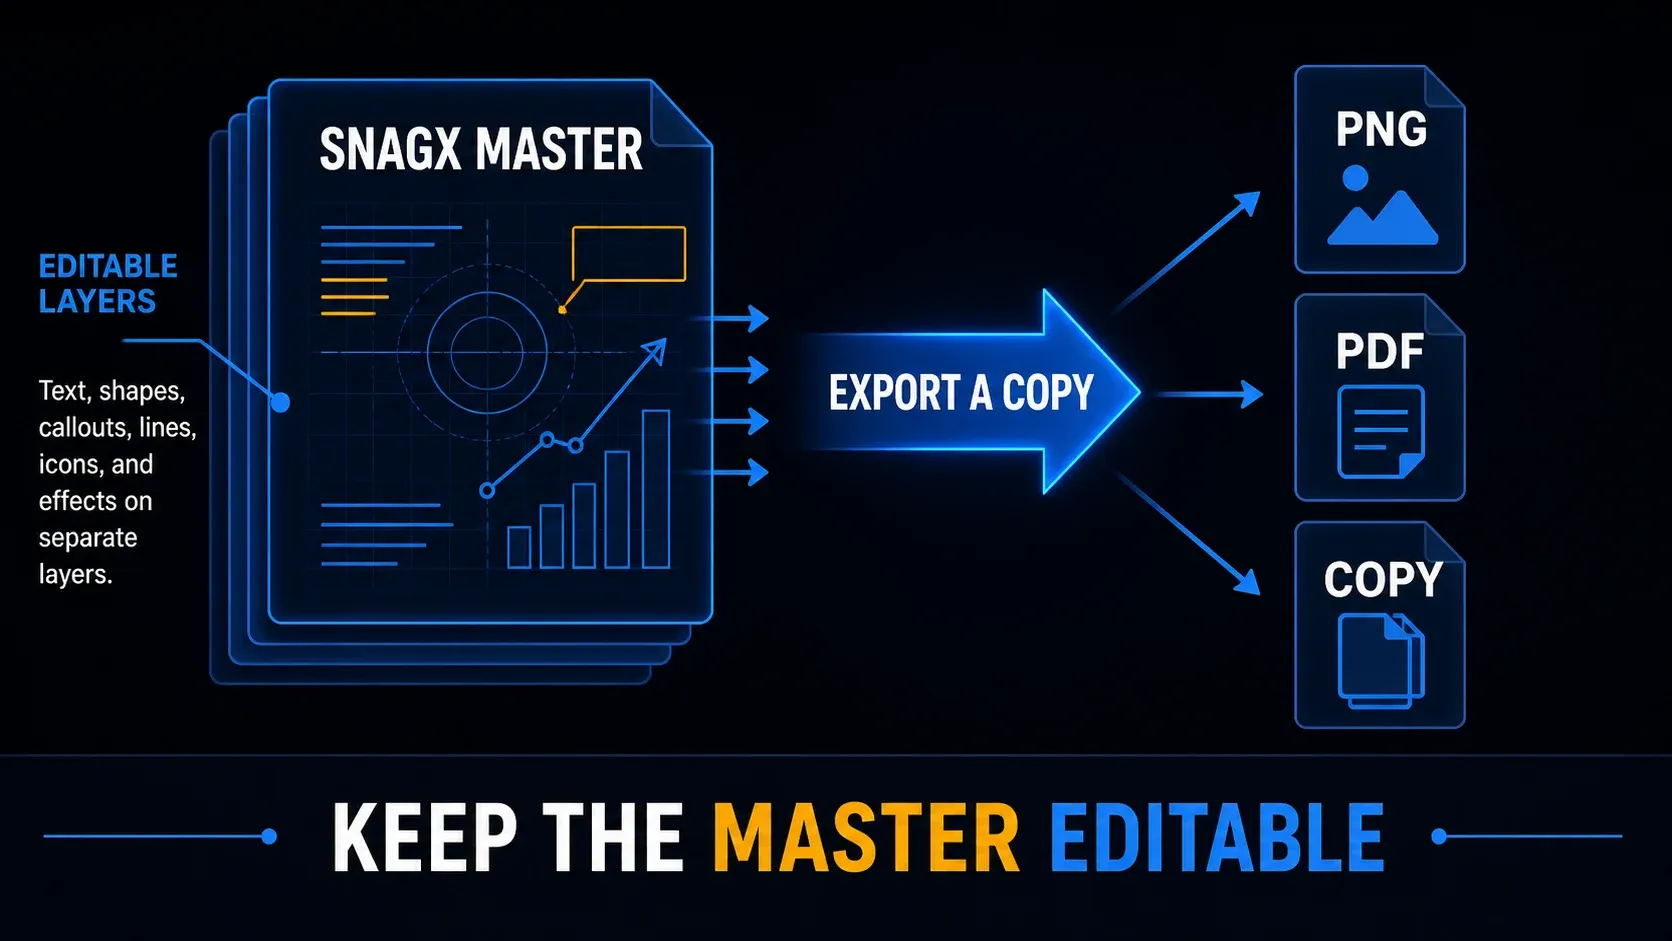
SNAGX preserves supported objects such as text, arrows, callouts, shapes, and pasted images for later editing. Use it for your working file. Use PNG for the screenshot you attach to a message or document.
- Select the edited capture in Editor's recent tray or Library.
- Choose File > Save As.
- In Save as type on Windows, or Format on Mac, choose SNAGX – Snagit Capture File. Choose a private, backed-up project folder and a name such as topic-master.snagx, then click Save.
- With the finished capture selected, choose File > Save As again. Select PNG, choose a delivery folder, and use a distinct name such as topic-final.png. Click Save.
- Open topic-final.png in an image viewer outside Snagit. Inspect the text, crop, annotations, redacted areas, and filename before attaching it.
These steps follow TechSmith's current file-saving guide. That guide distinguishes the exported file from Snagit's own editing state: Windows can retain editable annotations locally after Editor restarts, while a non-SNAGX image on Mac is flattened when Snagit quits. This does not make PNG a portable layered project. Keep SNAGX when you need dependable future edits or an editable transfer that contains no confidential source data.
PNG is a useful first choice for interface text. If the recipient needs JPEG or PDF instead, use the export format and settings guide. Neither a clipboard copy nor a delivery file replaces your editable master.
Find an earlier capture in Library
Click Library at the top of Editor. Search for the filename, or filter by date, source, or a tag, then double-click a thumbnail to open it. TechSmith's Library instructions also explain tagging and sorting. Windows libraries on network drives have fewer filtering options.
Keep important masters in your normal backup plan rather than relying on Library history alone. Do not share your whole Library to deliver one screenshot: it can include unsaved captures and private originals. The Library location guidance warns against sharing a cloud Library with other users. For moving or backing up your own captures, use the Library location and backup guide.
Send the checked copy
For a simple handoff, attach the PNG you just inspected. For a quick paste, Copy All copies the current image to the clipboard; paste with Ctrl+V on Windows or Command+V on Mac. If the capture contains redactions, using the inspected exported file avoids confusing it with the editable source.
Share Link uploads the capture. It normally sends it to Screencast and copies a URL. In managed installations, an administrator can configure OneDrive on Windows or Google Drive instead. Check the destination before clicking. If your rules prohibit cloud uploads, save the file locally and use an approved delivery method.
A clean image can still disclose information through its filename or shared title. TechSmith's sharing documentation says descriptive titles can include the captured file or webpage name. To stop including that source automatically:
- Windows: open Edit > Editor Preferences > Share and select Do not include capture source in shared file names and titles.
- Mac: open Snagit > Settings > Share and clear Include capture source in shared file names and titles.
Check the actual name and title anyway. For a share link, confirm the intended recipient has access and that access is no broader than needed. When policy allows, check signed-out behavior in a private browser window; that check does not replace reviewing the destination's permission settings. Send a private master only when an authorized editor needs it and the source itself is safe to disclose.
Try a short video only when motion helps
If a screenshot cannot explain the order or timing of an action, make a short sample recording. In Capture, choose Video and Region. Set Open In to Snagit Editor for this first attempt. Before starting capture on Windows, choose File > Capture Preferences > Capture. Turn Automatically start video recording off and Show Ready to Record window on. Return to Capture, click Capture, and select the recording area.
In Ready to Record, review the microphone, system audio, and camera settings. Turn on only the sources you need. Click Record, perform a short example, then click Stop and play it back. Try about ten seconds first so you can check the sound and framing before recording the full sequence.
On Mac, voice recording needs Microphone permission in System Settings > Privacy & Security. Apple recommends quitting and reopening the recording app after changing this permission. Set microphone options before recording; the Mac 2026.3.2 release removed the microphone options button during recording.
The video capture instructions explain Open In: Snagit Editor opens the result for review, None normally saves it to Library without opening Editor, and Camtasia Editor sends it there without saving it in Snagit Library. On Windows, check Edit > Editor Preferences > Library > Automatically save new video captures in the Library. If autosave is disabled, save the recording manually before closing Snagit; unsaved captures can be deleted. Do not assume every recording route leaves a Library copy.
Snagit can trim, cut, and combine clips. For the full recording procedure, use the screen recording guide. If you need a multitrack timeline or more extensive video editing, the Snagit versus Camtasia comparison explains that choice.
Choose your next capture task
Use a region when one part of a screen answers the question. Capture a window or full display only when that extra context helps, and check everything visible within the selected area. For content below the fold, follow the scrolling capture workflow rather than taking a series of overlapping images.
Once your first image workflow works, save repeated settings as a Snagit preset. If you need the words instead of a picture, use Grab Text and OCR. For a procedure with several actions, use Step Capture. The Snagit guides hub organizes the other capture, editing, export, and troubleshooting tasks.
Snagit beginner tutorial FAQ
What should a Snagit beginner learn first?
Learn one complete image workflow: Image, Region, Preview in Editor on, capture, one useful annotation, a private SNAGX master, and a separate PNG. Inspect the PNG before sharing. Add scrolling or video when you need it.
Where do Snagit captures go?
Image captures normally autosave as SNAGX in Library, though Windows users can disable that setting. Preview in Editor controls whether the image opens for review. For video, Open In: None normally saves to Library, but Windows video autosave can be disabled in Editor Preferences. Save manually before closing Snagit if autosave is off. The Camtasia Editor route does not save a Snagit Library copy.
Why does my capture not open in Snagit Editor?
For an image, check that Preview in Editor is on in Capture and review any automatic sharing settings. For video, select Snagit Editor in Open In. Try a small capture after changing the setting before investigating other causes.
Should I save SNAGX or PNG?
Keep SNAGX for supported editable objects and export PNG for delivery. Windows can retain annotation state locally, but a shared PNG is not a portable layered master. Keep any SNAGX that contains covered secrets private.
Is blur safe for confidential text?
Do not rely on blur or pixelation for confidential text. Use Solid shapes, export a flattened copy such as PNG, and inspect that file before sharing. Do not send an editable source whose redaction objects can be removed.
Can Snagit record screen video and audio?
Yes. Choose Video, select the area, review microphone and system audio settings, then click Record. Use Open In: Snagit Editor for an easy first review and play back a short sample before the full recording. Permissions and controls differ by platform.
Is Snagit the same on Windows and Mac?
The basic capture, edit, and save workflow is similar. Windows defaults to Print Screen for global capture; Mac uses Control+Shift+C. Save As uses Save as type on Windows and Format on Mac. Mac also requires the appropriate screen and microphone permissions for the capture you are making.