
Snagit Editor is the desktop editing workspace that comes with Snagit; you don't download it separately. Install Snagit for Windows or Mac, open Editor after a capture or from the app, then crop, redact, annotate, review, and export. It isn't a full browser editor, and it isn't the multitrack Camtasia video editor.
Go straight to the task you need
- Install it: download Snagit from TechSmith. Editor comes in the same desktop package.
- Learn the complete first workflow: follow the Snagit beginner tutorial.
- Fix a launch problem: use the focused Editor-will-not-open guide.
- Copy or change words: use the screenshot text guide.
- Prepare a safe share copy: follow the blur and redaction workflow.
- Record or edit a short video: start with the Snagit screen recording guide.
For other capture and troubleshooting tasks, browse the Snagit guides directory.
What Snagit Editor is, and what it is not
Snagit is really two closely connected desktop areas. The Capture window starts an image or video capture. Editor opens the result and gives you the canvas, tools, properties, recent items, Library access, and sharing controls. You can also open supported files directly in Editor when you need to mark up an existing image.
Editor is included in Snagit. TechSmith also uses the name Camtasia Snagit, but this is different from the desktop Camtasia Editor video application. Before buying, check the products in your order and the Snagit subscription and license options.
Snagit Editor is built for fast visual communication: screenshots, directions, redaction, OCR-based text work, simple GIFs, and short recordings. When the job needs masks, color work, independent media tracks, or complex animation, use a full photo compositor or timeline editor.
What changed in Snagit Editor in 2026
As of September 12, 2026, TechSmith's Windows version history lists 2026.3.1. The Mac version history lists 2026.3.2, released September 2. That Mac update fixes automatic scrolling capture in Edge and captures appearing in Editor when Preview in Editor is off.
Earlier in this release series, Windows 2026.3.0 improved Editor accessibility and fixed missing scrollbars. Mac 2026.3.0 added multi-item duplication in Recent Captures and expanded Step Capture export options.
The controls differ by platform. Windows 2026.1.0 replaced Preview in Editor for video with Open In: choose Snagit Editor, choose None to save to the Library without previewing, or choose Camtasia Editor for separate screen, camera, and audio editing. Mac 2026.1.0 added Recent Captures pinning, multi-object resize and rotate, and click-to-play video. Check your build before following a platform-specific instruction.
Download Snagit Editor for Windows or Mac
Download the official Snagit installer for Windows or Mac. It includes Editor. If you already own an older license, download the version that your license covers rather than assuming the newest installer will activate with your key.
Windows users can also install through the Microsoft Store. TechSmith's Store installation instructions describe a 15-day Snagit trial with an option to extend it by another 15 days. Individual subscriptions use your TechSmith purchase account, not your Microsoft Store account. Updates for this installation are handled within Snagit, not through the Store. Check the trial terms shown by your installation route.
On a managed work computer, stick to the package and version your administrator approved. TechSmith's install and update guide separates ordinary user installation from administrator deployment and version-specific downloads. Skip third-party download sites. An altered installer creates a security and support problem before Editor ever opens.
On Mac, check compatibility before updating. TechSmith's macOS compatibility table does not list Snagit 2026 as compatible with macOS Sonoma 14. A compatible older build and the license to use it are separate requirements; confirm both before changing your operating system or Snagit version.
How to open Snagit Editor
You do not need to take a new screenshot just to use Editor. Open it from Snagit, then open the image you want to change.
- Windows: launch Snagit from Start and choose Editor in the Capture window. If a capture is already open there, you can start editing it.
- Mac: launch Snagit from Applications. With Snagit running, try Command+Shift+E, the Open Editor shortcut in TechSmith's published shortcut reference.
- Existing file: in Editor, press Ctrl+O on Windows or Command+O on Mac and select a supported image or SNAGX file. Keep the original until you have checked your edited copy.
TechSmith's published hotkey tables are labelled for Snagit 2025. They list separate Windows and Mac shortcuts; Windows tool shortcuts also depend on toolbar position. If a shortcut behaves differently in your build, check its assigned action in the app. The Snagit keyboard shortcuts guide covers capture and editing shortcuts by platform.
The five parts of the workspace
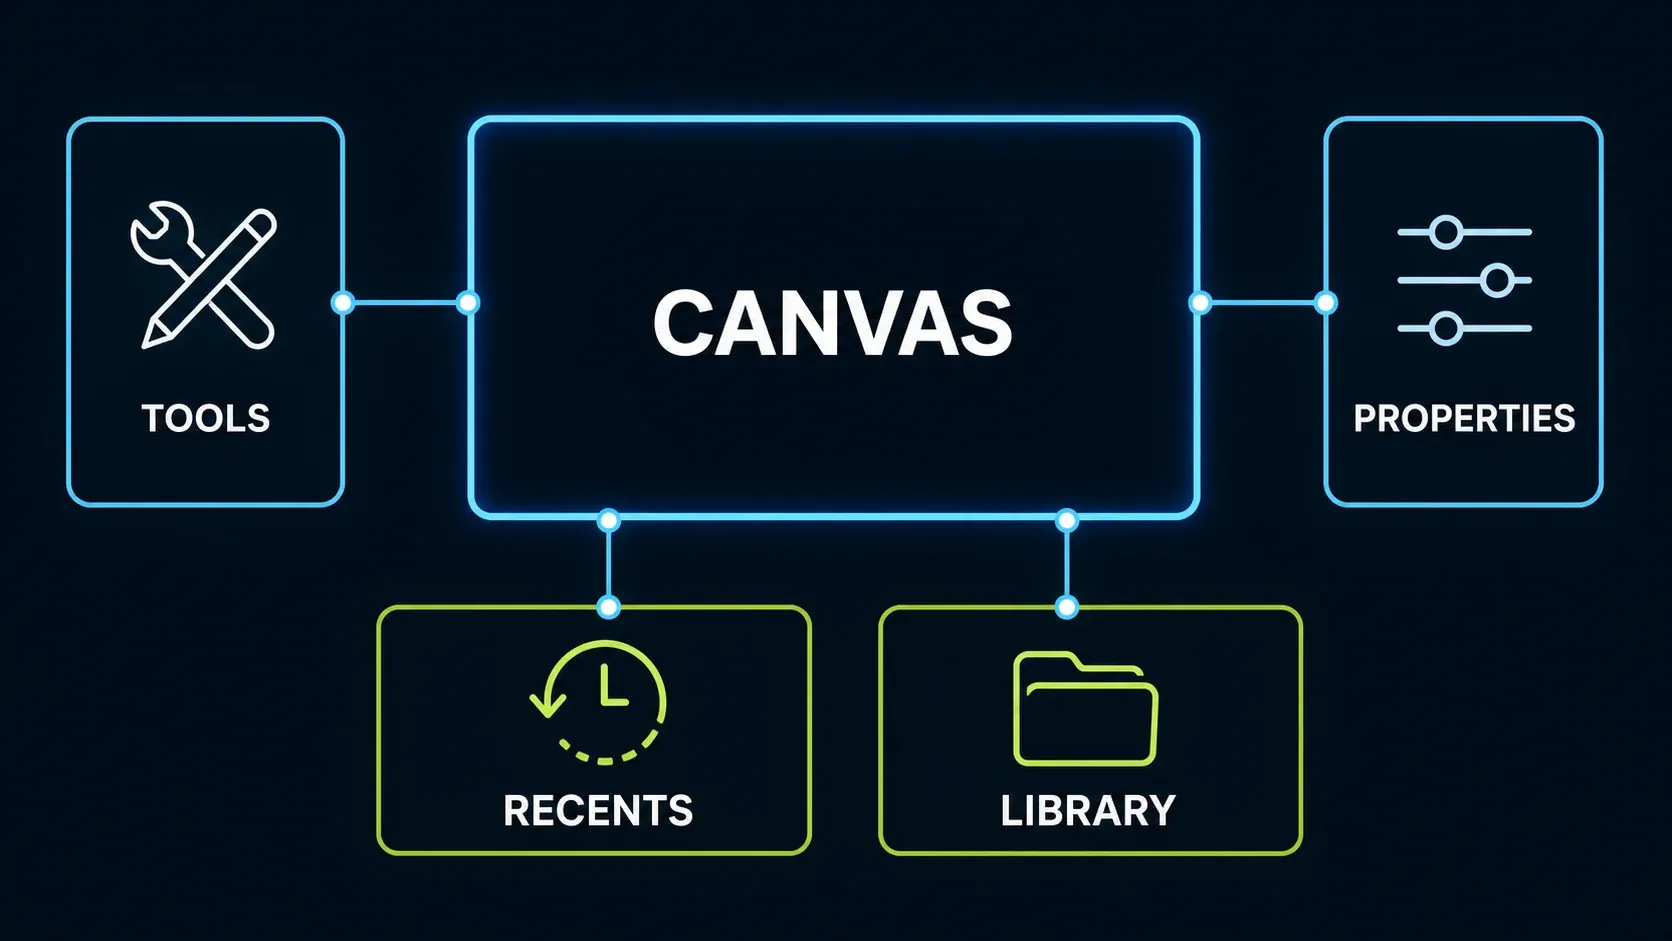
| Area | What it does | Common mistake |
|---|---|---|
| Canvas | Displays the current image or video | Editing the wrong open capture |
| Tools | Selects crop, selection, text, arrows, shapes, steps, blur, and other actions | Choosing a similar-looking tool without checking its job |
| Tool Properties | Changes color, width, style, font, and other options for the active tool | Expecting one set of properties to control every tool |
| Recent Captures | Keeps recent work close to the canvas | Treating recents as a permanent backup |
| Library | Finds and organizes stored captures with search and metadata | Moving or deleting source folders without a backup plan |
The canvas is where you work. The selected tool and its properties decide what a click or drag does. Recent Captures keeps recent items nearby; Library helps you find stored captures. Neither replaces a separate, tested backup. On a small screen, swipe the tables horizontally to read every column.
Use a safe five-step editing order
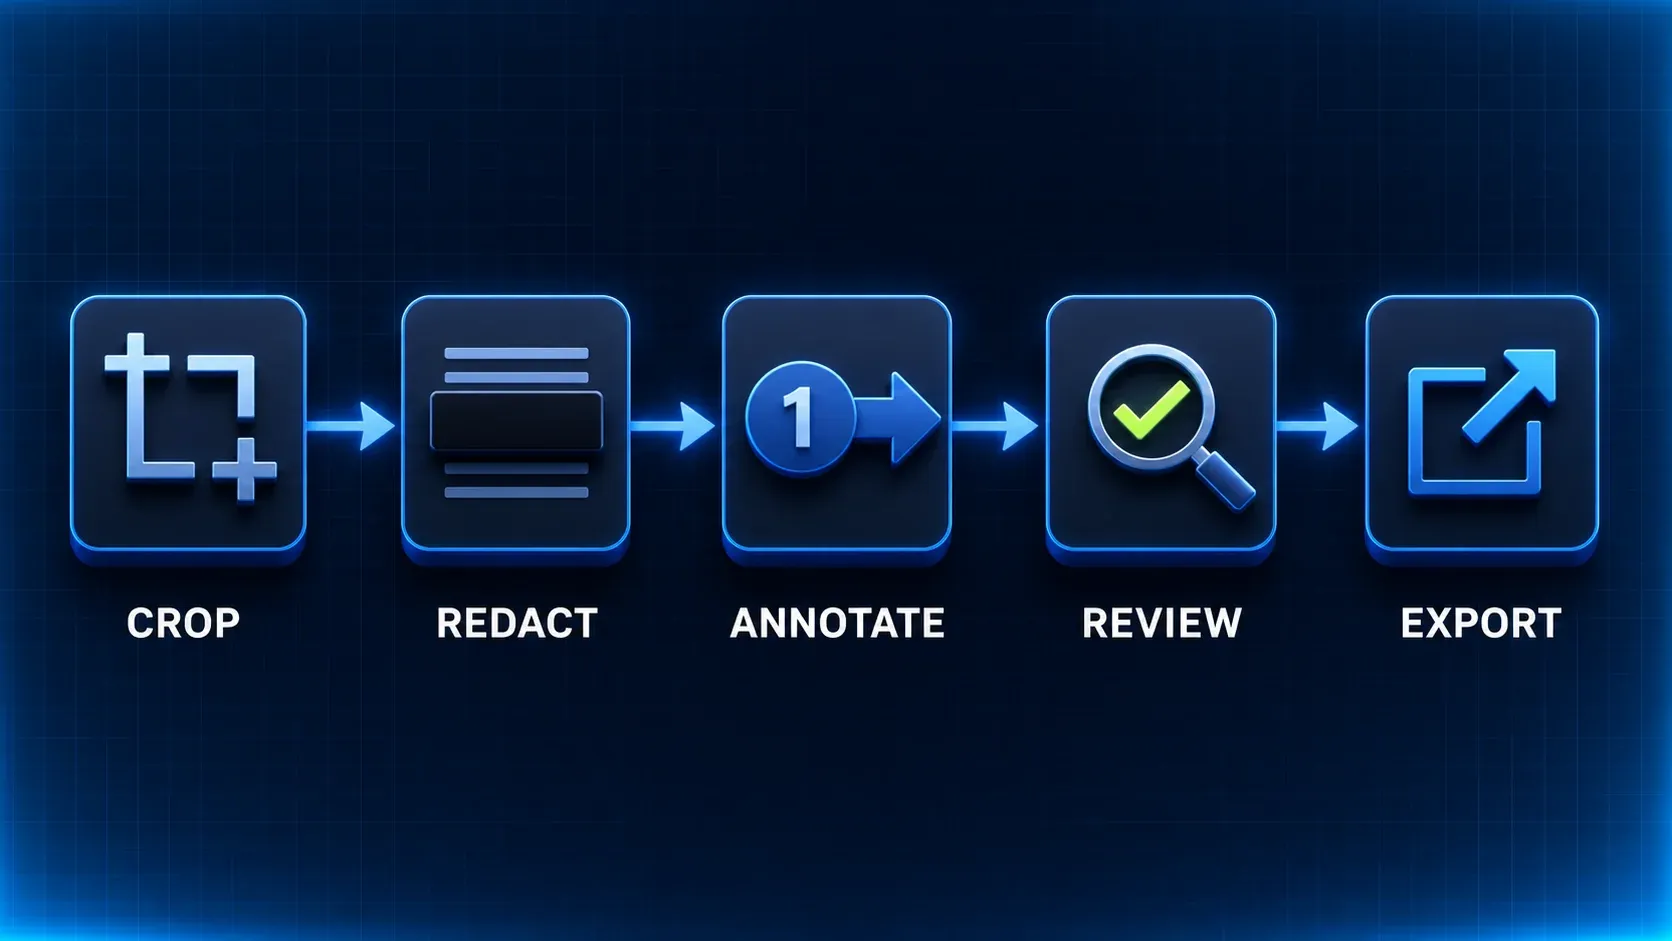
A consistent order saves you from redoing things. Crop after you place arrows and you can cut them off. Redact after decoration and a callout can carry a second copy of private data. Export before review and small text can end up unreadable at the size your reader sees.
Crop the working area
Remove unused outer edges before you place arrows, callouts, or numbered steps.
Remove sensitive information
Redact private data before decoration, then inspect the exported pixels rather than trusting the editable canvas alone.
Add the reader's guidance
Use arrows, callouts, shapes, or numbered steps only where they tell the reader what to do next.
Review at the final size
Zoom out, check legibility, proofread recognized text, and confirm that every mark points to the correct control.
Keep a master and export a copy
Keep a private SNAGX source for an image you may edit again. Export a separate delivery copy, and share only the inspected copy when the source contains private data.
For sensitive material, open the exported copy and inspect the actual pixels. Don't trust a blur strength, an editable object, or the assumption that a covered area can't be recovered. The dedicated Snagit redaction guide walks through the safer choice between hiding, removing, and sharing.
Choose the correct image tool
TechSmith's current Snagit feature list confirms the main capture, annotation, text, organization, and basic video capabilities. Pick a tool by the change you need, not by the icon that looks familiar.
| Task | Use | Result |
|---|---|---|
| Remove outer edges | Crop | Cuts content outside the chosen boundary |
| Remove a middle strip | Cut Out | Joins the remaining areas after removing a horizontal or vertical section |
| Change pixel dimensions | Resize Image | Changes the output width or height |
| Point to a control | Arrow, Shape, or Callout | Adds an editable object in the SNAGX source |
| Number a sequence | Step | Places ordered markers that can be restyled |
| Move an object | Selection or Move | Repositions an editable object or selected content |
| Reduce visual noise | Simplify | Replaces busy regions with simpler shapes and colors |
Crop and Cut Out solve different problems: Crop changes the outer boundary; Cut Out removes an internal section and joins the remaining parts. If a tall settings panel has one irrelevant block in the middle, Cut Out can shorten it without shrinking the controls. Resize changes pixel dimensions. Changing the canvas zoom only changes your view, not the saved image size.
Give each annotation a job. Point an arrow at the control to click, put the action in a callout, and number steps in the order the reader should follow. The screenshot annotation guide shows how to choose and place those marks.
Build repeated guides without copying old mistakes
A Quick Style saves a tool's appearance, such as an arrow's color and width. A theme coordinates styles across tools. A capture preset stores capture choices. Step Capture turns a click sequence into ordered visual steps, while a template arranges captures into a document layout. Choose the feature that saves the work you actually repeat.
Reach for these features when the underlying process is stable. Reuse the style and layout, then recapture the current controls. Copying last quarter's finished screenshot can carry over an old account name, a retired setting, or an incorrect warning. Keep the source process beside the template so the next editor knows which facts need a fresh check.
For a recurring support guide, choose one arrow and callout style, keep the capture size consistent, and name the editable source by task and review date. Ten screenshots are easier to follow when their labels and scale agree. The Snagit presets guide explains how to save repeatable capture settings.
For a click-by-click procedure, use the current Step Capture workflow to collect the sequence, then strip accidental clicks and verify the order. Use the Snagit templates tutorial when several captures need a printable or shareable layout. Keep warnings in visible text as well as images so readers can find and copy them.
Keep an editable SNAGX master
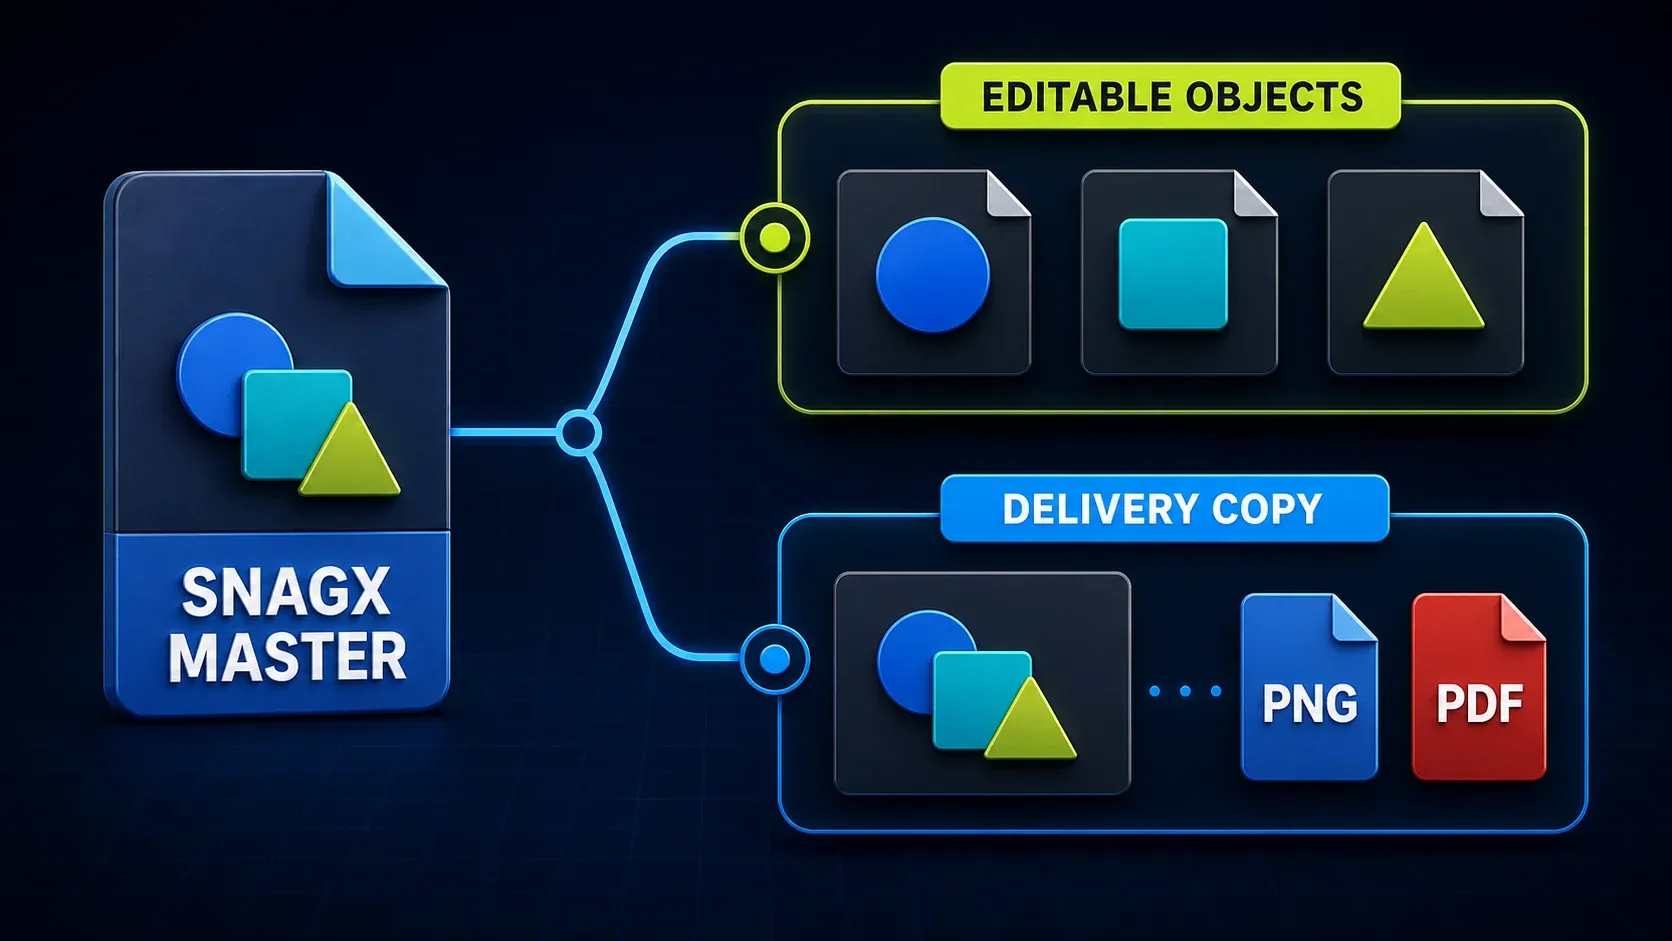
SNAGX is Snagit's editable source format. TechSmith's source-graphics guidance explains that Snagit objects can stay editable in the source, while exported PNG and JPEG files flatten those objects into pixels. A flattened file is convenient to deliver, but it can't give you back every separate arrow, callout, or text box later.
Keep the SNAGX file whenever the interface, wording, or branding might change. Export a PNG for a help article, a PDF for a document workflow, or another supported format for the final destination. Don't overwrite your only editable source with a flattened copy.
Snagit keeps editable annotations, but it does not restore the original object structure of an imported PNG. Smart Move can detect elements in a screenshot and help reposition them; that is different from recovering the original text boxes and arrows. If you need to revise an annotation later, keep its SNAGX source. For private data, do not leave a removable cover over the only shared copy.
For important work, an editable file still isn't a backup. Know where the Library and source files live, include them in a tested backup, and verify a restore. The Snagit Library backup procedure covers Windows and Mac paths without treating cloud sync as a guaranteed restore plan.
Text, Grab Text, and Edit Text do different jobs
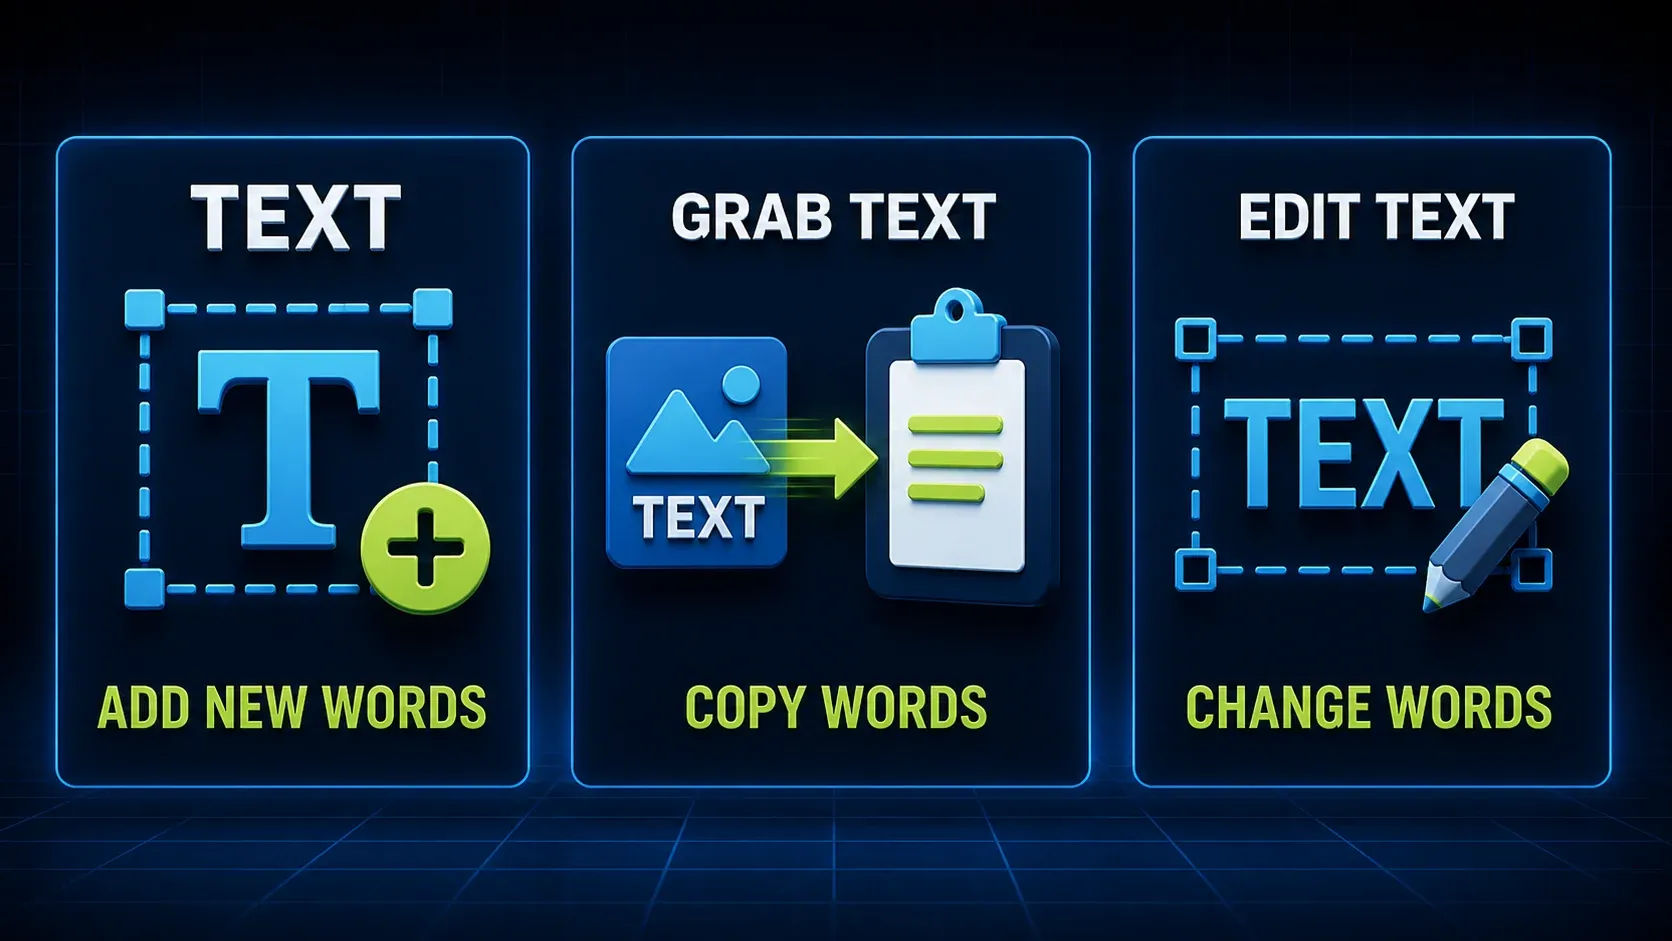
| Goal | Tool | What to check |
|---|---|---|
| Add new words | Text | Font, size, contrast, spacing, and reading order |
| Copy words from pixels | Grab Text | Recognition errors before pasting elsewhere |
| Change words in a capture | Edit Text | Replacement shape, background reconstruction, and spelling |
OCR can misread small, angled, low-contrast, or stylized text. TechSmith's Windows OCR best-practices note also warns that large captures can take longer to process. Select the useful text region, then proofread names, numbers, paths, and warnings. Recheck the layout when Edit Text substitutes a font.
Windows OCR update: a third-party OCR license expired on May 1, 2026. TechSmith's Windows OCR notice recommends updating the affected engine to 2026.1.1 or later, 2025.4.2 or later, or 2024.3.7 or later within the corresponding release series. These Windows build requirements are not Mac requirements. If your work installation is managed, ask IT for the approved update before changing experimental settings or reinstalling.
When text is the main task, use the complete Grab Text and Edit Text workflow. That page covers selection, proofreading, and the difference between copying recognized text and changing visible pixels.
What Snagit Editor can do with video
Snagit can record the screen, camera, microphone, and supported system audio. Its recording instructions cover capture and basic trimming. In Editor you can cut unwanted sections, combine recordings, save a video frame as an image, create an animated GIF, and export video. For the editing procedure, follow how to trim and combine videos in Snagit.
Snagit suits a short support answer, a bug reproduction, or a quick walkthrough. Choose Camtasia Editor when you need a full timeline, independent tracks, or more detailed audio and motion editing. The Snagit screen recording guide and Snagit versus Camtasia comparison explain the recording and editing differences.
Before export, play the video from the start and listen with headphones. Check the opening and closing trim, private notifications, account names, cursor location, microphone level, and any spoken number or warning. A clean-looking first frame doesn't prove the rest of the recording is safe to share.
Export without losing the next edit
- Keep the master: save an SNAGX source for an image with editable objects. SNAGX is not a video project format.
- Choose the destination format: PNG works well for crisp screenshots, while PDF fits document delivery and MP4 fits basic video.
- Check the final size: open the exported file at the width used by the help center, email, slide, or document.
- Inspect private data: look at the exported pixels and every video frame that could contain account details or notifications.
- Use a clear filename: include the task, version, or review date when readers may compare several copies.
The best export setting depends on where the file is going. A 4K screenshot dropped into a narrow article can make labels too small, while a heavily compressed image can blur UI text. The Snagit export settings guide lays out the format and quality tradeoffs without forcing one setting onto every workflow.
If Editor will not open or a tool is missing
Start with the exact operating system and Snagit build. Compare it with the current Windows 2026 history or Mac 2026 history, install the supported update for your entitlement, restart Snagit, and check whether the problem hits one file or every capture. A single damaged file and an application-wide launch failure need different fixes.
Do not delete Library data, preferences, or license files as a first reaction. Back up important captures and settings before a reset. If Editor opens but its menus or tools are missing, use TechSmith's Windows missing-menus guidance; its configuration reset can remove custom toolbars, Quick Styles, presets, and share history. For a launch failure, follow the Snagit Editor troubleshooting guide. Let IT handle changes to a managed installation.
Snagit Editor FAQ
What is Snagit Editor?
Snagit Editor is the desktop editing workspace included with Snagit. It opens captures so you can crop, redact, annotate, work with recognized text, trim basic video, organize recent work, and export a finished file.
Is Snagit Editor a separate download?
No. Install Snagit for Windows or Mac from TechSmith, and the Editor is installed with the capture application. Windows users can also use the documented Microsoft Store route.
Is Snagit Editor free?
It is included with a paid Snagit entitlement and can be used during an eligible trial. TechSmith's Microsoft Store instructions currently describe a 15-day trial with an option to extend it by another 15 days. Terms can differ by route or region.
Can I use Snagit Editor online?
Snagit Editor is a Windows and Mac desktop application, not a full browser editor. Camtasia Online and TechSmith's web tools are separate products; they do not give you the complete Snagit Editor workspace in a browser.
How do I open Snagit Editor?
On Windows, open Snagit and choose Editor in the Capture window. On Mac, launch Snagit and try Command+Shift+E, the Open Editor shortcut in TechSmith's published reference. In Editor, Ctrl+O on Windows or Command+O on Mac opens a supported image or SNAGX file. Check your app's shortcut settings if an assignment differs.
Does Snagit Editor have layers?
Snagit retains editable annotations in an SNAGX image source, but PNG and JPEG exports flatten them. Smart Move can detect elements in an image; it does not recover the original vector objects. Keep SNAGX when you need to change individual arrows, callouts, or text boxes later.
Can Snagit Editor edit text in a screenshot?
Yes. Text adds new words, Grab Text copies recognized words, and Edit Text attempts to change text already visible in a capture. OCR results depend on size, angle, contrast, and font, so proofread every result.
Can Snagit Editor edit video?
It can trim unwanted sections, combine recordings, save a video frame as an image, create animated GIFs, and export video. Choose Camtasia Editor for a full timeline, independent tracks, or more detailed audio and motion editing.